
£500–£2,500+ UK Bath to Shower Conversion: Timeline & Hiring Checklist
Find UK costs (£500–£2,500+), timelines, waterproofing must haves, and a contractor backed hiring checklist for Cardiff homeowners.
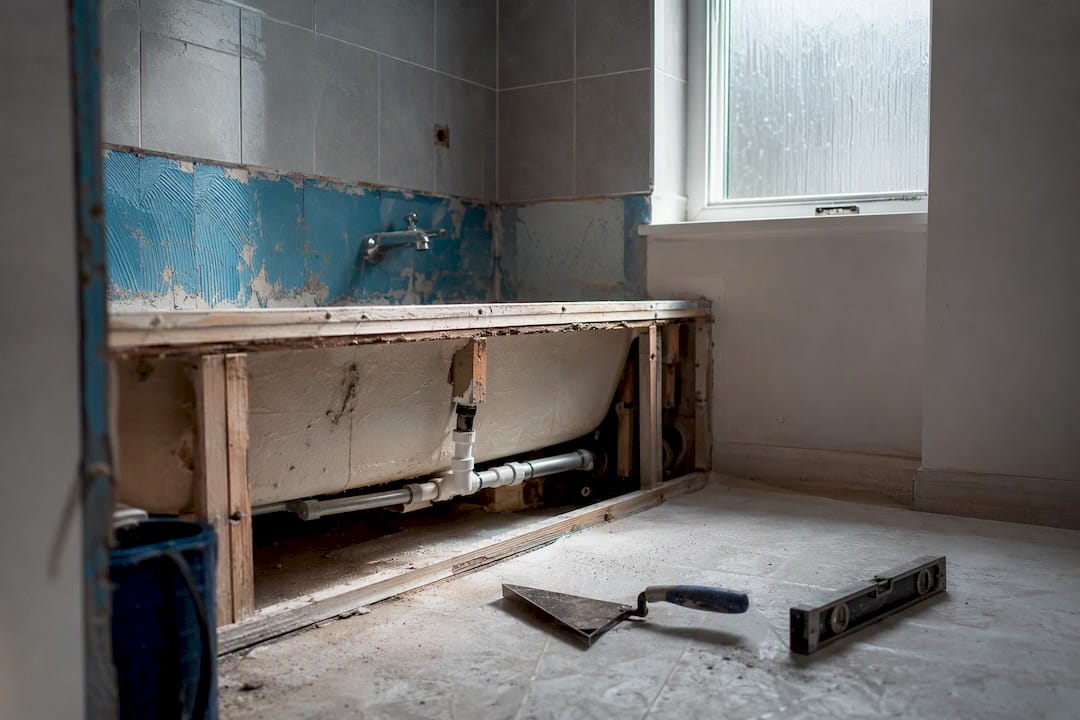
Yes, converting a bath to a shower is straightforward in most UK homes, with a basic over-bath swap costing a few hundred to about a thousand pounds and a full walk-in conversion costing several thousand pounds. The two things that decide feasibility are your drain position and how much floor space you actually have. Before anything else, measure your bathroom’s footprint and check where the waste pipe sits, or book a professional survey to confirm what’s possible.
TL;DR:
- Over-bath shower conversions cost £500 to £1,000 and require no drain relocation, making them ideal for small bathrooms with well-positioned waste pipes.
- Waterproofing quality and drain placement are crucial, as poor installation or incorrect drain location cause leaks and long-term damage despite the tile or finish style.
- Larger, accessible conversions like walk-in or wet-room options can exceed £2,500, especially if drain relocation or subfloor work is necessary, but they offer long-term flexibility.
- Plumbing, waterproofing, and structural work timelines vary from a few days to two weeks, depending on complexity, with proper ventilation reducing curing times.
- Always verify the waterproofing, drain position, and warranty details before signing a quote, since these factors significantly impact longevity and safety.
Table of Contents
- Which Conversion Type Fits Your Budget?
- From Planning to Handover: What Happens in Each Phase
- Which Shower Type Suits Your Space?
- Line-Item Costs to Expect on a Quote
- Practical Size Templates for Your New Shower
- How Long Does a Bath to Shower Conversion Take?
- When Do You Need Building Regulations Approval?
- How to Choose and Vet a Fitter
- Why Getting the Waterproofing Right Matters More Than the Tile You Choose
- Ready to Book a Bath to Shower Conversion?
- Sources
Which Conversion Type Fits Your Budget?
Your budget should decide the conversion type before you fall in love with a design. Three main paths exist, and each one answers a different question about your bathroom and your wallet.
An over-bath shower conversion is the cheapest route. You keep the tub’s footprint, add a shower screen or curtain rail, and swap the mixer for a shower valve. Checkatrade’s cost guide puts this at £500 to £1,000, and it’s usually a one to two day job with no drain relocation involved.
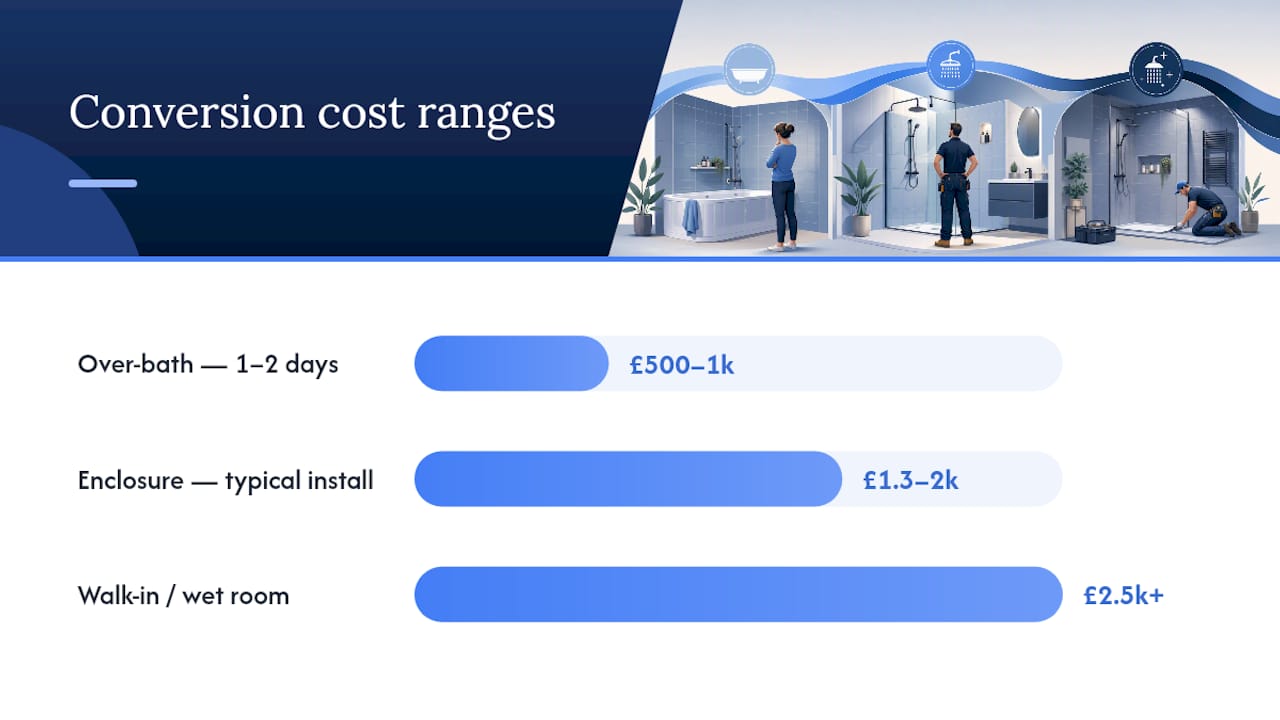
An enclosure conversion replaces the tub entirely with a shower tray and enclosed glass panels, typically landing between £1,300 and £2,000 according to the same Checkatrade data. You’re paying for tray removal, new tiling around the wet area, and a proper enclosure frame or frameless glass setup.
A walk-in or curbless conversion goes further still, averaging around £2,500 but climbing well past that when the drain needs moving or the subfloor needs work. This is the option that delivers a genuinely modern, low-maintenance bathroom, but it demands more plumbing and waterproofing precision.
Here’s what actually drives the price within each category:
- Drain position — if the existing waste line lines up with your new shower location, you save significantly on plumbing labor.
- Subfloor condition — rot or water damage under an old bath adds joist repair costs before any shower work can start.
- Material choice — a standard acrylic tray costs far less than a bespoke tiled wet deck.
- Accessibility features — grab bars, a fold-down seat, or a zero-threshold entry add both material and labor time.
- Tiling extent — full-height tiled walls cost more than acrylic wall panels but tend to last longer and resist mold better.
Accessibility upgrades deserve their own line in your budget. A curbless entry with a level-access tray, non-slip flooring, and grab rails can add several hundred pounds on top of a standard walk-in conversion, mostly because of the extra subfloor and drainage work a level threshold requires. If mobility is a genuine concern for anyone in the household, it’s worth planning this from the start rather than retrofitting later, since ripping out a finished shower to lower the floor is far more disruptive than doing it once.
So how do you choose? If your bathroom is small, your drain is already well positioned, and you just want the bath gone, an enclosure conversion covers most needs without a big spend. If you’re renovating for the long term, want better accessibility, or you’re already gutting the room, a walk-in or wet-room approach costs more upfront but avoids a second renovation five years from now.
From Planning to Handover: What Happens in Each Phase
A bath to shower conversion moves through a fairly predictable sequence, and knowing what happens at each stage means you can ask the right questions before problems become expensive surprises.
- Planning and measuring. Your fitter maps the room’s footprint, checks ceiling height and door swing clearances, and tests a few shower footprint templates against the space. This is also when you decide between a tray and a tiled wet deck, since that choice affects the floor structure work that follows.
- Strip-out. The bath comes out, along with old tiling and any rotten backing board. A competent tradesperson inspects the subfloor and joists at this point, because a leaking bath trap can quietly damage timber for years without visible symptoms upstairs.
- Plumbing. If the new shower’s drain lines up with the old waste, this stage is quick. If not, the waste pipe gets rerouted, which is where linear drains and trap position constraints come into play. A linear drain along one edge of the tray gives more flexibility in tricky layouts than a center-point drain does.
- Waterproofing. This is the step that decides whether your shower lasts fifteen years or leaks within eighteen months. Tanking membranes and bonded waterproof panels are the two common approaches, and either needs proper overlaps at joints and corners to carry any manufacturer warranty.
- Shower base or wet deck installation. A preformed tray is faster to fit and easier to guarantee against leaks. A fully tiled wet deck looks more integrated but demands precise slope work, typically around 1:50, so water reliably runs to the drain rather than pooling.
- Walls and finishes. Ceramic tile, large format porcelain, and acrylic wall panels all handle moisture differently. Tile needs sealed grout lines that require periodic maintenance; acrylic panels seal in one continuous sheet with far less upkeep but a more limited design range.
- Fixtures and commissioning. Thermostatic mixer valves are the standard now for good reason. They hold water temperature steady even if someone flushes a toilet elsewhere in the house, which matters for anti-scald safety, particularly in households with children or elderly residents. Pressure gets checked once fixtures are connected.
- Handover. Your installer should run the shower for an extended period, checking every seal and joint for leaks before calling the job finished.
Pro Tip: Ask your installer to run the new shower on full flow for at least fifteen minutes before they leave, and check the ceiling below if it’s a first-floor bathroom. A slow leak from a poorly sealed tray edge often won’t show up until the second or third use.
At handover, get everything in writing: a leak test confirmation, any Building Regulations compliance documentation relevant to the work done, and clear care instructions for your specific tray or wall finish. This paperwork matters more than most homeowners realize, particularly if you sell the house within the warranty period. For more detail on getting the waterproofing layer right, our guide to shower wall waterproofing walks through membrane types and where leaks most commonly start.
Which Shower Type Suits Your Space?
The shape and size of your bathroom narrows your options faster than any style preference. Four main types cover almost every UK conversion.
Walk-in, doorless showers skip the door or screen entirely, relying on shower footprint and layout to contain the spray. They read as spacious and modern, but they need either a larger footprint or a clever splash guard, since without one, water can migrate onto the bathroom floor. These work best in bathrooms with generous square footage or an alcove layout that naturally channels the spray.
Enclosures with a door remain the most space-efficient option for tighter bathrooms. Sliding doors suit narrow rooms where a hinged door would swing into a walkway; hinged or pivot doors give a wider opening and easier cleaning access but need clearance space to swing open. If you’re converting within a standard UK bathroom under 6 square meters, an enclosure with a sliding door is often the only realistic fit.
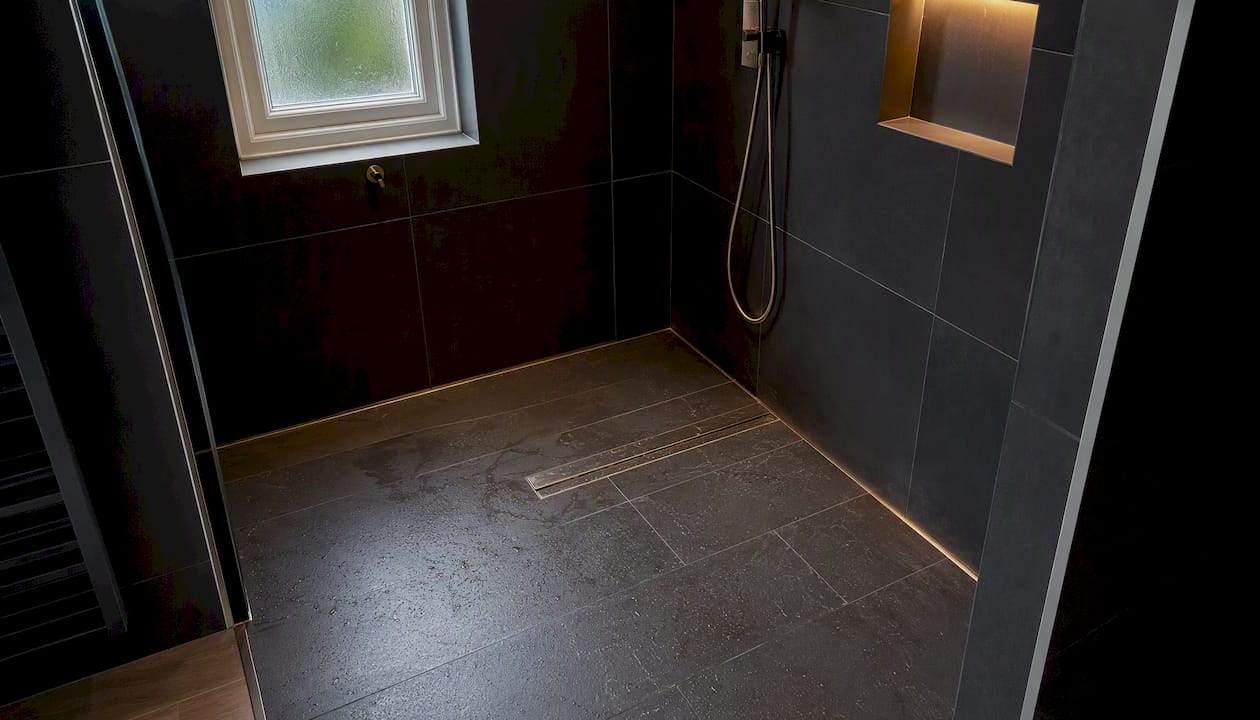
Curbless or zero-threshold showers remove the raised lip entirely, so the shower floor sits flush with the bathroom floor. The accessibility benefit is real, particularly for anyone with mobility concerns or planning to age in place, but the construction complexity goes up considerably. Getting a curbless design to drain properly without water escaping onto the bathroom floor generally means greater floor depth and more careful slope planning than a standard tray installation, plus a linear drain along one edge rather than a center point. Industry guidance is consistent on this: curbless designs add waterproofing complexity because the subfloor often needs to be recessed to accommodate the drain slope.
Full wet-room conversions waterproof the entire bathroom floor and lower walls, not just the shower area. This makes sense when you’re already gutting the room, want a completely doorless, curbless look throughout, or you’re designing for long-term accessibility. It’s overkill, though, if you just want the bath gone and a functional shower in its place. For design inspiration across these options, our walk-in shower ideas page shows a range of finishes that work well in typical UK room sizes.
Line-Item Costs to Expect on a Quote
A proper quote should break costs down by task, not just hand you one lump figure. Knowing what each line item covers lets you spot where a quote is padded and where it’s genuinely thin.
Expect to see these components on a detailed quote:
- Bath strip-out and disposal — removing the old tub, backing panels, and any damaged tiling.
- Waste relocation (if needed) — moving the drain to align with the new shower position.
- Shower tray or wet deck — the base structure, with tiled decks costing more in labor than preformed trays.
- Waterproofing membrane or panels — tanking kits or bonded boards, priced by square meter of coverage.
- Wall finish — tile, large format porcelain, or acrylic panels, plus adhesive and grout or sealant.
- Glass or enclosure hardware — screens, hinges, sliding tracks, and door seals.
- Valves and fixtures — the shower valve, showerhead, riser rail, and any additional body jets.
- Labor days — usually quoted separately from materials so you can see where the time actually goes.
Several variables push a quote from the low end of a range toward the high end: the existing layout, how complex the plumbing rework is, the quality of materials specified, and any accessibility features built in. A drain that needs relocating six feet across the room, for instance, adds both labor time and potential subfloor disruption that a straightforward swap never touches.
VAT and warranty terms change the final number too. A quote that looks cheaper on paper sometimes excludes VAT or offers only a one-year workmanship guarantee, while a slightly higher quote might include a five or ten-year waterproofing warranty. Always ask whether the headline price is VAT-inclusive before comparing two quotes side by side.
There are legitimate ways to trim cost without cutting corners on safety. Choosing a standard-size shower tray instead of a bespoke cut saves on both the tray itself and the fitting labor, since installers aren’t working around unusual dimensions. Reusing an existing valve body is sometimes possible if it’s in good condition and compatible with your new fixtures, though a competent plumber should confirm this rather than assume it. What you should never trim is the waterproofing membrane spec or the number of coats and overlaps it requires. That’s the one place where a cheap shortcut costs far more later, once water finds its way behind the tile.
Practical Size Templates for Your New Shower
Getting the dimensions right before you commit to a layout saves you from a shower that feels cramped or, worse, one you have to redo. Trade sources consistently point to three practical footprint templates: 36 by 36 inches as a workable minimum, 36 by 48 inches as a comfortable standard, and 36 by 60 inches as a generous size. That last figure isn’t a coincidence: a standard UK bathtub footprint is close to 60 inches long, which is exactly why so many bath to shower conversions land naturally on a 36 by 60 layout without needing to touch surrounding walls.
Key spacing rules to keep in mind:
- Preserve at least 21 inches of clear floor space in front of the toilet and vanity so the room still functions comfortably.
- Aim for an entry width of at least 32 inches if accessibility is a priority, since narrower openings make wheelchair or walker access difficult.
- A built-in bench or recessed niche eats into usable floor area, so factor those into your footprint decision before finalizing tray size.
- Curbless layouts typically need a slightly larger footprint to accommodate the slope required for proper drainage, usually built around a linear drain running along one edge rather than a single center point.
If your existing bathroom is genuinely tight, a 36 by 36 enclosure with a sliding door is still workable and far better than squeezing in an oversized tray that leaves no room to dry off. For layout inspiration in smaller UK bathrooms specifically, take a look at our guide to small bathroom layouts, which covers exactly this trade-off between shower size and remaining floor space.
How Long Does a Bath to Shower Conversion Take?
Timeline expectations vary enormously depending on how much plumbing and structural work your conversion involves, and setting the wrong expectation here is one of the most common sources of homeowner frustration mid-project.
- Survey and planning — usually a single visit, though scheduling around your installer’s availability can add a week or two of lead time before work starts.
- Strip-out — typically half a day to a full day for a straightforward bath removal.
- Plumbing work — a few hours if the drain stays in place; up to two days if the waste line needs relocating.
- Waterproofing — application takes a day, but curing time before tiling can begin adds another day or two depending on the product used.
- Tiling or panel installation — one to three days depending on the extent of wall coverage and whether it’s tile or acrylic panels.
- Fixtures and final commissioning — a day, including the leak test and pressure check.
Put together, a simple enclosure conversion often finishes in two to five days, while a full walk-in or wet-room job with drain relocation and subfloor repair commonly runs one to two weeks once curing times are factored in. Poor ventilation slows curing noticeably, so a bathroom with no extractor fan or window can add an extra day to the waterproofing stage alone.
If losing your only bathroom for a week isn’t an option, ask your installer about staging the work, using off-site prepped panels, or scheduling the strip-out for a period when you can use a second bathroom or a neighbor’s shower. Small adjustments like this make the disruption far more manageable than treating the whole project as one continuous blackout period.
When Do You Need Building Regulations Approval?
Most bath to shower conversions don’t require formal approval, but the line depends entirely on what kind of work is involved. Gov confirms that routine replacements and like-for-like fittings generally fall outside Building Regulations approval, but structural changes or drainage alterations can bring the project back under scope. If you’re moving a drain, cutting into a structural wall, or changing the room’s ventilation setup significantly, check with your local authority or your installer before work begins rather than after.
Electrical work inside a bathroom carries its own strict safety zones, and anything within those zones legally requires a registered electrician, not a general tradesperson. This isn’t a formality. Bathroom electrics sit close to standing water, and incorrect installation is a genuine safety risk, not just a compliance box to tick.
Waterproofing quality has knock-on effects well beyond the shower itself. A membrane installed without proper overlaps voids most manufacturer warranties outright, and insurers can point to poor waterproofing as a contributing factor if a water damage claim comes up years later.
Keep documentation from every stage of the job:
- Building Regulations compliance certificates, where the work required them.
- Part P electrical sign-off, confirming any bathroom electrical work meets safety standards.
- Waterproofing warranty documentation from the membrane or panel manufacturer.
- A written record of the leak test carried out at handover.
Checkatrade’s guidance is direct on this point: keeping evidence of compliant work matters most at resale, when a buyer’s surveyor asks exactly these questions and an incomplete paper trail can hold up a sale or knock money off an offer.
How to Choose and Vet a Fitter
A written quote tells you almost everything you need to know about whether a tradesperson is worth hiring. It should spell out the full scope of work, list what’s explicitly excluded, state the warranty terms in writing, and clarify whether you’re being charged a day rate or a fixed price for the whole job. A vague one-page quote with a single total figure is a warning sign, not a simplicity you should appreciate.
Before you sign anything, verify these basics:
- Public liability insurance (PLI) — ask to see proof, not just a verbal assurance.
- References from recent, similar jobs — ideally conversions, not just general plumbing work.
- A portfolio of completed bath to shower conversions, not just bathroom photos in general.
- A sample contract or written terms you can review before committing.
- Evidence of similar drain relocation or waterproofing work, if your project needs either.
At first contact and again at the survey, ask directly about drain position and what it means for cost, subfloor condition and whether they expect any surprises once the bath comes out, the realistic timeline for your specific layout, and what warranty covers the waterproofing versus the fixtures. A fitter who can’t answer these clearly, or who dodges the warranty question, isn’t someone you want holding a wet saw in your bathroom.
Pro Tip: When comparing three quotes, line up each one against the same checklist: scope, materials specified, warranty length, and whether VAT is included. A £400 gap between two quotes often disappears entirely once you account for one excluding VAT and offering half the warranty length.
Red flags worth walking away from include a quote with no written warranty at all, reluctance to provide references, and pressure to pay a large deposit before any work has started. A legitimate tradesperson expects you to compare quotes and won’t rush you into signing.
Why Getting the Waterproofing Right Matters More Than the Tile You Choose
Most homeowners spend their planning energy on tile color and shower fixtures, and almost none of it on the membrane hidden underneath. That’s backward, and it’s the single biggest gap between how these projects get marketed and how they actually fail.
A bath to shower conversion doesn’t fail because the tile looks dated. It fails because water finds a gap at a corner seam, migrates into the subfloor, and rots joists nobody sees again until a ceiling stain appears in the room below, sometimes years later. The tray-versus-tiled-deck debate, the curbless-versus-standard-threshold decision, the drain type you pick: every one of those choices really comes down to one question, which is whether water reliably reaches the drain and stays inside the waterproof envelope the whole way there. Get that right and almost any finish on top will hold up fine. Get it wrong and even the most expensive porcelain tile is sitting on a countdown clock.
The other underestimated factor is drain position. Homeowners fixate on shower size and style, but a drain that’s badly placed relative to the room’s slope potential causes more real-world problems than a shower that’s a few inches smaller than ideal. If a survey reveals your existing waste line sits in an awkward spot, it is almost always worth the extra plumbing cost to move it properly rather than compromise the slope to work around it. A shower that drains slowly for the next fifteen years is a daily irritation that no amount of nice tile fixes.
If there’s one place to spend slightly more than the cheapest quote allows, it’s the waterproofing layer and the labor time to install it properly, not the fixtures or the glass.
— Cameron
Ready to Book a Bath to Shower Conversion?
Jmplumbingservicesltd handles the full conversion in one contract, so you’re not coordinating a plumber, a tiler, and a waterproofing specialist separately and hoping their timelines line up. For homeowners in Cardiff and the Vale of Glamorgan, that means one team responsible for the drain work, the membrane, the tiling, and the finished handover, with no gaps in accountability if something needs fixing.

Before your survey, it helps to have a few things ready: rough measurements of your current bathroom, photos of the existing bath and plumbing access, and a sense of whether accessibility features matter to your household. Our team will confirm drain position, check the subfloor condition, and walk you through tray versus tiled deck options on-site, based on real work across Cardiff bathroom installations. Homeowners in Penarth can also see recent local projects on our Penarth bathroom page.
If you’re ready to get a realistic quote for your space, request a bathroom installation survey and we’ll confirm what your specific layout allows before any work starts.
Sources
For approval requirements on drainage or structural changes, gov.uk’s building regulations guidance is the definitive reference. For UK-specific cost benchmarks, Checkatrade’s cost guide breaks down pricing by conversion type. For sizing decisions, Trussell’s Transformations’ shower size templates and This Old House’s standard shower sizing guide both offer practical, trade-tested dimension guidance worth checking before finalizing your layout.
- Gov
- How Much Does Bath to Shower Conversion Cost in 2026? - Checkatrade
- Walk-In Shower Sizes: Practical Templates And What To Plan For - Trussell’s Transformations
- Standard shower sizes: a complete guide - This Old House