
Walk-In Shower Ideas for UK Homes: 12 Designs That Work
Explore stylish walk-in shower ideas for UK homes that maximize space and safety. Discover designs that enhance accessibility without compromising on...
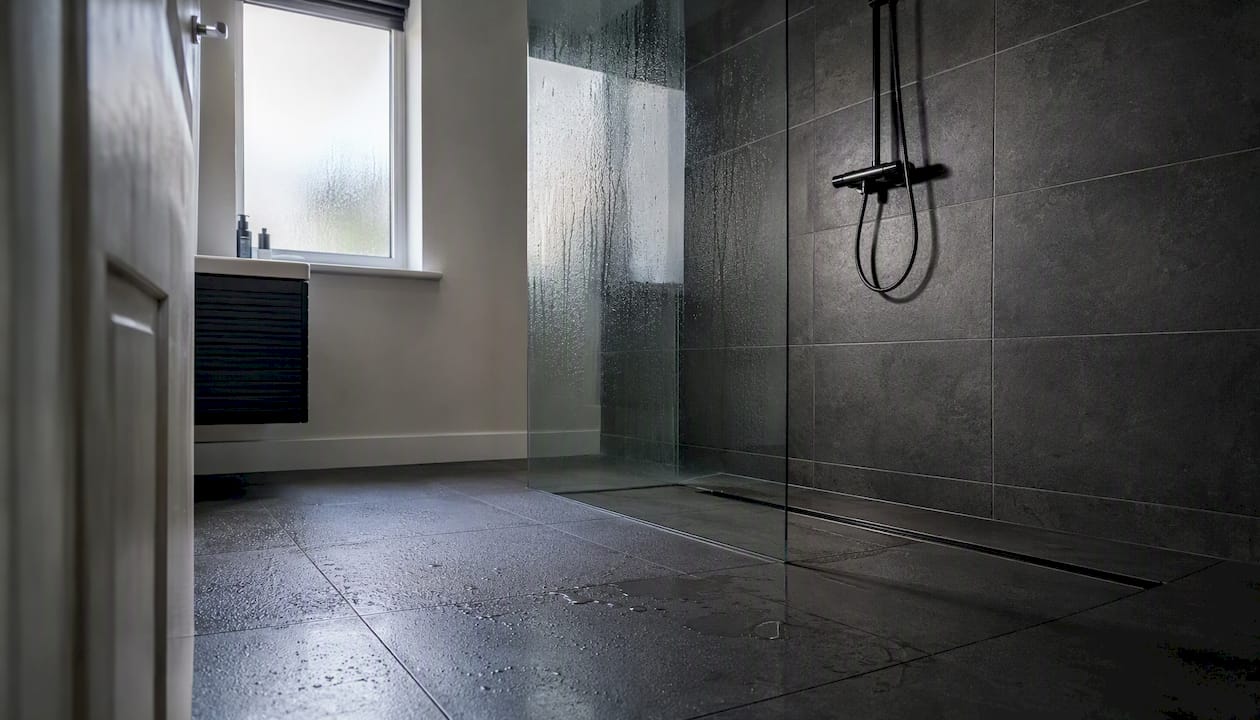
For most UK bathrooms, a curbless doorless or single fixed-panel walk-in shower gives the best balance of space, safety, and style. It removes the step-over threshold that makes bath-shower combos awkward, works in footprints as tight as 36"×36", and improves long-term accessibility without sacrificing a modern look.
Before you call an installer, two technical constraints shape every decision:
- Minimum footprint and drainage: A curbless design needs a sloped floor draining to either a linear or center drain. The floor must pitch correctly, and waterproofing must go in before any tile. These are professional tasks.
- Splash control: A doorless opening needs either a fixed glass panel or a half-wall, plus roughly 30–36 inches of dry run between the showerhead and the open edge.
Two quick visual options to shortlist:
- Doorless single fixed panel — open feel, easy cleaning, works from about 36"×36"
- Framed or frameless glass enclosure — better splash containment, suits alcove layouts and smaller rooms
Your immediate next steps:
- Measure your bathroom floor and note the drain location and pipe access.
- Decide between a linear drain (cleaner look, simpler slope) or a center drain (existing plumbing may already be there).
- Book a site visit with a local installer before committing to tiles or fixtures.
Key Takeaways
A curbless walk-in shower with a linear drain and a fixed glass panel is the most practical, accessible, and style-forward choice for the majority of UK bathrooms, provided the waterproofing is specified and installed correctly before any tile work begins.
| Point | Details |
|---|---|
| Best overall approach | A curbless doorless or single fixed-panel walk-in suits most UK bathrooms for space, safety, and style. |
| Minimum footprint | 36"×36" is the practical minimum; 48"×36" is more comfortable and allows a fixed glass panel. |
| Waterproofing first | Membrane and slope must be installed and signed off before tiling; this is the most common failure point. |
| Small-bathroom priority | A tub-to-shower conversion reclaims the full tub footprint with no layout shift, often the highest-impact change. |
| Local installation | Jmplumbingservicesltd covers Cardiff and the Vale of Glamorgan for full walk-in shower and wet-room installs. |
Table of Contents
- 12 Walk-In Shower Ideas You Can Actually Use
- How to plan a walk-in shower for small UK bathrooms
- Choosing fixtures, finishes, drainage, and waterproofing
- Your contractor-ready planning checklist and installer questions
- What actually matters when designing a walk-in shower for UK homes
- Jmplumbingservicesltd can handle your walk-in shower from design to handover
- Sources
12 Walk-In Shower Ideas You Can Actually Use
These walk-in shower designs range from budget-friendly to full wet-room conversions. Each one includes a quick note on why it works and what to sort out before you start.
1. Doorless single fixed glass panel
A single frameless glass screen on one side of the shower opening is the most popular modern shower design in UK bathrooms right now. It gives you the open, airy look without spraying water across the floor. Designers consistently recommend it as the simplest route to a spa-like feel. Minimum footprint roughly the size of 36"×36". Place the showerhead on the wall opposite the open side.
2. Curbless linear-drain wet zone
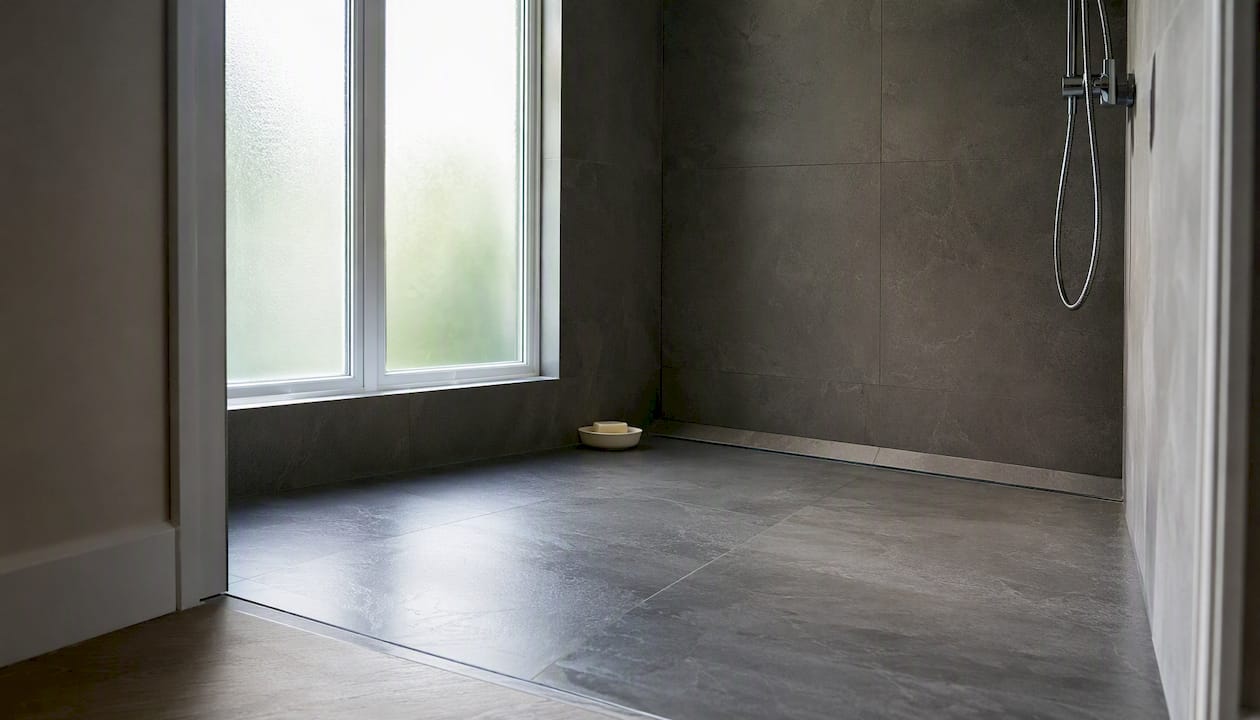
No curb, no threshold, just a continuous floor surface sloping gently to a linear drain at the wall. Curbless installations perform best with a linear drain because it simplifies the slope to a single plane, which also lets large-format wall tiles read without interruption. This is the most accessible option and the one most likely to add resale value.
3. Corner walk-in with curved glass
Two walls do most of the splash work, so you only need a curved or angled glass panel to close the third side. Corner layouts are ideal for bathrooms where the door swings into the center of the room. They fit neatly into a 36"×36" corner and leave the rest of the floor open.
4. Feature tile plumbing wall
Pick one wall, usually the one with the plumbing, and tile it in a bold material: large-format stone-look porcelain, zellige, or handmade ceramic. Keep the other three walls simple. Feature walls and bold tiles are a current designer move that turns the shower into a focal point rather than a utility corner.
5. Full-tile wet room
The entire bathroom floor and shower zone share one continuous waterproofed surface. There is no tray, no screen, and no visual boundary. This works best in bathrooms with good ventilation and a floor that can be re-leveled for drainage. It is the most involved conversion but also the most dramatic result.
6. Skylight-lit shower
If your bathroom sits under a roof slope or has a flat ceiling above the shower zone, a rooflight or sun tunnel transforms the space. Natural light makes tiles read truer and small showers feel larger. Worth discussing with your installer early, since it involves structural work.
7. Integrated bench
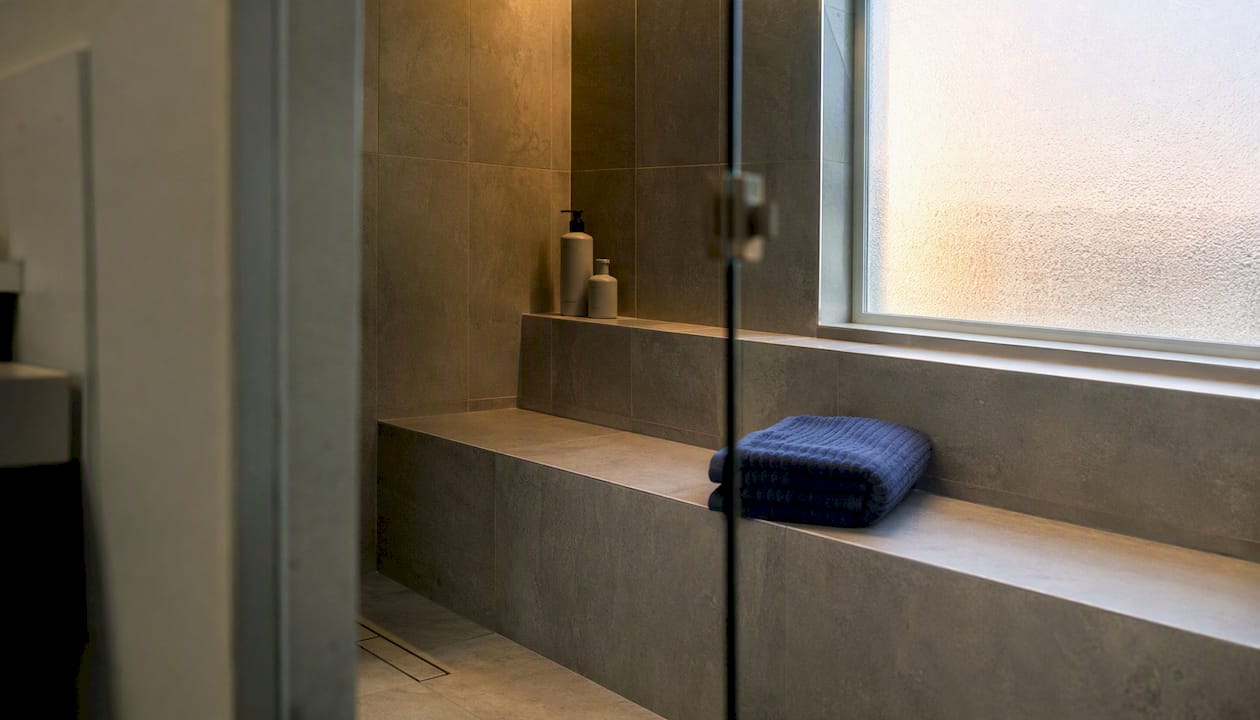
A built-in tiled bench along one wall serves double duty: seating for accessibility and a ledge for products. Plan it before waterproofing, because the bench substrate needs to be tanked along with the floor and walls. A depth of 15–18 inches works for most adults.
8. Recessed tile niches
Cut into the wall between studs or into a block wall, a recessed niche sits flush with the tile surface and keeps bottles off the floor. Standard sizing is 12"×24" or 12"×12". Like the bench, niches must be planned before waterproofing begins, not after.
9. Mixed metal fixtures
Matte black showerheads with brushed brass controls, or brushed nickel with chrome accents, can work if you keep the combination intentional. The cleaner approach: pick one finish and run it across every fitting, including the drain cover, towel rail, and door handle. Design trends favor one coordinated metal finish to create a designed rather than ad-hoc look.
10. Patterned mosaic floor
A mosaic floor in the shower zone, contrasting with plain large-format tiles on the walls, creates a natural visual boundary without a curb. Small-format tiles also grip the slope to the drain better than large slabs. Penny rounds and 2" hex are the most practical choices for wet floors.
11. Two-head layout for two people
Two showerheads on opposite walls, each with its own thermostatic control, need a minimum footprint of roughly 60"×36" and adequate water pressure. Check your home’s flow rate before specifying this, because a low-pressure supply will undermine both heads simultaneously.
12. Curtain-in-a-pinch for budget installs
A ceiling-mounted curved curtain rail with a weighted shower curtain is the lowest-cost way to contain splash in a curbless or tray-based walk-in. It is not as sleek as glass, but it works, it is easy to replace, and it buys time while you save for a frameless screen.
Pro Tip: For doorless designs, place the showerhead on the far wall and allow at least 30–36 inches of dry run between the spray zone and the open edge. That distance is what keeps your bathroom floor dry.
How to plan a walk-in shower for small UK bathrooms
A walk-in shower can fit in a small bathroom, but only if you plan the layout before you pick the tiles. Corner showers, doorless single panels, and continuous floor tile are the three moves that consistently make tight UK footprints work.
Practical minimums to know:
- 36"×36" (roughly 900mm×900mm): the absolute minimum for a comfortable single-person shower
- 48"×36": more comfortable, allows a fixed glass panel on one side
- Tub footprint (typically 60"×30"): converting a bath to a walk-in reclaims the full tub area with no layout shift, which is often the highest-impact change in a small bathroom
Layout solutions that work in compact rooms:
- Corner walk-in: uses two existing walls, needs only one glass panel, leaves the center of the room open
- Alcove with single panel: fits between three walls, one glass screen closes the fourth side, suits narrow bathrooms
- Tub-to-shower conversion: replaces the bath in its existing alcove, no plumbing relocation needed
- Half-wall partition: a tiled knee wall (roughly 40–48" high) with glass above it, good for rooms where a full glass panel feels heavy
Visual tricks that make small showers feel larger:
Running the same floor tile from the bathroom into the wet zone is one of the most effective moves available. It erases the visual boundary between the two areas and makes both feel bigger. Clear frameless glass does the same thing vertically. Vertical tile on the shower walls draws the eye upward and adds perceived height.
Keep the showerhead on the wall farthest from the opening, and avoid a bench in showers under 48" wide unless accessibility requires it. A teak stool that can be moved out is a better option in tight spaces.
Measurements to take before calling an installer:
- Overall bathroom floor dimensions (length × width)
- Distance from the existing drain to each wall
- Ceiling height at the shower position
- Location of the soil stack and any visible pipework
- Window or extractor fan position relative to the shower zone
Choosing fixtures, finishes, drainage, and waterproofing
The wet-zone engineering comes first. Get drainage and waterproofing right before choosing tile and fixtures, because a beautiful finish over a poorly sloped floor will leak within a year.
Drain choices
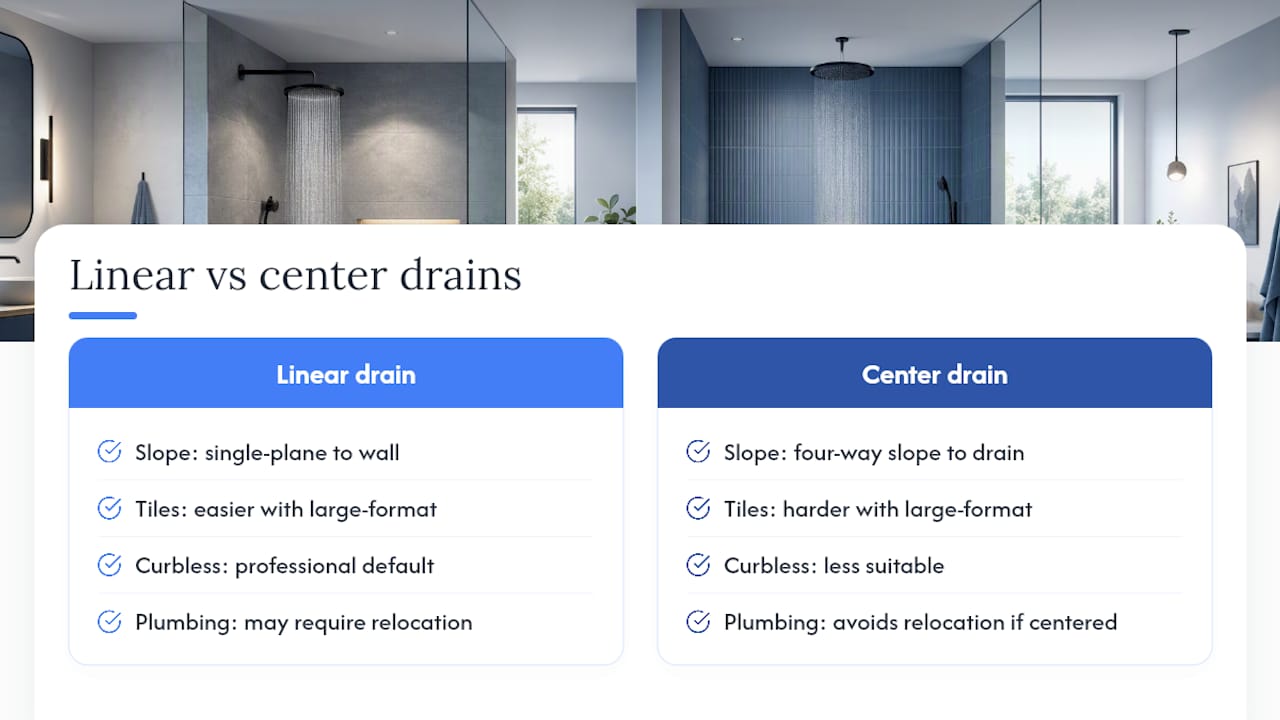
A linear drain at the wall simplifies the floor slope to a single plane, which is easier to tile accurately and looks cleaner. A center drain requires the floor to slope from all four sides, which is harder to execute with large-format tiles. For curbless designs, linear is the professional default. If your existing plumbing centers under the floor, a center drain avoids a pipe relocation, which can meaningfully affect cost.
Floor tile and slip resistance
Small-format tiles, penny rounds, and 2" hex mosaics conform to the slope more easily than large slabs and provide more grout lines underfoot, which improves grip. Small-format mosaic floor tiles increase slip resistance and handle the slope to the drain better than large-format alternatives. For walls, large-format tiles (600mm×1200mm or larger) reduce grout lines and look cleaner. Keep grout color close to the tile color on floors to minimize visual noise.
Fixture choices and placement
Stick to one metal finish across all fittings. Matte black and brushed brass are both popular in UK bathrooms right now, but brushed nickel ages more neutrally if you plan to sell.
Waterproofing essentials
Tanking the floor and lower walls with a liquid membrane or sheet membrane is non-negotiable. The membrane goes on before any tile adhesive. Tile-in drain flanges must be bonded into the membrane layer, not just set on top of it. This is work for a licensed installer; a failed membrane is the most common cause of shower leaks through ceilings in UK homes.
Pro Tip: For wet-room conversions, specify a membrane that carries a manufacturer’s warranty and ask your installer to photograph the tanked substrate before tiling begins. That photo is your proof of compliance if a leak ever occurs.
Your contractor-ready planning checklist and installer questions
Before the site visit
- Measure the bathroom floor (length, width, and ceiling height at the shower position).
- Photograph the existing drain location and any visible pipework.
- Note the extractor fan position and whether it vents externally.
- Decide on your preferred drain type (linear or center) and glass style (frameless, semi-frameless, or curtain).
- Set a realistic budget band before the conversation starts.
UK cost and timeline expectations
These are banded estimates for typical installs in Cardiff and the Vale of Glamorgan. Prices vary with tile choice, glass spec, and access difficulty.
- Tub-to-shower conversion (tray-based): £1,500–£3,500, typically 2–4 days on site
- Curbless walk-in with linear drain and glass panel: £3,000–£6,000, typically 4–6 days on site
- Full wet-room conversion (floor re-leveled, full tanking): £5,000–£10,000+, typically 5–10 days on site
These figures cover labor and basic materials; premium tiles, bespoke glass, and underfloor heating add to the total. Always get at least two written quotes.
Questions to ask your installer
- Which waterproofing membrane do you use, and does it carry a manufacturer’s warranty?
- Who is responsible for signing off the waterproofing before tiling starts?
- Where will the linear drain connect to the existing waste pipe?
- How will you handle the existing pipework if it needs relocating?
- Who supplies the tiles, and who does the tiling: you or a separate tiler?
- What ventilation upgrade, if any, do you recommend for this layout?
- Can you provide references from a similar wet-room or curbless install?
Red flags to watch for
- No written waterproofing plan or membrane specification in the quote
- Vague drainage description (“we’ll sort the slope on the day”)
- No references or photos of completed wet-room work
- Request for more than 25–30% of the total cost as an upfront cash payment
- No mention of building regulations or ventilation requirements
A poorly waterproofed shower is the most expensive mistake in a bathroom renovation. If a quote skips the membrane detail, skip the quote.
What actually matters when designing a walk-in shower for UK homes
Most walk-in shower inspiration online is shot in large American or Scandinavian bathrooms with ceiling heights and floor areas that simply do not exist in a typical Cardiff terrace or Vale of Glamorgan semi. The advice is not wrong, it just does not translate directly.
The practical reality for UK homes is that the wet-zone engineering matters more than the finish choices. A beautifully tiled shower with a poorly sloped floor or an under-specified membrane will fail within a few years, and the repair cost usually exceeds what was saved on the original install. The finish choices, tile size, glass style, and fixture finish are all reversible decisions. The waterproofing is not.
Cardiff and Vale of Glamorgan properties also tend to have older ventilation setups that were not designed for open wet rooms. A doorless or full wet-room conversion almost always needs an upgraded extractor, ideally one that vents externally rather than recirculating. This is worth budgeting for from the start, not treating as an afterthought.
The other thing that gets underestimated is the value of planning niches and benches before the membrane goes in. Cutting into a tanked wall after the fact is a waterproofing risk. Every storage decision should be made at the design stage, not during the tile fix.
For accessible bathroom design, a curbless walk-in with a fold-down seat and a grab rail is the most future-proof choice available in a standard UK bathroom. It works for everyone now and requires no structural modification later.
Jmplumbingservicesltd can handle your walk-in shower from design to handover

Jmplumbingservicesltd installs walk-in showers, wet-room conversions, and full bathroom renovations across Cardiff and the Vale of Glamorgan, handling everything from the waterproofing membrane to the final tile grout. The team manages plumbing, tiling, and drainage in a single coordinated job, so you are not coordinating three separate trades yourself.
Every installation includes a written waterproofing specification before a single tile goes down. For homeowners in Penarth, Cowbridge, Barry, and the surrounding area, the team offers site visits to assess your existing layout, drain position, and ventilation before quoting. Bring your measurements, a rough idea of your preferred finish, and a realistic budget range.
To book a site visit or get a written quote, visit Jmplumbingservicesltd or the Penarth installation page for local contact details.
Sources
- 55 Stunning Small Bathroom Walk-In Shower Ideas
- Designer-Approved Walk-In Shower Ideas to Try | Good Housekeeping
- 18 Walk-In Shower Ideas That Make a Splash | Architectural Digest
- Walk-In Shower Remodel Ideas: Layouts, Tile, and Design for Every Bathroom
- Walk-In Shower Ideas: The Curbless Look Done Right