
Wet Room Ideas for Small and Accessible Bathrooms
Discover innovative wet room ideas that maximize space and accessibility in small bathrooms, making them stylish and practical.
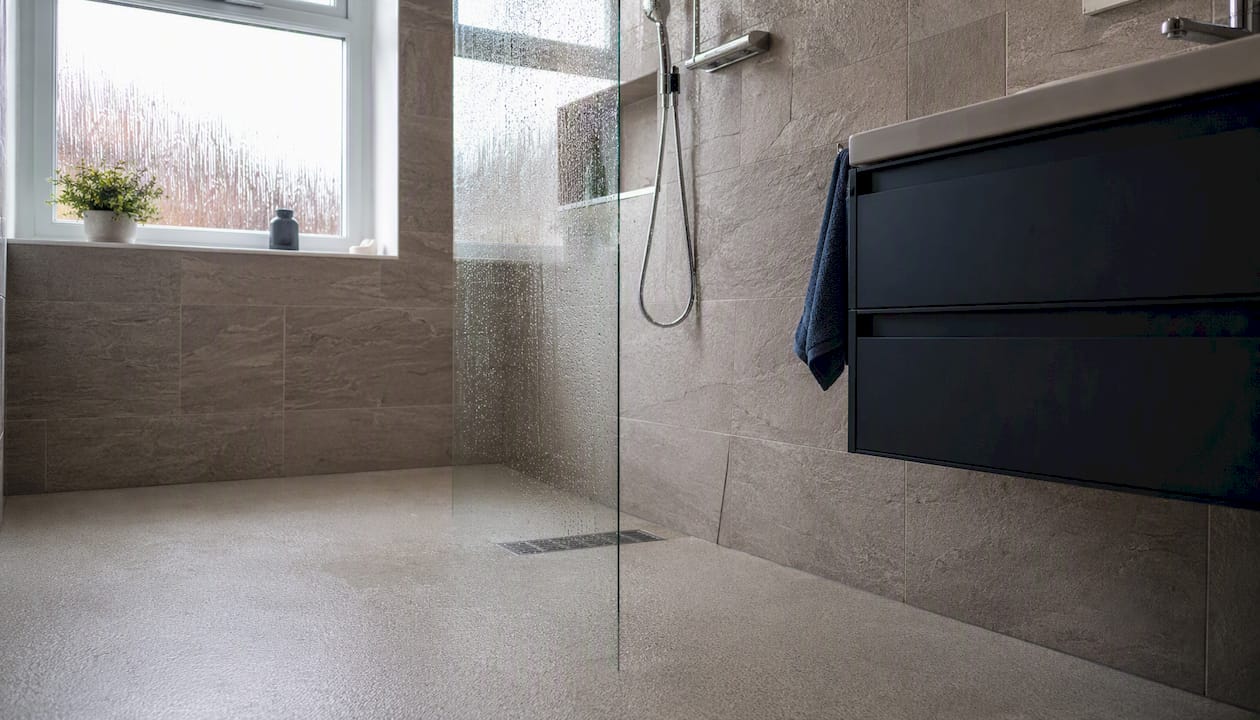
A wet room is a fully tanked, level-access bathroom where the entire floor is waterproofed and water drains freely without a tray or step. That single design decision opens up more space, removes trip hazards, and makes even a cramped bathroom feel noticeably larger. If you’re weighing up whether one works for your home, here’s what to consider first:
- Small-space layouts: A functional shower zone can start at a very small footprint, suitable for tight bathrooms.
- Linear drains: Easier to tile around than center-point drains and far cleaner visually.
- Glass half-panels: Define the wet zone without boxing it in or blocking light.
- Wall-hung fittings: Free up floor area and make cleaning significantly easier.
- Underfloor heating: Speeds drying and keeps the floor comfortable underfoot.
- Large-format tiles: Reduce grout lines and make small rooms read as bigger.
- Accessible features: Zero-threshold entry, grab rails, and thermostatic valves future-proof the space.
- Budget tanking options: Tanking boards cost less than full liquid-applied systems and suit most timber subfloors.
Typical UK projects run between £5,000 and £15,000 depending on scope. The costs section below breaks that down by budget bracket.
Key Takeaways
A wet room works in almost any bathroom footprint when the tanking, drain position, and floor fall are planned correctly from the start.
| Point | Details |
|---|---|
| Minimum dimensions | A functional shower zone starts at 900mm x 900mm; a full wet room layout works from roughly 1200mm x 1700mm. |
| Drain position first | Fix the drain location before tanking begins — it determines the floor fall and the entire tile layout. |
| Budget range | UK wet room projects typically cost £5,000–£15,000 depending on scope, subfloor type, and finishes. |
| Ventilation spec | Specify 20–25 l/s extraction for a wet room, not the 15 l/s bathroom minimum, to manage humidity and prevent mold. |
| Jmplumbingservicesltd | Handles full wet room installation across Cardiff and the Vale of Glamorgan, from survey and tanking through to tiling and fixtures. |
Table of Contents
- What is a wet room and how does it differ from a walk-in shower?
- What are the best wet room ideas to inspire your design?
- How do you build a wet room step by step?
- What tiles and finishes work best in a wet room?
- How do you design a small wet room or accessible layout?
- What does a wet room cost in the UK, and how long does it take?
- What ventilation, lighting, and heating does a wet room need?
- What are the most common wet room problems and how do you prevent them?
- How do you choose the right wet room installer?
- A local wet room installation by Jmplumbingservicesltd
- What professional installers notice that most homeowners miss
- Jmplumbingservicesltd handles wet room projects across Cardiff and the Vale of Glamorgan
- Sources
What is a wet room and how does it differ from a walk-in shower?
A walk-in shower has a defined tray or raised area and waterproofing that’s local to that zone. A wet room waterproofs the entire floor and walls, so water can fall anywhere across the room. The floor is laid to a gradient that directs water toward a drain, and there’s no step to negotiate. Level access and continuous tile floors increase perceived space and improve accessibility in ways a tray-based shower simply can’t match.
Pros of a wet room:
- Removes the step into the shower, improving safety for all ages
- Continuous floor tiling makes the room feel larger
- Easier wheelchair and mobility aid access
- Visually clean and contemporary
Cons to weigh up:
- Full tanking costs more than a shower tray installation
- Ventilation needs are higher than a standard bathroom
- Poorly executed waterproofing is expensive to fix
- Timber subfloors require additional build-up, which raises floor height
Pro Tip: Decide on your drain type and its position before anything else. Moving a drain after tanking has started means ripping out the substrate. If you’re on timber joists, confirm the floor build-up depth with your installer early — some systems add 50–80mm, which affects door clearances and transitions to adjacent rooms.
What are the best wet room ideas to inspire your design?
The ideas below are organized by who they suit best, with a note on what each one means for the build.
- Galley layout (small bathrooms): Sanitaryware on one wall, shower zone at the far end. Keeps plumbing runs short and the floor fall simple.
- Alcove conversion (small bathrooms, budget): Convert an existing shower alcove into a fully tanked wet zone. Lowest disruption, shortest build time.
- Monochrome tone-on-tone (modern, any size): Same tile color in different textures on floor and walls. Tone-on-tone texture layering with large-format tiles and simple glass screens is one of the most consistent trends in contemporary wet rooms.
- Feature tile wall (luxury, mid-range): One bold wall behind the shower head in a contrasting tile. Everything else stays neutral to avoid visual noise.
- Micro-cement seamless finish (luxury): No grout lines, completely seamless look. Requires specialist application and periodic sealing, but the result is genuinely striking.
- Glass half-panel (small, modern): A fixed panel 900–1000mm high defines the wet zone without closing off the room. Works especially well in narrow bathrooms.
- Recessed niche (any size): Built into the wall during the tanking stage. Far cleaner than a shelf or caddy, and adds zero floor footprint.
- Wall-hung vanity (small, accessible): Frees up floor space and makes mopping straightforward. Pair with a wall-hung WC for maximum effect.
- Porcelain tiled furniture and vanities (luxury, low-maintenance): Waterproof by nature, spa-like in finish, and they outlast wood-framed units in constant humidity.
- Thermostatic bar valve (accessible, family): Precise temperature control and easy single-lever operation. A practical upgrade that costs relatively little at the fixture stage.
- Tile-in linear drain (modern, any size): The drain cover is tiled to match the floor. Virtually invisible and the cleanest finish available.
- Warm metal finishes — brushed brass or matte black (modern): Fixtures in a single warm metal tone pull the room together without additional decoration.
- Compact wet room package for 2–4 m² (small, budget): Full waterproofing, anti-slip porcelain, compact wall-hung sanitaryware, and a linear drain. Proven to work in very tight footprints.
- Spa/minimalist with a single overhead rain head (luxury): One large ceiling-mounted shower head, no clutter. Needs adequate water pressure and a thermostatic valve to work properly.
- Underfloor heating mat (any size): Dries the floor faster and eliminates the cold-tile shock. Particularly worthwhile in wet rooms where the whole floor gets wet.
- Sliding or outward-opening door (small bathrooms): Choosing the right bathroom door type matters more in a wet room than a standard bathroom — an inward-opening door that swings into a wet floor is a slip risk and a space waster.
Pro Tip: When you collect inspiration images, annotate each one with two measurements: where the drain sits relative to the room’s longest wall, and the width of any glass screen. Those two dimensions drive almost every other decision in the build.
How do you build a wet room step by step?
The essential sequence is: site survey and structural check, floor preparation and falls, tanking, substrate, drain installation, tiling, fixtures, and finishing. Skipping or rushing any stage creates problems that are expensive to fix later.
Site prep and structural check comes first. A surveyor or experienced installer checks the subfloor type (concrete slab vs. timber joists), existing pipe runs, and whether the floor can handle the additional weight of a full tanking system. Timber floors need a rigid board overlay before any waterproofing goes on.
Falls preparation is where the floor gradient is established. The recommended gradient is roughly 1:60–1:80, directing water toward the drain without making the floor feel noticeably sloped underfoot. Linear drains allow a single-direction floor fall, which is simpler to tile cleanly than the four-way fall a center-point drain requires. In small rooms, that simplicity matters.
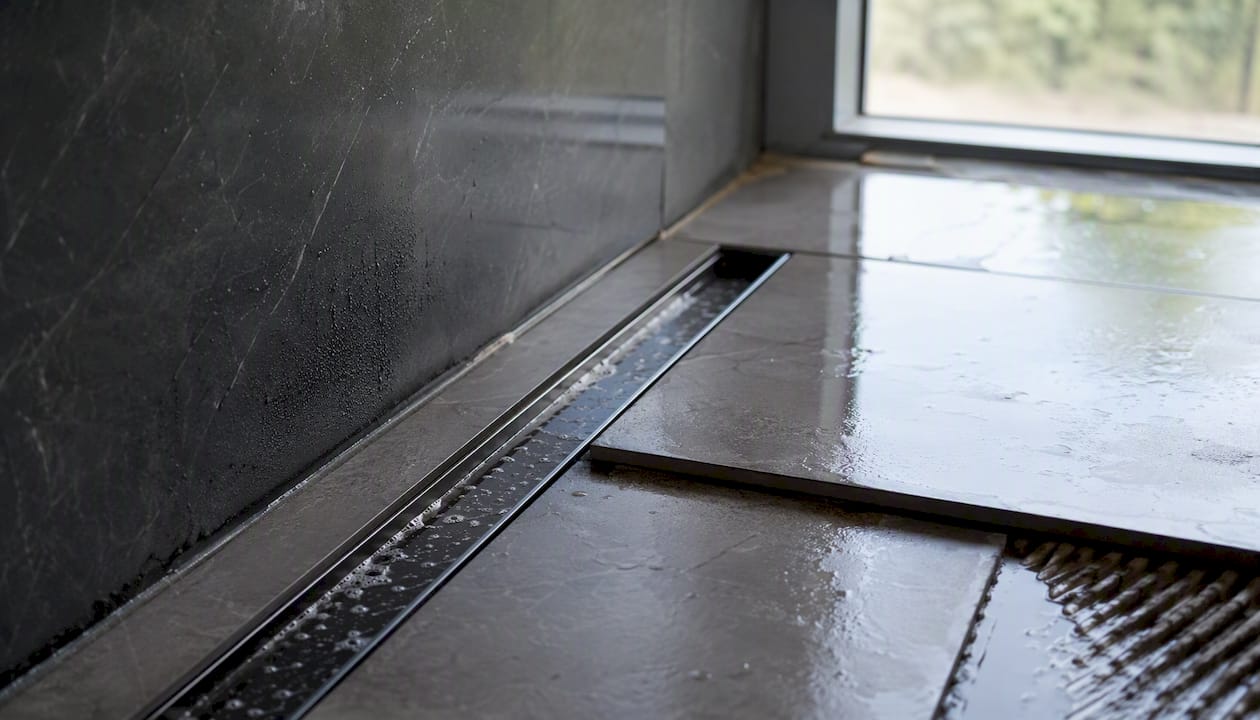
Tanking is the waterproofing layer, and there are three main approaches. A liquid-applied membrane is brushed or rolled onto walls and floor in multiple coats, forming a continuous barrier. Tanking boards (rigid foam-core boards with a waterproof surface) are faster to install and suit timber subfloors well. A full tanking system combines both, used on larger projects or where the risk of water ingress is higher. Whichever system your installer specifies, the junctions between floor and wall are the most critical points — they need reinforcing tape and extra membrane coverage.
Drain selection follows tanking. A tile-in linear drain gives the cleanest finish and simplifies the floor fall to a single plane. A standard shower waste works for budget projects but requires a four-way fall and more complex tiling. Drain position should be fixed before any screeding or boarding begins.
Tiling goes over the tanked substrate. The tiler works to the fall, cutting tiles to maintain the gradient. Grout joints need to be sealed, and silicone rather than grout is used at all internal corners.
Trade roles to plan for:
- Plumber: first fix pipe rerouting, drain connection, fixture installation
- Screeder or tiler: floor preparation, falls, and all tiling
- Electrician: underfloor heating, extractor fan, IP-rated lighting (must be Part P certified)
- General builder: structural work, boarding, door adjustments
Building regulations note: Wet rooms don’t typically need planning permission, but electrical work in a bathroom is notifiable under Part P of the Building Regulations. Any electrician you hire must be registered with a competent person scheme (such as NICEIC or NAPIT) or the work must be signed off by building control. Structural changes — removing a load-bearing wall, for example — require building control notification regardless.
What tiles and finishes work best in a wet room?
Porcelain is the default choice for good reason. It’s dense, low-porosity, and handles constant moisture without absorbing it. Ceramic works in lower-traffic wet rooms but is more porous than porcelain. Natural stone (slate, travertine, limestone) looks exceptional but requires sealing on installation and regular resealing — in a wet room that’s used daily, that maintenance commitment is real.
Anti-slip ratings matter on the floor. The DIN 51097 standard classifies barefoot wet areas into groups: Group A (low slip resistance) through Group C (highest). For a wet room floor, Group B minimum is the practical standard, and Group C is worth specifying if the room will be used by older adults or children. Your tile supplier should be able to confirm the rating; don’t assume a textured tile is automatically compliant.
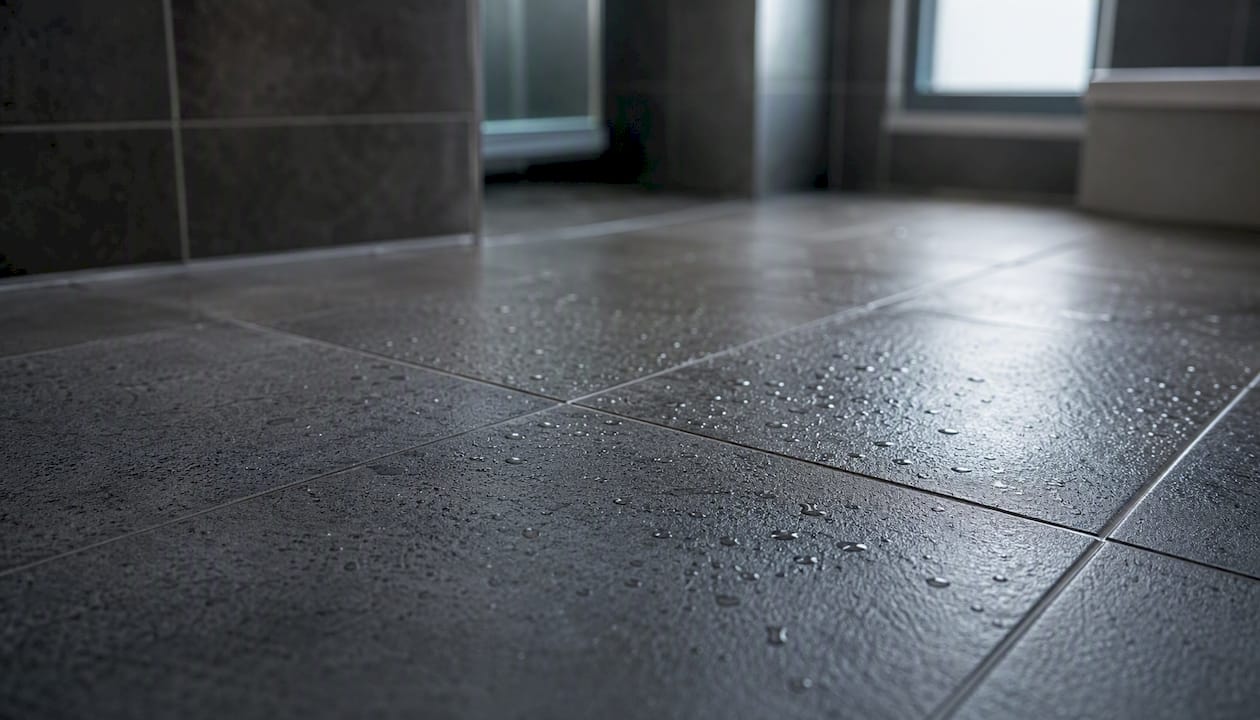
Grout choice affects longevity significantly. Epoxy grout is non-porous, stain-resistant, and doesn’t need sealing — the right call for wet room floors and shower walls. Cement-based grout is cheaper and easier to work with, but it needs sealing on installation and resealing annually in high-humidity areas. Grout failure (cracking, darkening, or crumbling) is one of the most common early signs that a wet room is developing moisture problems.
Tile size and the floor fall interact in ways most homeowners don’t anticipate. Large-format tiles (600mm x 600mm or larger) look cleaner and reduce grout lines, but they require a very flat, accurately prepared substrate to sit without lippage. In small wet rooms, mosaic or smaller tiles can be more forgiving for achieving the floor fall and adding grip — the smaller format allows the tiler to follow the gradient more precisely. The right answer depends on your substrate and your installer’s preference, so discuss it before you order tiles.
For waterproof flooring options beyond ceramic and porcelain, slip-resistant stone-effect porcelain and LVT are both worth considering in adjacent areas.
Maintenance tips:
- Squeegee the floor after each use to reduce standing water
- Reseal cement grout annually; epoxy grout needs no sealing
- Check silicone at wall-floor junctions every six months and replace at the first sign of discoloration or lifting
How do you design a small wet room or accessible layout?
A functional wet room shower zone starts at 900mm x 900mm, and a comfortable full wet-room layout becomes realistic at roughly 1200mm x 1700mm. Below those dimensions, you’re designing a wet zone within a bathroom rather than a true whole-room wet room, which is still a valid and practical approach.
Layout checklist for small bathrooms:
- Place the drain along the longest wall to allow a single-plane fall
- Position the shower head on the wall opposite the door to keep the wet zone away from the entry
- Use wall-hung sanitaryware to free up floor area and simplify cleaning
- Specify a compact linear drain (as narrow as 60mm wide) to minimize the visual interruption on small floors
- Consider a glass half-panel rather than a full enclosure to preserve sightlines
Accessibility features worth specifying:
- Zero-threshold entry (the whole point of a wet room, but confirm the floor build-up doesn’t create a lip at the door)
- Fold-down or fixed grab rails at the shower zone and near the WC
- Thermostatic valve with a temperature limiter (prevents scalding, easier to operate with limited grip)
- Wall-hung WC and basin at the correct height for the user
- Non-slip floor tiles rated to DIN 51097 Group C for higher-risk users
For a deeper look at accessible bathroom design considerations and UK regulatory guidance, the full guide covers grab rail positioning, turning circles, and Part M compliance.
Subfloor considerations: Concrete subfloors are the easier base for a wet room. They’re rigid, don’t flex, and can handle liquid-applied membranes directly. Timber joist floors flex slightly, which can crack a rigid tanking membrane over time. The solution is a rigid overlay board (such as Wedi or Schluter Kerdi-Board) that bridges the flex before the membrane goes on. This adds floor height — typically 30–80mm depending on the system — so check door clearances and transitions to adjacent flooring before committing.
What does a wet room cost in the UK, and how long does it take?
UK wet room projects typically run between £5,000 and £15,000, with the spread driven by room size, subfloor type, tile choice, and fixture quality. For a detailed breakdown of what drives those costs locally, the wet room cost guide covers Cardiff and Vale of Glamorgan pricing in detail.
| Budget bracket | Typical inclusions | Approximate duration |
|---|---|---|
| Budget (£5,000–£7,500) | Tanking board system, standard porcelain tiles, basic linear drain, compact fixtures, standard extractor | 5–8 days |
| Mid-range (£7,500–£11,000) | Liquid-applied membrane, larger-format tiles, tile-in linear drain, thermostatic valve, underfloor heating mat | 8–12 days |
| High-end (£11,000–£15,000+) | Full tanking system, premium porcelain or stone, bespoke drain, designer fixtures, feature lighting, porcelain furniture | 12–20 days |
Stage-by-stage timeline:
- Survey and design: 1–3 days (measure, confirm subfloor, agree specification)
- Demolition and strip-out: 1–2 days
- Structural and plumbing first fix: 1–3 days
- Tanking and substrate: 2–4 days (including cure time for liquid membranes)
- Tiling: 2–5 days depending on room size and tile format
- Fixtures and second fix: 1–2 days
- Finishing and snagging: 1 day
Cost-saving tips without cutting corners:
- Keep the drain in its existing position where possible — moving it means rerouting waste pipes, which adds cost and time
- Choose a tile-in linear drain over a bespoke stone or metal cover — the visual result is similar, the price difference is not
- Use a tanking board system on timber subfloors rather than a full liquid-applied system — it’s faster and often more appropriate for the substrate
- Phase the project: get the wet room built first, then upgrade fixtures later
What ventilation, lighting, and heating does a wet room need?
Ventilation is non-negotiable in a wet room. The UK Building Regulations Part F sets a minimum of 15 l/s for bathrooms, but wet rooms generate significantly more moisture. Specifying an extractor at 20–25 l/s is the practical standard for a wet room, and a humidity-sensing model that runs automatically until the room is dry is worth the modest extra cost. A continuous mechanical extract ventilation (MEV) system is worth considering if the wet room is in an internal room with no window.
Lighting in a wet room does more than illuminate — it defines zones. Recessed IP-rated ceiling fittings provide even ambient light, while targeted task lighting placed around the vanity (not directly above the mirror) avoids glare and creates a more usable space. Accent lighting in a recessed niche or along the base of a wall-hung vanity adds depth without adding clutter. All fittings inside the wet room must carry an IP65 rating minimum; fittings within Zone 1 (directly above the shower) must be IP65 or higher. All electrical work must be carried out by a Part P registered electrician.
Underfloor heating is particularly effective in wet rooms because the whole floor gets wet and needs to dry. An electric mat system for a small wet room (around 2 m²) runs at roughly 300–400 watts and costs relatively little to run for the drying benefit it provides. Hydronic (water-fed) underfloor heating is more efficient over larger areas but requires a more complex installation. Either way, the heating element goes in after tanking and before tiling, so it must be planned into the build sequence from the start.
Pro Tip: Fit a timer or smart control on the extractor so it runs for at least 20 minutes after the shower is used. Most mold problems in wet rooms start not from the shower itself but from residual humidity that’s never fully extracted.
What are the most common wet room problems and how do you prevent them?
Most wet room failures trace back to one of three causes: inadequate tanking, poor drainage falls, or insufficient ventilation. Catching problems early is far cheaper than a full remediation.
Maintenance schedule:
Weekly:
- Squeegee the floor after use
- Wipe down glass panels and wall tiles to prevent soap scum buildup
Monthly:
- Check silicone at wall-floor junctions and around the drain for any lifting or discoloration
- Clear the drain cover of hair and debris
- Run the extractor fan for a few minutes and confirm it’s drawing air
Annually:
- Reseal cement grout (epoxy grout needs no resealing)
- Inspect the drain for slow drainage — a sign of partial blockage or a failing trap
- Check for any soft spots in the floor tiles, which can indicate water has breached the tanking
Warning signs that need a tradesperson:
- Water appearing on the ceiling of the room below — the tanking has failed and needs professional assessment
- Persistent mold on walls despite regular cleaning — likely a ventilation or waterproofing issue
- Tiles lifting or hollow-sounding when tapped — water has got under the substrate
- Grout crumbling or falling out — reseal immediately; if the problem recurs, the substrate may be moving
Minor grout resealing and drain clearing are homeowner tasks. Anything involving the tanking layer, structural tiles, or signs of water ingress below the floor needs a qualified installer. A shower leak through the ceiling is a specific scenario worth reading up on before deciding whether to call a professional.
How do you choose the right wet room installer?
The quality of a wet room comes down almost entirely to the waterproofing stage — and that’s the part you can’t see once it’s finished. Choosing the right installer matters more here than in almost any other bathroom project.
Contractor vetting checklist:
- Ask for photos of completed wet rooms, not just general bathroom work — wet room tanking is a specific skill
- Confirm they carry public liability insurance (minimum £1 million cover)
- Ask for two or three references from wet room clients specifically, and follow up on them
- Check trade certifications: Gas Safe if they’re doing any gas work, NICEIC or NAPIT for electrical, and membership of a recognized bathroom trade body (such as the Association of Plumbing and Heating Contractors)
- Confirm the electrician they use is Part P registered
Questions to ask at the quote stage:
- Which tanking system do you use, and why is it right for my subfloor?
- Where will the drain go, and what type of drain are you specifying?
- What tile substrate are you using, and is it compatible with the tanking system?
- Who handles the electrical work, and are they Part P registered?
- What warranty do you offer on the waterproofing?
Warranty and aftercare:
- A reputable installer should offer at least a 12-month workmanship guarantee
- Ask specifically about the tanking warranty — some membrane manufacturers offer 10-year product guarantees when applied by a certified installer
- Clarify in writing who is responsible if a leak appears within the warranty period
A local wet room installation by Jmplumbingservicesltd
A Cardiff homeowner approached Jmplumbingservicesltd with a 3.2 m² bathroom that hadn’t been touched in 20 years. The brief was straightforward: remove the bath, create a fully accessible wet room, and keep the project within a mid-range budget.
Project brief:
- Existing bath removed; space converted to a full wet room
- Timber joist subfloor requiring rigid board overlay before tanking
- Client requested zero-threshold entry, grab rail, and thermostatic valve for an elderly parent
- Budget band: mid-range (£7,500–£11,000)
Build sequence:
- Survey confirmed timber subfloor and existing drain position (retained to control costs)
- Rigid tanking boards installed over joists; liquid membrane applied at all junctions
- Tile-in linear drain positioned along the longest wall
- Large-format anti-slip porcelain tiles laid to a 1:70 gradient
- Wall-hung basin and WC installed; thermostatic bar valve and grab rail fitted
- IP65 recessed downlights and humidity-sensing extractor installed by a Part P registered electrician
The project completed in 10 working days. The client’s existing drain position was retained, which avoided pipe rerouting costs and kept the project on budget. For similar projects across Cardiff and the Vale of Glamorgan, the bathroom renovation Cardiff page shows the full scope of what Jmplumbingservicesltd handles.
Pro Tip: Always photograph the tanking layer before tiling begins. If a leak appears two years later, those photos tell you exactly where the membrane was applied and whether the junction detailing was done correctly. A good installer will do this without being asked.
What professional installers notice that most homeowners miss
The most common mistake in wet room planning isn’t the tile choice or the fixture budget — it’s treating the drain as an afterthought. Where the drain goes determines the floor fall, the fall determines the tile layout, and the tile layout determines how the room looks. Fix the drain position on day one.
Three things worth knowing before you brief any installer:
First, the wet-wall junction is where most leaks start. The corner where the floor meets the wall is under constant thermal movement. A tiler who uses grout at that junction instead of flexible silicone is setting up a future leak. Ask specifically how they handle internal corners.
Second, not all porcelain is equal for wet room floors. A tile that looks textured may still have a DIN 51097 Group A rating — fine for a dry floor, inadequate for a wet one. Always ask for the slip-resistance certificate, not just the visual description.
Third, ventilation is usually underspecified. Most quotes default to the minimum 15 l/s extractor because it’s cheaper. In a wet room, that’s not enough. A humidity-sensing extractor rated at 20–25 l/s costs perhaps £30–£50 more at the fixture stage and prevents mold problems that cost hundreds to remediate.
Red flags in a quote or site visit:
- No mention of tanking system or substrate type
- Drain position not discussed before pricing
- Electrical work quoted as part of the tiler’s scope (it must be a separate, Part P registered electrician)
- No reference to floor gradient or fall direction
- A quote that’s significantly lower than others without a clear explanation of what’s been omitted
Jmplumbingservicesltd handles wet room projects across Cardiff and the Vale of Glamorgan
Skipping the design-and-build coordination is where wet room projects most often go wrong — one trade finishes before the next has confirmed their requirements, and the tanking or drain position ends up compromised. Jmplumbingservicesltd manages the full sequence: waterproofing, tiling, plumbing, and electrical coordination, all under one contract with a single point of contact.

For Cardiff homeowners, the bathroom installation Cardiff page covers the full service range and project types. If you’re in Penarth, Rhoose, or elsewhere in the Vale of Glamorgan, the team covers those areas with the same scope. The practical next step is a site survey: Jmplumbingservicesltd visits, checks your subfloor, confirms drain options, and gives you a written quote before any work begins. Get in touch to book yours.
Sources
These are the sources and inspiration hubs referenced throughout this article, all relevant for UK homeowners planning a wet room:
- Wet room design ideas - QualiPorcelain
- How Much Does a Wet Room Cost? - Assisted Living
- Wet Room Ideas - Houzz