
What Installers Check: Wet Room Tanking for UK Homeowners
Installer-informed homeowner guide to wet room tanking: the kit parts, the 600mm wet-zone rule, step-by-step liquid kit application, and when to hire a pro.
What Installers Check: Wet Room Tanking for UK Homeowners
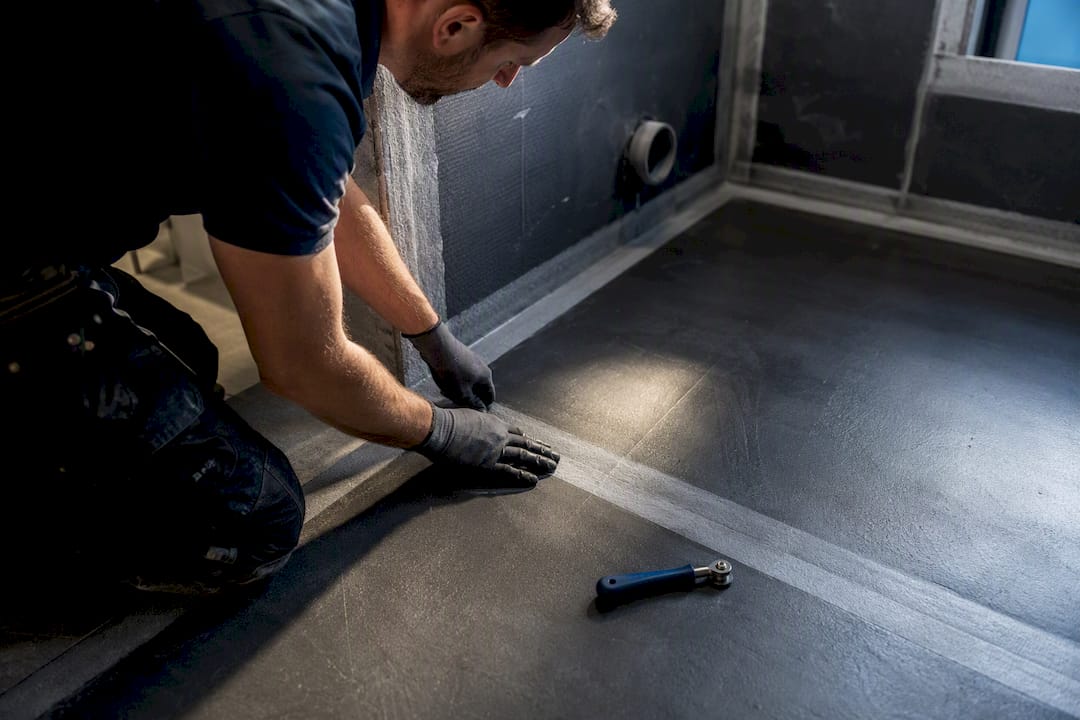
Yes, a wet room needs tanking. Every wet room requires a continuous watertight membrane across the floor and at least 600mm up the walls of the shower zone. Use a proven liquid two-coat kit (primer, tape, membrane) for most DIY jobs, or a bonded sheet system if you want faster coverage and a consistent membrane thickness. Complex drains, awkward pipework, or anything tied to a warranty deserve a professional installer.
TL;DR:
- Proper tanking requires a continuous waterproof membrane extending at least 600mm up the walls in the wet zone to prevent water penetration.
- Liquid membrane systems are more forgiving for DIY installation and are cheaper initially, but require drying time between coats, while sheet membranes provide faster, more consistent coverage.
- Applying tanking involves careful substrate preparation, precise taping at corners and joints, and allowing proper curing time before tiling to avoid leaks.
- The choice of tanking system should match your substrate type, room temperature conditions, and complexity of drainage or pipework for long-term effectiveness.
- For complex rooms or where warranties matter, engaging a professional installer ensures critical areas like corners and drain details are correctly sealed.
Table of Contents
- What Wet Room Tanking Actually Means
- Liquid Kits vs. Sheet Membranes: Which Fits Your Bathroom
- What’s Actually in a Wet-Room Tanking Kit
- How to Apply a Paint-On Tanking Kit, Step by Step
- Matching Tanking to Your Substrate, Heating, and Joints
- What Wet Room Tanking Costs and How Long It Takes
- What Installers Check Before Anything Gets Tiled
- When DIY Makes Sense and When It Doesn’t
- Get Your Wet Room Tanked Right the First Time
- Manufacturer Datasheets Worth Checking
- Sources
- FAQ
What Wet Room Tanking Actually Means
Tanking is the physical layer that stops water: a membrane bonded directly to the floor and walls that creates a watertight barrier before a single tile goes down. Waterproofing is the bigger picture, the overall strategy that includes falls, drainage, and detailing that keeps water where it belongs. Tanking is one part of that strategy, arguably the most important one.
Tiles and grout look waterproof but aren’t. Grout is porous, and even the best tile has hairline gaps at every joint, so water works its way through eventually and soaks the substrate underneath if there’s nothing stopping it. That’s exactly why the membrane sits beneath the tile, not on top of it.
Two things worth knowing before you buy anything:
- The wet zone on the walls needs to run at least 600mm beyond the showering area, not just around the shower tray footprint.
- UK tiling work is commonly measured against BS 5385-1, and several manufacturers back their kits with European Technical Assessments that speak to how the membrane performs long term.
Liquid Kits vs. Sheet Membranes: Which Fits Your Bathroom
Most wet room tanking comes down to two families of product, and the right one depends on your substrate, your tools, and how much patience you have for drying times.
Liquid two-coat systems go on with a brush or roller. You prime the substrate, tape the joints and corners, then paint on two coats of membrane at right angles to each other so there are no weak spots where brush strokes align. The EVERBUILD Aquaseal Wet Room System, Bostik’s flexible tanking system, and the NoMorePly Waterproof Tanking Kit all follow this pattern. They’re forgiving on irregular surfaces and cheap to buy in small quantities, which makes them the default choice for a first-time DIYer.
Sheet membranes are pre-made flexible sheets bonded to the substrate with adhesive, the approach used in systems like Sika’s SikaCeram range and Schluter-KERDI. They give you a uniform thickness the moment they’re down, no waiting for a second coat to cure, and they’re a strong match for underfloor heating because the sheet decouples minor substrate movement from the tile above.
A quick way to think about the trade-off:
- Liquid kits: cheaper entry point, more forgiving on odd shapes, but drying time between coats adds a day to the job.
- Sheet systems: faster once you’re set up, consistent ~1mm finished thickness, but you need tighter cutting skills around drains and corners.
One figure worth remembering: Bostik’s flexible tanking system is rated for application between 5°C and 30°C, which rules out a cold garage or an unheated bathroom in winter without extra planning.
What’s Actually in a Wet-Room Tanking Kit
Kits vary by brand, but the components do the same jobs across nearly every system on the market.
- Primer — seals porous substrates like plaster or cement board so the membrane bonds properly instead of soaking in unevenly.
- Waterproof membrane — the liquid or paste that forms the actual barrier, applied in two coats.
- Joint and corner tape — reinforces the weakest points in any tanking job: internal corners, board joints, and the seam where floor meets wall.
- Drain mat or collar — a shaped piece that wraps the membrane tightly around the drain body, the single most leak-prone spot in the entire room.
- Application brush and gloves — basic, but worth having the right size brush for corners versus flat runs.
Coverage matters more than most buyers realize. A standard kit often covers around 4.5 square meters, while larger kits stretch to roughly 7.5 square meters, so measure your actual wet zone, not just the floor, before you order. Unopened tubs have a shelf life too. Check the date code, since membrane that’s sat in a warehouse too long can skin over or thicken in the container.
How to Apply a Paint-On Tanking Kit, Step by Step
Rushing any one of these steps is how leaks happen two years down the line, usually behind a wall nobody wants to open up again.
- Prep the substrate. Clean it, make sure it’s dry, and check it’s structurally sound. New screed or plaster needs to cure fully per the manufacturer’s own guidance before you touch it with primer.
- Prime porous surfaces. Plasterboard, plaster, and some cement boards need a primer coat first so the membrane doesn’t soak in unevenly.
- Tape first. Apply joint and corner tape to every internal corner, board joint, and the area around pipe penetrations and the drain before any membrane goes on.
- Apply coat one. Brush the membrane on horizontally in a continuous layer, then let it dry for the time stated on the tub.
- Apply coat two. Apply the second coat vertically, at right angles to the first, closing off any pinholes the first pass missed.
- Check thickness and overlaps. Aim for the manufacturer’s minimum finished thickness, generally around 1mm, and make sure tape overlaps run past corners rather than stopping dead center.
- Wait before tiling. Manufacturer re-tile times vary, but Aquaseal’s system allows tiling after around 12 hours in good conditions. Cold or humid rooms take longer.
Pro Tip: Never leave a finished membrane exposed to sunlight or foot traffic for days on end. It’s an underlayer, not a wearing surface, and manufacturers are specific that it needs tile or vinyl covering it as soon as it’s cured.
The mistakes that cause real problems are predictable: coats applied too thin, tape that doesn’t overlap properly at corners, skipping substrate prep because “it looked dry enough,” and tiling before the membrane has actually cured rather than just looking dry on the surface.
Matching Tanking to Your Substrate, Heating, and Joints
Not every wall or floor takes tanking the same way, and getting this wrong is where a lot of DIY jobs go sideways.
- Plasterboard needs priming before membrane goes on; it’s absorbent and will drink the first coat unevenly without it.
- Cement backer boards are moisture resistant, not waterproof on their own. The joints between boards still need taped and membraned, or water finds its way through the seams regardless of the board itself.
- Plywood and concrete each have their own primer requirements, so check the specific datasheet rather than assuming one primer suits every substrate.
- Underfloor heating changes the calculation. Confirm the membrane and adhesive are both rated for wet or electric systems before you commit, since heat cycling stresses joints differently than an unheated floor.
- Movement joints in larger rooms or where different structural elements meet often call for a decoupling membrane or a flexible adhesive rather than a rigid bond, and manufacturers are specific about where these need to sit.
What Wet Room Tanking Costs and How Long It Takes
Entry-level DIY kits sit at the affordable end, while trade-grade systems with certified components cost more but often come with the paperwork insurers and warranty providers want to see. Add extra budget if the drain or trap needs replacing, if you’re fitting new backer boards, or if you’re paying for labor rather than doing it yourself.
A realistic timeline for a paint-on kit: prep and prime on day one, tape and first coat on day two, second coat and drying on day three, then tiling once the membrane has fully cured, which varies by product and room conditions.
- Simple, accessible bathroom with straightforward drainage: doable as a weekend-plus DIY project.
- Complex drainage, inaccessible pipework, or anything where you need the paperwork for building insurance: bring in a professional installer rather than risk a comeback job.
What Installers Check Before Anything Gets Tiled
Corners and pipe penetrations fail more often than flat wall or floor sections, which is why installers spend disproportionate time there. Dedicated internal corner pieces and generous tape overlap at every junction matter more than an extra coat on an open wall, since thin coating at corners is where most tanking failures start.
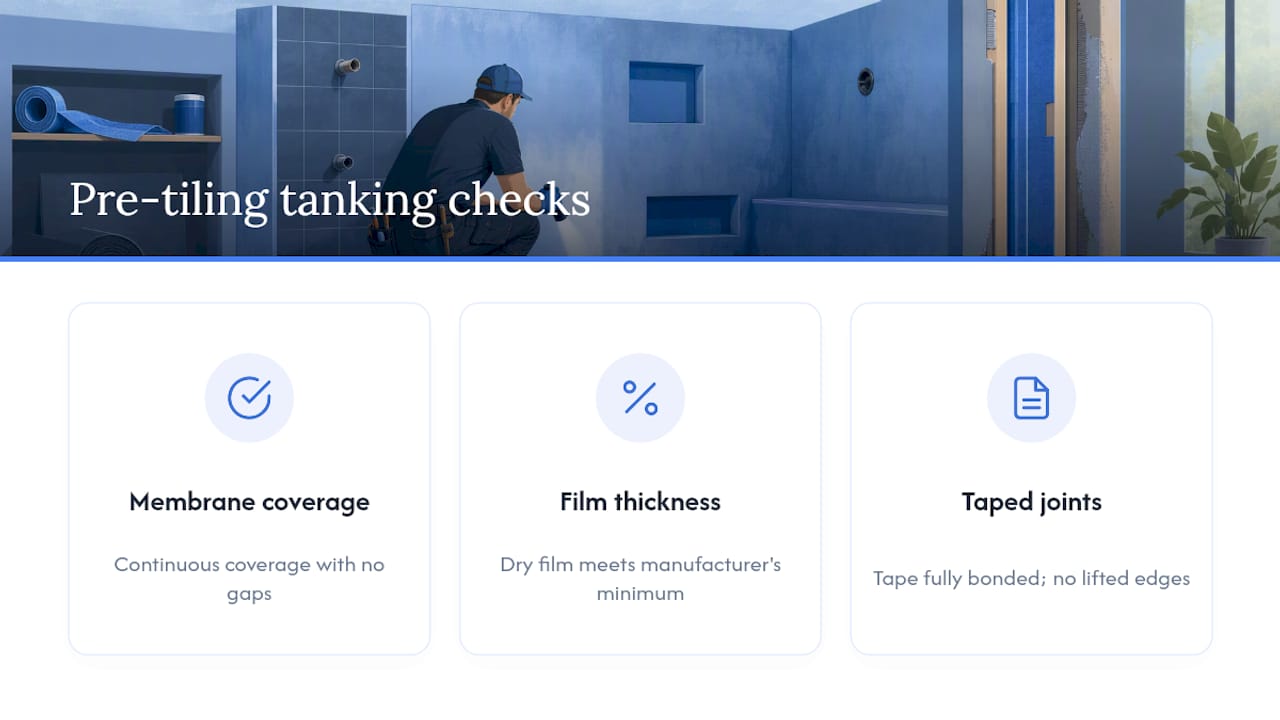
Before any tile goes down, a proper check covers three things: continuous membrane coverage with no gaps, dry film thickness that matches the manufacturer’s minimum, and a visual pass over every taped joint to confirm the tape actually bonded rather than lifting at the edges.
Pro Tip: Run your hand along every corner and pipe penetration once the membrane has cured. A slightly raised or bubbled section usually means an air pocket under the membrane, and it’s far easier to fix before tiling than after.
Experienced wet room installers know which corners get skipped on a rushed job. If you’d rather have someone check the work before it’s covered by tile, a site visit settles that question quickly.
When DIY Makes Sense and When It Doesn’t
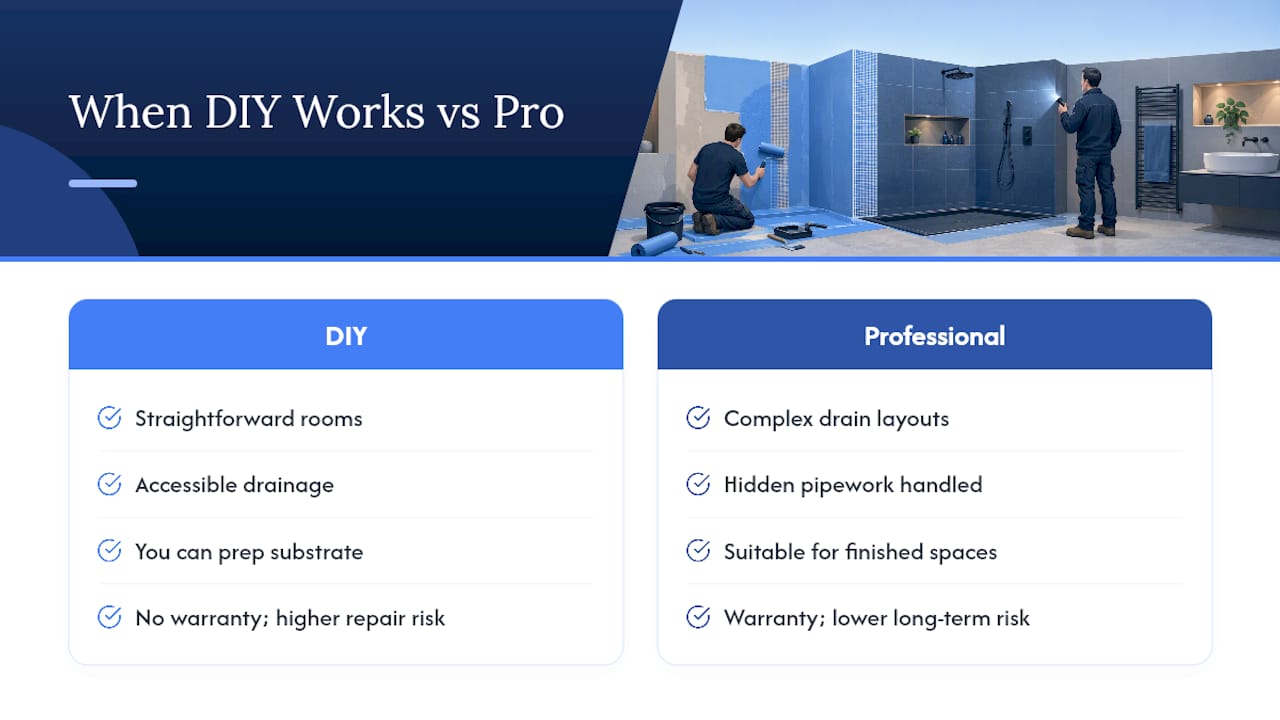
DIY tanking works well for straightforward rooms with accessible drainage and a substrate you can prep properly. It stops making sense the moment you’re dealing with a complex drain layout, hidden pipework, or a room where a failed membrane means ripping out tile in a finished space.
The upfront cost of hiring a professional is smaller than most people assume once you weigh it against a leak repair two years later, especially where a warranty is on the line.
— James
Get Your Wet Room Tanked Right the First Time
Homeowners benefit from one accountable team for the whole job, rather than separate subcontractors for the tanking and tiling. That matters here specifically: tanking failures almost always trace back to a handoff between trades where nobody owned the corners or the drain detailing.

A site visit can provide a fixed quote covering waterproofing, tiling, drainage, and finishing, with no showroom markup added on top. If your project is a full wet room conversion, our wet room conversions and installations page covers what’s included. For a wider bathroom renovation with tanking as part of the job, the Bathroom Renovation Cardiff service runs from £2,500 to £4,000 depending on scope. Get in touch to book a survey and see exactly what your room needs before any membrane goes down.
Manufacturer Datasheets Worth Checking
Coverage, drying times, and substrate requirements vary between products, so always confirm against the manufacturer’s own paperwork before buying: the Aquaseal Waterproof Tanking Membrane data sheet, Bostik’s flexible tanking system datasheet, the SikaCeram Sealing Membrane W product document, and the NoMorePly Waterproof Tanking Kit page, which lists its ETA-08/0250 assessment.
Sources
FAQ
Does a Wet Room Need Tanking?
Yes. Because a wet room has no shower enclosure, the entire floor and the wet zone on the walls, extending at least 600mm from the showering area, need a continuous watertight membrane before tiling. Skipping tanking means water reaches the substrate through grout lines over time.
How Much Does It Cost to Tank a Wet Room?
Tanking materials alone are relatively inexpensive for a standard-size bathroom, but total project cost depends on drainage work, backer boards, and labor. For a full wet room conversion including tanking, tiling, and finishing, JM Plumbing Services Ltd’s bathroom renovation service runs from £2,500 to £4,000, and other project costs are available on request.
What Is the Best Type of Tanking for a Wet Room?
There’s no single best system. Liquid two-coat kits like Aquaseal or Bostik’s flexible tanking system suit uneven substrates and DIY budgets, while sheet membranes like Schluter-KERDI give faster, more consistent coverage for underfloor heating setups. The right choice depends on your substrate and skill level.
What Is the Difference Between Tanking and Waterproofing?
Tanking is the physical membrane applied to walls and floors to create a watertight layer. Waterproofing is the broader strategy that includes tanking along with falls, drainage design, and detailing around fixtures. Tanking is one component of a properly waterproofed wet room, not the whole picture.