
Shut Off Water Fast: Find Your Stopcock Under the Sink
Locate your internal stopcock quickly, shut off water safely at the sink, test and maintain the valve, and learn when to call a plumber in an emergency.
Shut Off Water Fast: Find Your Stopcock Under the Sink
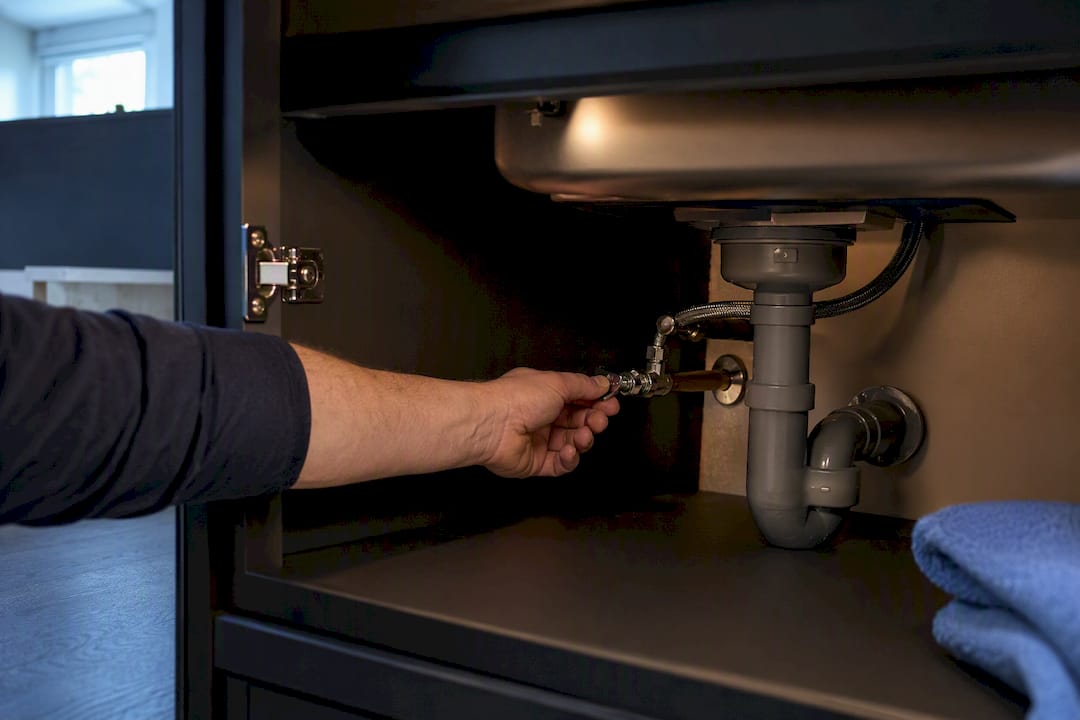
Most homes’ internal stopcock sits under the kitchen sink, usually on the wall or floor behind the pipework feeding the tap. Turn it clockwise to shut off the water immediately. If it’s not there, check under the stairs, in an airing cupboard, or near the front door. Can’t find it anywhere? Pull up your house plans or call your water supplier before the leak gets worse.
TL;DR:
- Most internal stopcocks are located under the kitchen sink, with alternative spots including under stairs, in airing cupboards, or near the front door.
- Turning a stopcock requires slow, steady rotation clockwise to shut off water, and it should be tested regularly to prevent seizing or leaks.
- External stopcocks on the boundary are usually owned by the water supplier, while internal ones are the homeowner’s responsibility to locate and maintain.
- Kitchen renovations often box in stopcocks behind cabinetry, making access difficult, and most seized valves should be replaced rather than forced.
- Contact a plumber for help if you cannot find, operate, or if your stopcock is seized, leaking, or inaccessible, especially before emergencies occur.
Table of Contents
- Where to Check for Your Stopcock Location
- How to Turn Your Stopcock On and Off
- Flats, Communal Supplies, and Who’s Responsible for What
- Can’t Find Your Stopcock? Try This Escalation
- Testing and Maintaining Your Stopcock
- Expert Note: What We See on Real Jobs Across Cardiff
- Get Your Stopcock Checked or Replaced
- Sources
- FAQ
Where to Check for Your Stopcock Location
Start at the kitchen sink. Get down and look for a vertical pipe rising from the floor with a valve fitted on it, either a round tap head or a T-bar handle. That’s the most common inside stop valve position because it usually sits right where the main supply pipe first enters the house.
If the kitchen draws a blank, work through these spots in order:
- Under the stairs, inside a cupboard or boxed panel
- Airing cupboard, often near the hot water cylinder
- Downstairs WC or a utility room
- Garage, cellar, or basement wall
- Near the front door, sometimes behind a low access panel
- Beside the meter box, if one is fitted inside the property
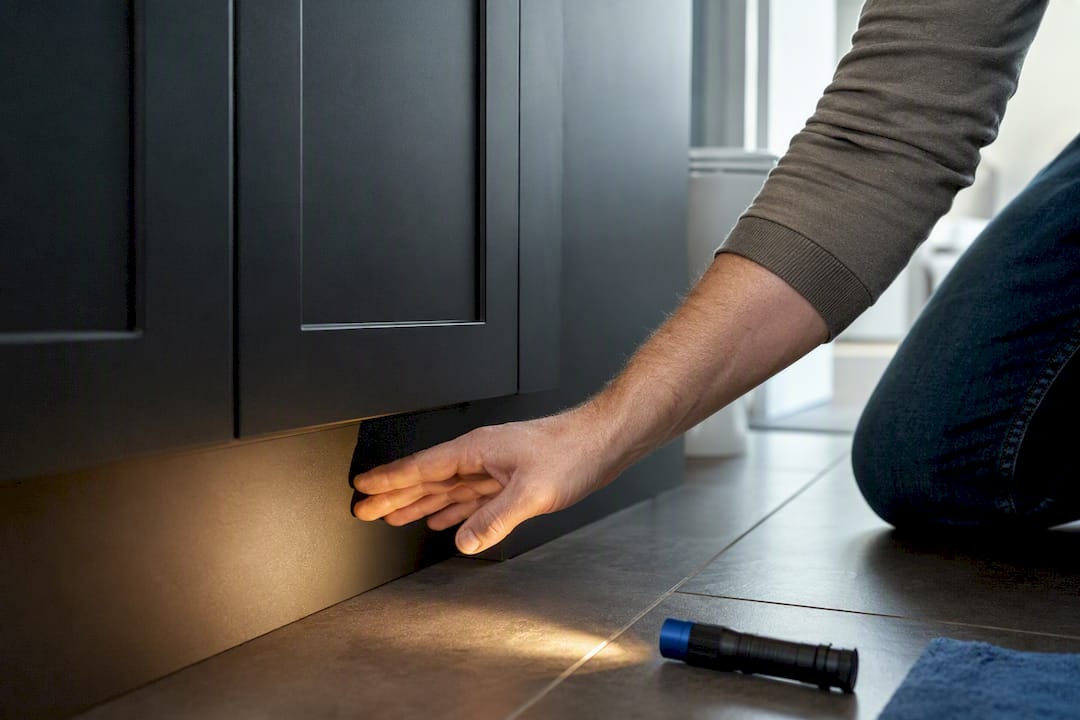
Older properties tend to keep the valve near the original supply entry point. Newer builds sometimes tuck it under floorboards close to where pipework rises into the kitchen units. Kitchen renovations are a common culprit for a “missing” stopcock. Fitters rarely relocate the valve when they install new units, so it often ends up boxed in behind a cabinet or under a plinth, exactly where you’d never think to look.
Pro Tip: Tap along kickboards and cabinet plinths near the sink. A hollow sound usually means an access panel is hiding behind it.
How to Turn Your Stopcock On and Off
Once you’ve found it, operating a stopcock correctly matters more than people assume. Turn it the wrong way under pressure, or force a seized valve, and you can snap the spindle clean off.
Most valves use one of three heads: a round tap style, a T-bar, or a lever. Whichever type you have, the rule is the same: clockwise closes the valve, anti-clockwise opens it.
- Locate the valve and clear any obstruction around it.
- Turn it clockwise slowly, using steady pressure rather than force.
- Run a downstairs tap to confirm the flow has actually stopped.
- Leave taps open briefly to drain remaining water from the pipes.
- When ready to restore supply, turn anti-clockwise slowly and check for drips at joints.
Don’t yank a stiff valve. If it won’t budge, back off and call a plumber rather than risk shearing the spindle, which turns a five-minute job into a pipe replacement. If flooding has reached sockets or light fittings, cut the electricity at the consumer unit before doing anything else.
Pro Tip: Expect a short delay before taps run dry. Water sitting in the pipework between the stopcock and the tap has to drain out first.
Flats, Communal Supplies, and Who’s Responsible for What
Not every stopcock is yours to touch. Every property usually has two: an internal one you control, and an external one on the boundary that belongs to the water company.
- The internal stopcock inside your home is your responsibility to locate, use, and maintain.
- The external stop tap, usually under a small cover near the boundary, is normally maintained by your water supplier, not you.
- Flats and some terraced houses often share a supply through a communal stopcock in a riser cupboard or at the building’s entry point.
- If you live in a flat, talk to the building manager or freeholder before touching anything communal. Shutting the wrong valve can cut off water for every flat in the block, not just yours.
Can’t Find Your Stopcock? Try This Escalation
When the obvious spots turn up nothing, work through these steps in order rather than tearing cabinets apart at random.
- Dig out your house plans or building survey and look for a small “SC” marking, which usually flags the stopcock’s position.
- Ask a neighbor with an identical or similar-layout property. They may have found theirs already and can point you toward the equivalent spot.
- Find the external stop tap near the boundary. Its position on your property line often lines up roughly with the internal valve on the other side of the wall.
- Contact your water supplier with your address and meter reference if you’re still stuck. They can confirm where the external stop tap sits and, in some cases, send someone to shut it off in an emergency.
Estate agents and previous owners are also worth a call if you’ve just moved in. It’s a five-minute question that can save you an hour of crawling around skirting boards during a flood.
Testing and Maintaining Your Stopcock
A stopcock you’ve never touched is a stopcock you can’t trust in an emergency. Isolation valves like this are built for occasional use, and cheaper hardware can seize or start leaking if it sits untouched for years, according to general plumbing guidance on isolation valves.
- Turn the valve fully closed and back open once every six months, just to keep it moving freely.
- Watch for resistance. A valve that fights you partway through a turn is likely starting to seize.
- Check for drips at the spindle or body immediately after testing.
- Look for corrosion on the valve body or the pipework leading into it.
Persistent dripping after you’ve exercised the valve, visible corrosion around the spindle, or a valve that won’t fully close are all signs it needs replacing rather than nursing along. If you’re already dealing with a related issue, our guide on dripping tap causes covers the diagnostics for that specific problem.
Pro Tip: Test your stopcock right after you move in, not during your first emergency. You want to know it works before you need it to.
Expert Note: What We See on Real Jobs Across Cardiff
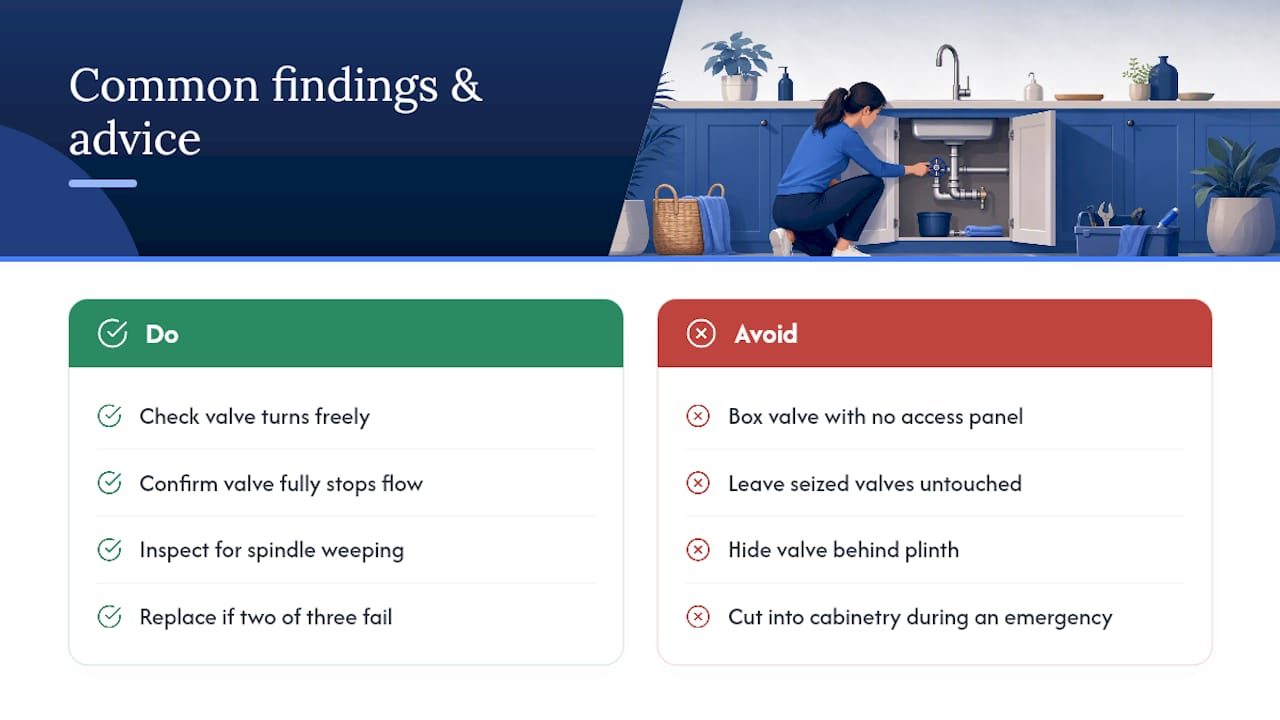
Boxed-in stopcocks are a common issue encountered after kitchen renovations. Fitters box the valve in behind a plinth and forget to leave an access panel, so homeowners end up cutting into cabinetry mid-emergency.
The other repeat offender is the seized valve nobody’s touched in a decade. Our checks are simple: does it turn without excessive force, does it fully stop the flow, and is there any weeping at the spindle once it’s shut? If two of those three fail, replacement beats repair almost every time.
— James
Get Your Stopcock Checked or Replaced
A local plumbing service handles stopcock checks, replacements, and general plumbing repairs with a dedicated team, fixed pricing, and no showroom markup.

If your valve is seized, leaking, or nowhere to be found, that’s a job worth booking rather than forcing. Our general plumbing and leak detection services cover stopcock replacement, dripping taps, and low water pressure diagnosis, and we can usually get to a seized or failing valve within the week. If a renovation boxed yours in years ago and you’re planning a refit anyway, it’s worth raising during a bathroom renovation so the new layout leaves it properly accessible. Get in touch through the plumbing page above for a quote on a repair or replacement.
Sources
- How to Find Your Internal Stopcock — WaterSafe
- Find and use your inside stop valve | Thames Water
- Where’s my stop tap? — Southern Water
- Where is my stopcock? How to easily locate your internal stop tap — Ideal Home
FAQ
What Does a Stopcock Valve Look Like?
It’s typically a small brass or plastic valve fitted onto a vertical section of pipe, with either a round tap head, a T-bar handle, or a lever on top.
Where Do I Find the Stopcock in a UK House?
Check under the kitchen sink first, then under the stairs, in an airing cupboard, or near the front door, since these are the most common spots where the main supply pipe enters the property.
Do All Houses Have a Stopcock Inside?
Nearly all UK homes have an internal stopcock, though some flats and shared buildings rely on a communal stopcock instead of an individual valve inside each unit.
I Can’t Find the Stopcock in My Flat. What Should I Do?
Check riser cupboards and the building’s entry point first, then contact your building manager or freeholder, since communal supplies are often controlled from a shared location rather than inside your individual flat.
Who Do I Call if My Stopcock Is Seized or Broken?
A local plumber can free or replace a seized valve safely. Jmplumbingservicesltd offers general plumbing repairs across Cardiff and the Vale of Glamorgan, including stopcock replacement.