
3mm Tolerance or Lippage: Large Bathroom Tiles for UK Renovations
Contractor Backed guide to large format bathroom tiles: the 3mm flatness rule, adhesive and ordering checks to avoid lippage and costly rework.
3mm Tolerance or Lippage: Large Bathroom Tiles for UK Renovations
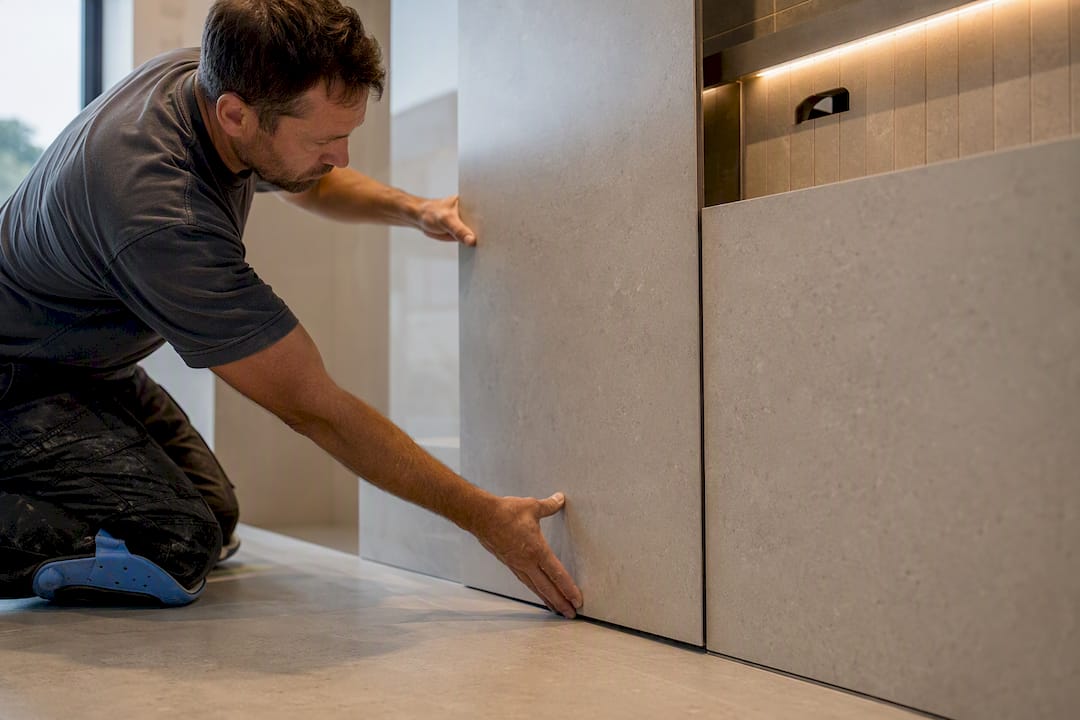
Yes, large format tiles will give most bathrooms a cleaner, larger look and far less grout to scrub, and for most homeowners that trade is worth making. The catch is what happens underneath: these tiles demand a genuinely flat substrate and an installer who knows how to bed them without lippage. Get the prep right and you get a slab-like finish that looks expensive. Skip it, and you get visible ridges at every edge.
TL;DR:
- Proper substrate flatness within 3mm over a meter is essential to prevent lippage and achieve a high-quality large format tile finish.
- Rectified edges allow for grout lines as narrow as 1.5 to 3mm, enhancing the seamless, slab-like appearance.
- Handling large tiles requires full-bed adhesive, careful cutting, and the involvement of experienced installers to avoid structural cracks.
- Higher-quality porcelain tiles with low water absorption are recommended for floors and wet areas, with textured finishes preferred for slip resistance.
- Expect to order 15-20% extra tiles to accommodate cuts, wastage, and batch variations, and verify batch matching upon delivery.
Table of Contents
- What Counts as a Large Format Tile in Bathroom Design?
- Why Large Bathroom Tiles Have Become the Default Choice
- Choosing the Right Tile Size for Your Bathroom’s Proportions
- Porcelain, Ceramic, Matte, or Gloss: What Actually Suits a Wet Room?
- What Does Installing Large Format Tile Actually Require?
- Grout Color and Layout Choices That Change the Whole Room
- How Much Extra Tile Should You Order, and What to Check on Delivery
- Should You Tile This Yourself or Bring in a Professional?
- Practitioner Notes: What Actually Goes Wrong on Site
- Is the Bigger, Cleaner Look Worth the Extra Installation Complexity?
- Get a Large Format Tile Installation Done Right the First Time
- Sources
- FAQ
What Counts as a Large Format Tile in Bathroom Design?
There’s no single legal definition, but the trade generally agrees: a tile counts as large format once one side runs past about 600mm. Below that, you’re in standard territory. Above it, you’re in a different installation category altogether, with different rules for size and layout.
The sizes you’ll see most in bathroom showrooms are 600x600mm squares, 600x1200mm planks, and 1200x600mm run the other way. Beyond that sit slab-style panels, sometimes over a meter and a half long, more common on feature walls than full floors because of weight and handling.
One term worth knowing before you order samples: “rectified.” A rectified tile has been mechanically ground to a precise, uniform edge after firing, rather than left with the slightly rounded edge of a pressed tile. Rectified edges let installers run much tighter grout lines, often 1.5 to 3mm, which is a big part of why large tiles read as a near-continuous surface rather than a grid. Check the spec sheet or the box label for “rectified” before you assume you can get that tight-joint look.
Why Large Bathroom Tiles Have Become the Default Choice
Fewer grout lines mean fewer places for grime, soap scum, and mildew to collect, and that alone sells a lot of homeowners on going bigger. The visual effect matters just as much. An uninterrupted expanse of tile reads as one continuous surface rather than a checkerboard, which makes even a modest bathroom feel more open and less busy.
This shift didn’t come out of nowhere. Large format formats moved into homes largely because they let designers fake the look of real stone slabs at a fraction of the material and installation cost of actual marble or granite. A 600x1200mm porcelain plank with subtle veining can pass for slab stone at a glance, without the sealing headaches natural stone brings into a wet room.
Porcelain large format tiles also tend to outlast their ceramic equivalents in wet, high-traffic bathrooms because the body is denser and absorbs far less water, which matters when you’re dealing with daily shower spray and mopping. Finish plays into the practical side too: gloss tiles bounce light around a dim bathroom and make cleaning marks more visible (both good and bad, depending on your tolerance for streaks), while matte finishes hide water spots better but show every fingerprint differently. Neither is objectively right. It depends on how much light your bathroom gets and how forgiving you want the surface to be day to day.
Choosing the Right Tile Size for Your Bathroom’s Proportions
Big tiles in a small bathroom aren’t automatically a mistake, and they aren’t automatically a fix either. What actually matters is proportion, not raw size. A 24x24 or 12x24 tile can make a small bathroom feel more expansive, but only if the layout avoids narrow border cuts that break the illusion.
Here’s the practical logic to work through before you commit to a size:
- Measure the room, then work backward. A 600x1200mm plank in a 6-foot by 8-foot bathroom can leave you with an awkward sliver at one wall. Test the layout on paper (or ask your installer to do a dry lay) before ordering.
- Avoid slivers under roughly two inches. A cut piece that thin looks like an installation error, not a design choice. If your layout produces one, shift the starting point or size down the tile.
- Run tiles in the direction that helps the room. Laying planks lengthwise down a narrow bathroom stretches the perceived length; running them the short way widens it.
- Align tile lines with fixtures. Grout lines that land dead center on a vanity or bath panel look intentional. Lines that clip awkwardly across a toilet or shower niche look like nobody checked first.
Right-sizing the tile to the room, not maximizing tile size for its own sake, is what separates a bathroom that feels bigger from one that just feels cluttered with oversized panels.
Porcelain, Ceramic, Matte, or Gloss: What Actually Suits a Wet Room?
Porcelain and ceramic aren’t interchangeable once water enters the picture. Porcelain is fired at higher temperatures and comes out denser, with much lower water absorption, which is why it’s the standard recommendation for bathroom floors and shower surrounds. Ceramic still has a place on bathroom walls, where it’s rarely submerged and the lower cost is worth taking.
Matte versus gloss is really a decision about where the tile goes. Gloss tiles look striking on walls and bounce light into a dark bathroom, but a highly polished floor tile turns dangerous the moment it gets wet, and a shower floor is wet constantly. Matte or textured finishes are the safer call for any floor, and doubly so inside the shower enclosure itself.
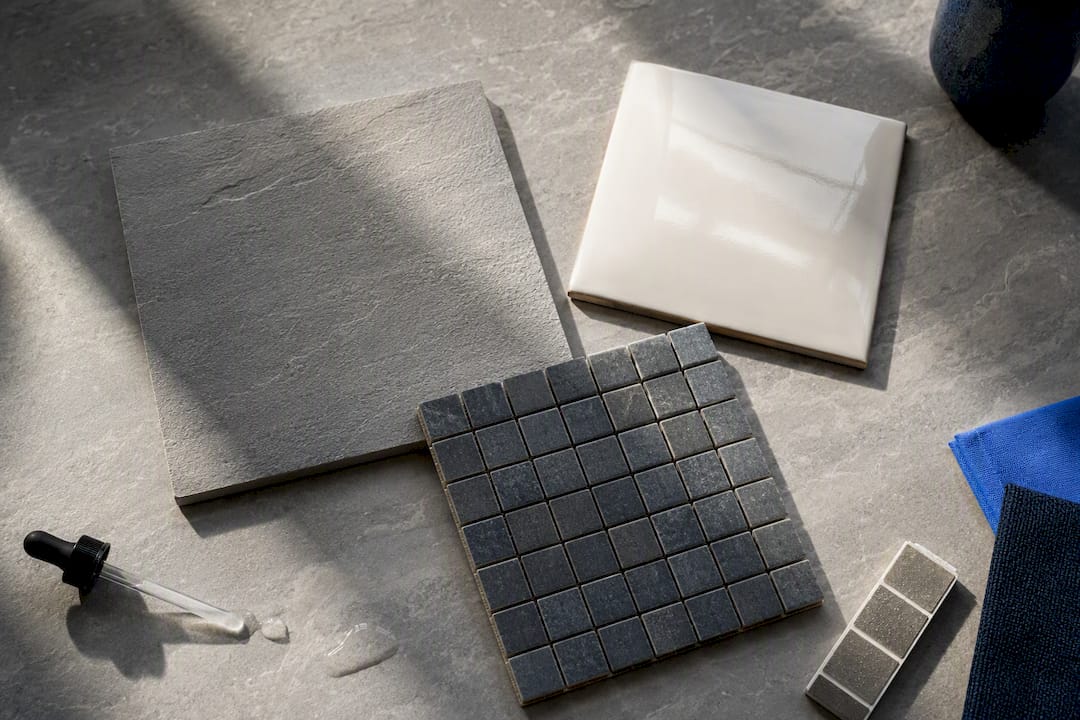
Slip resistance has an actual rating system behind it, not just a marketing claim. Look for an R-rating (the German ramp test standard) or a pendulum test classification on the tile spec sheet, and choose textured or anti-slip-rated finishes for any floor. For shower floors specifically, many installers step down to mosaics or smaller-format tile even when the rest of the room uses large format, because the smaller pieces create the grout lines needed for proper drainage falls and traction, something a single large slab can’t easily do.
What Does Installing Large Format Tile Actually Require?
This is where most large-format bathroom projects succeed or fail, and it has almost nothing to do with the tile itself. It’s about what’s underneath it.
Professional installers typically check subfloor flatness with a straight edge, and the tolerance for large format work is tight. A common benchmark is no more than about 3mm of deviation over a 1-meter span. Anything beyond that, and you’re setting up “lippage,” where the edge of one tile sits proud of its neighbor. On a small tile, a slight substrate dip barely shows. On a 600x1200mm plank, that same dip shows up as a visible ridge you can catch a towel on.
Here’s what a properly executed large format install involves, step by step:
- Substrate assessment. The installer checks flatness before anything else, using a straight edge or laser level across the full floor or wall area.
- Correction where needed. Uneven substrates get self-leveling screed on floors or additional board and skim work on walls, sometimes floor planing where high spots exist.
- Full-bed adhesive with back-buttering. Large tiles need adhesive combed onto both the substrate and the back of the tile itself, not just one side, to eliminate hollow spots and guarantee full contact.
- Movement joints. Expansion gaps get built in at wall junctions and large floor runs, since porcelain expands and contracts with temperature and a rigid, jointless installation eventually cracks.
- Careful cutting and handling. Large tiles are heavy and brittle at the edges. Cutting a 600x1200mm plank usually calls for a specialist wet saw or score-and-snap rail system, and moving them safely is often a two-person job.
Pro Tip: Ask any quote to specify the adhesive type by name, not just “tile adhesive.” A full-bed, high-flexibility adhesive rated for large format porcelain costs more than standard adhesive, but it’s the difference between a floor that lasts fifteen years and one that starts drumming hollow within two.
Grout Color and Layout Choices That Change the Whole Room
Grout color decisions carry more visual weight with large format tile than with anything smaller, simply because there’s less grout total and every remaining line does more work.
- Match grout to tile when you want the slab effect, near-invisible joints that read as one continuous surface rather than a tiled grid.
- Contrast grout deliberately when you want the grid itself to be part of the design, dark grout on light tile for a graphic, geometric look.
- Run the same tile floor to ceiling in a shower enclosure to create a cocooning, seamless feel that stops the eye at no visible break, an effect design guides consistently point to as one of the strongest large-format moves available.
- Ask for a layout preview if the tile has veining. Marble-look porcelain often ships with a repeating pattern, and a bad layout puts the same vein twice in adjacent tiles. Some suppliers offer book-matched pairs specifically to avoid this.
How Much Extra Tile Should You Order, and What to Check on Delivery
Tile cost scales with size, finish, and material. Large format porcelain in a stone-look finish sits well above basic ceramic, partly for the material and partly because the installation labor runs higher too, given the handling and leveling work involved.
Wastage is the part homeowners consistently underestimate. Standard guidance runs 10% extra for straightforward rectangular rooms, climbing higher, sometimes 15 to 20%, for bathrooms with lots of cuts around fixtures, niches, or a herringbone-style layout. Order it all in one purchase where possible, since batch numbers vary and a second order months later may not match in shade. When delivery arrives, check batch numbers against your invoice, inspect for cracked corners, and store the tiles flat rather than leaning on edge, where large panels are far more prone to stress cracks.
Should You Tile This Yourself or Bring in a Professional?
Small-format tile on a simple wall is genuinely within reach for a competent DIYer. Large format tile on a bathroom floor or inside a wet room is a different job, and the failure mode isn’t cosmetic, it’s structural: hollow spots under a floor tile eventually crack, and a poorly waterproofed shower wall leaks into the structure behind it.
Before hiring anyone, confirm they can answer these directly:
- How will they check and correct substrate flatness before tiling starts?
- What adhesive spec are they using, and is it rated for large format porcelain?
- Do they work in pairs for handling and setting large panels?
- What warranty or insurance covers the installation itself, separate from the tile manufacturer’s warranty?
A vague quote that skips substrate prep entirely, or a timeline that seems too fast for the square footage, is the clearest red flag you’ll get before the job starts.
Practitioner Notes: What Actually Goes Wrong on Site
On real renovation jobs, the two problems that come up again and again are uneven screed and the wrong adhesive. An old bathroom floor that looks flat to the eye often isn’t within the 3mm tolerance large format work needs, and adhesive bought off the shelf without checking the coverage rating leaves hollow pockets that show up as cracks a year later.
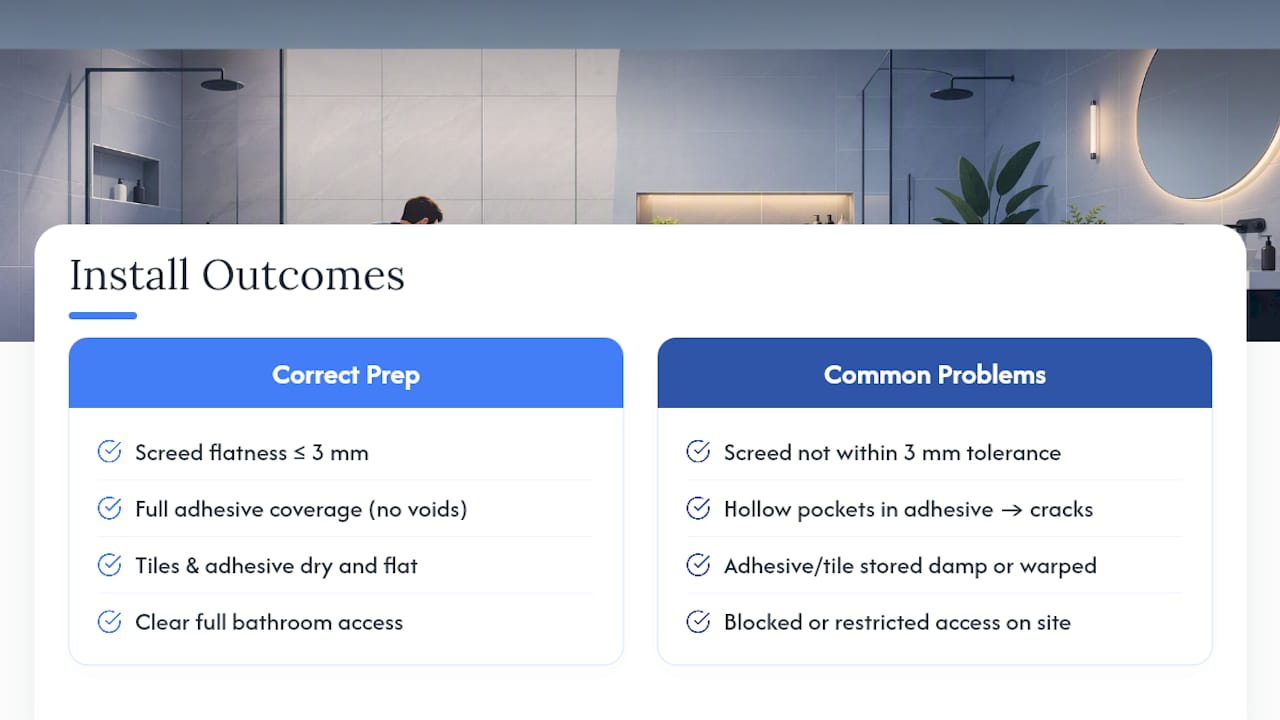
Before any install day, clear full access to the bathroom, keep tiles and adhesive stored dry and flat, and confirm every box carries the same batch number. Small prep steps like these prevent most of the delays that turn a week-long job into three.
Is the Bigger, Cleaner Look Worth the Extra Installation Complexity?
Large format tile is worth the added installation complexity in almost any bathroom getting a proper renovation, not a quick patch. The extra cost buys you a floor that resists the exact failure it’s most known for, when the substrate work is done right the first time. If you take one thing from this guide, spend the money on flatness before you spend it on the tile itself.
— James
Get a Large Format Tile Installation Done Right the First Time
If you’ve read this far, you already know the honest truth about large format tile: the tile is the easy part, and the substrate is where projects go wrong. Qualified installers handle both halves of that job for homeowners, from checking and correcting subfloor flatness to full-bed adhesive application, back-buttering, and the finished tiling itself.

Rather than quoting a tile size and hoping the floor underneath cooperates, the team surveys the substrate first and builds the adhesive spec and movement joints around what your bathroom actually needs, whether that’s a full bathroom renovation or a straightforward retile. If you’re planning a large format install and want someone to check your substrate before you order a single tile, get in touch through the Cardiff bathroom installation page to arrange a site visit and quote.
Sources
- Large format tiles guide — Icon Tiles
- When bigger is better: The dramatic look of large-format tiles — Houzz
- Do large tiles make a small bathroom look bigger? — Tilemart
FAQ
Are Large Tiles Good for Bathrooms?
Yes, for most bathrooms large tiles reduce grout lines, cut cleaning time, and create a more spacious look, provided the substrate is flat and the installer uses full-bed adhesive with back-buttering.
What Are the Disadvantages of Large Format Tile?
The main drawbacks are higher installation cost, a strict need for a flat substrate to avoid lippage, heavier and more awkward handling during cutting, and less flexibility for very small or irregularly shaped rooms.
What Sizes Do Large Format Tiles Come In?
Large format generally starts around 600mm on one side, with common bathroom sizes including 600x600mm, 600x1200mm, and larger slab-style panels for feature walls.
Can You Use Large Format Tiles in a Small Bathroom?
Yes, sizes like 12x24 or 24x24 inches can make a small bathroom feel bigger, but the layout needs to avoid narrow sliver cuts at the edges, which is best planned with a dry layout before installation.