
Bathroom Tile Patterns: The UK Homeowner's Complete Guide
Discover the best bathroom tile patterns to enhance your space. From herringbone to hexagon, find the perfect style for your home.
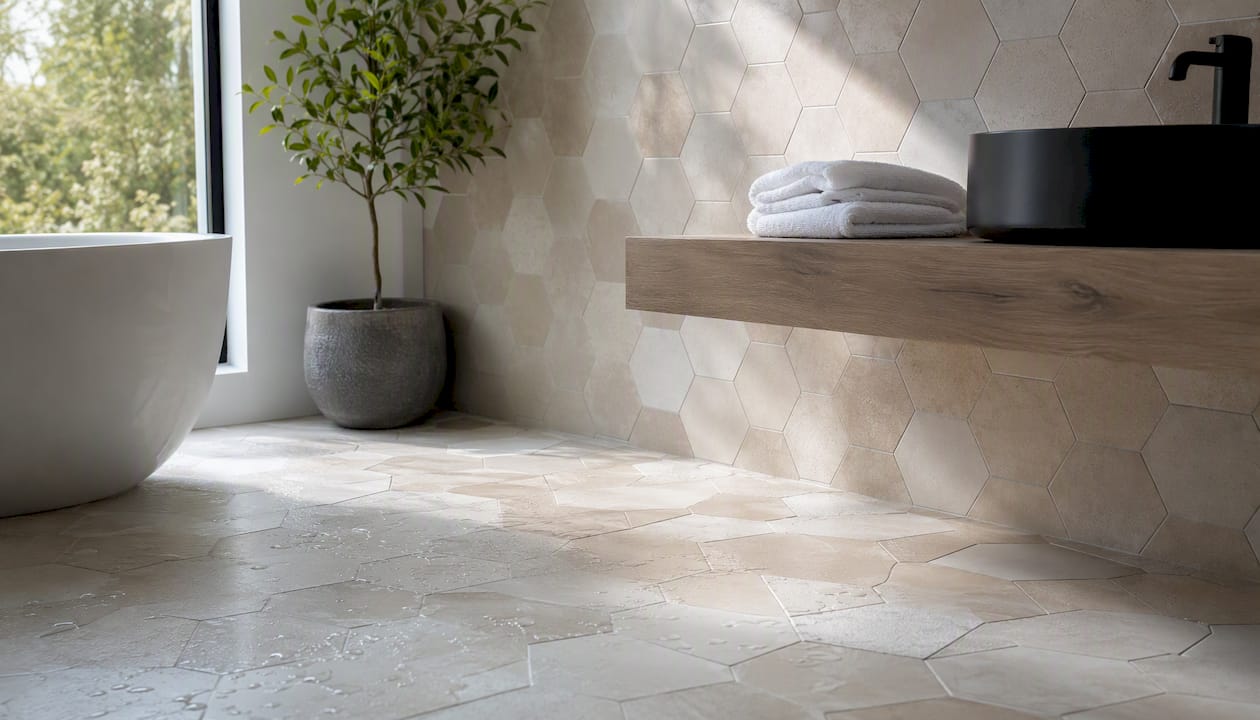
Most UK bathrooms rely on six pattern families: straight lay (grid), running bond (brick/subway), herringbone, chevron, large-format grid, and hexagon or checkerboard. For small bathrooms, large-format tiles in a vertical stack or continuous grid cut visual clutter and make the room read bigger. For statement floors, patterned porcelain in a herringbone or checkerboard layout with tone-matched grout is the most practical choice in 2026.
Quick pattern-to-use-case map:
- Straight lay / large-format grid: Best for small bathroom floors and walls where you want a clean, spacious feel with minimal grout lines
- Running bond / brick: Ideal for shower walls and splashbacks; forgiving on imperfect substrates and easy to install
- Herringbone / chevron: Feature walls, hallway-style bathroom floors, and anywhere you want visual energy; budget for 10–15% extra tile waste
- Hexagon / checkerboard: Shower floors, vintage-style bathrooms, and small rooms where a geometric accent adds character without overwhelming the space
One-line selection rule: For small UK bathrooms, favor large-format or vertically stacked tiles with narrow, tone-matched grout; for statement floors, choose patterned porcelain with a single bold surface and keep every other wall quiet.
Key Takeaways
The most reliable approach to bathroom tile patterns is to match pattern complexity to room size, budget for waste on angled layouts, and let one surface carry the pattern while the rest stay quiet.
| Point | Details |
|---|---|
| Pattern by room size | Large-format straight lay or vertical stack for small bathrooms; herringbone or checkerboard for larger floors. |
| Grout color rule | Match grout to tile color in small rooms; contrasting grout emphasizes pattern but shows staining faster. |
| Waste budget | Allow 10–15% extra tile for herringbone, chevron, and diagonal layouts; 5–8% for straight and running bond. |
| One patterned surface | Limit bold pattern to roughly 30–40% of visible area; keep other surfaces plain to avoid visual overload. |
| Jmplumbingservicesltd | Cardiff and Vale of Glamorgan homeowners can book a site survey and written estimate for tiling and full bathroom installation. |
Table of Contents
- What are the most popular bathroom tile patterns?
- How do you choose the right tile pattern for your bathroom?
- Where should each pattern go, and what are the UK safety rules?
- How much does tiling a bathroom cost in the UK, and how long does it take?
- What tile patterns are trending in UK bathrooms right now?
- When should you hire a professional tiler?
- How do you clean and maintain different tile patterns?
- How do you combine multiple tile patterns in one bathroom?
- What customization options exist within tile patterns?
- Where do popular bathroom tile patterns come from?
- Which tile patterns work best in small bathrooms?
- Sources
What are the most popular bathroom tile patterns?
The range of bathroom tile patterns available today spans from the utterly simple to the genuinely complex, and each one behaves differently depending on tile size, room proportions, and grout color. Here is a practical catalogue of every pattern you are likely to encounter.
Straight lay (grid / stacked)
Tiles align in a perfect grid, horizontal and vertical joints continuous. It reads clean and contemporary, especially with large-format porcelain. Best for floors and walls in any room size. Installation difficulty: easy. UK cost band: low. Matching grout makes surfaces feel seamless; contrasting grout turns every tile into a graphic element.
Running bond (brick / subway)
Each row offsets by half a tile width. The classic 3×6-inch subway tile in a running bond is arguably the most forgiving layout in residential bathrooms: it tolerates slightly uneven walls and suits almost any fixture style. Subway tile in running bond balances timeless aesthetics with cost-effectiveness. Best for shower walls and splashbacks. Difficulty: easy. Cost band: low.
1/3 offset
Instead of a 50% offset, each row shifts by one-third of the tile length. For tiles 300mm and longer, a 1/3 offset is recommended by many manufacturers because it reduces stress on tile edges and prevents the “lippage” (uneven tile edges) that a 50% offset can cause on large formats. Difficulty: easy to medium. Cost band: low to medium.
Herringbone
Rectangular tiles set at 90-degree angles to each other in a V-shape. The result is dynamic and directional, drawing the eye along the room’s length or height depending on orientation. It suits feature walls, bathroom floors, and wood-effect tile applications. The catch: herringbone wastes roughly 10–15% more tile than straight patterns and demands accurate cuts. Difficulty: hard. Cost band: high.
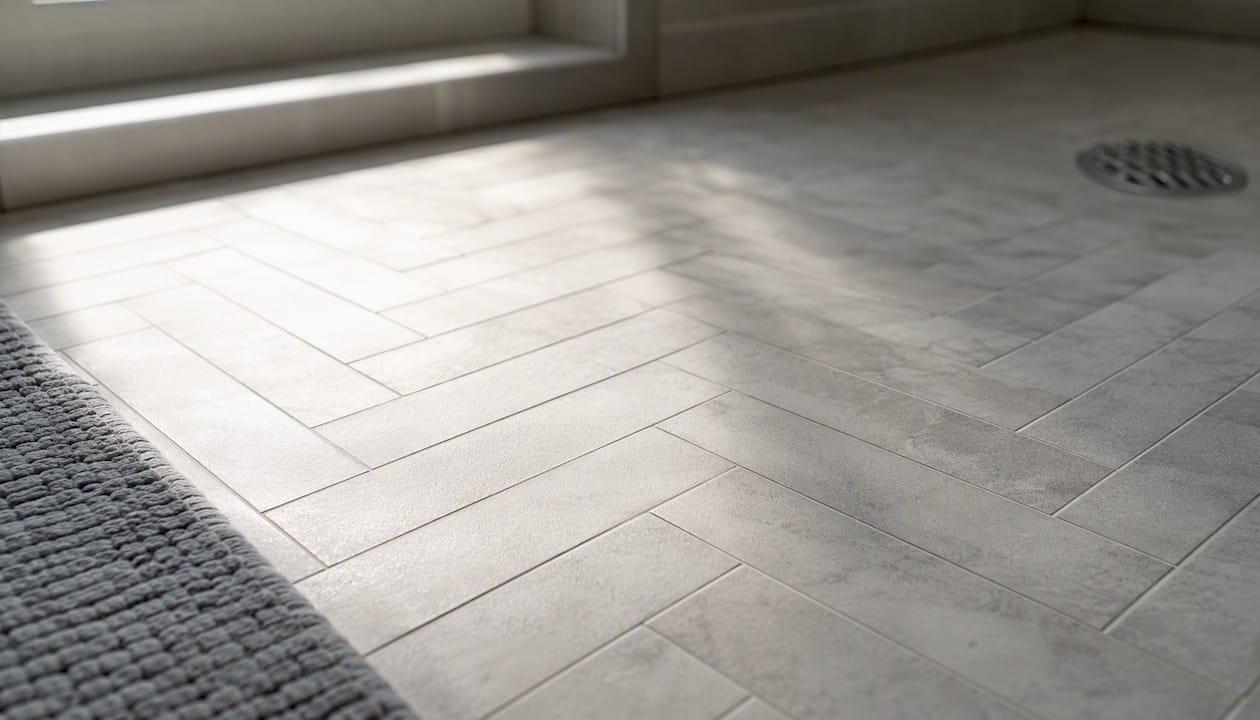
Pro Tip: Run herringbone vertically on a shower wall to add perceived height in a low-ceilinged UK bathroom — the upward V draws the eye up rather than across.
Chevron
Similar to herringbone but tiles are cut at an angle so the points meet precisely, creating a continuous zigzag rather than a staggered V. The effect is sharper and more geometric. Requires purpose-cut tiles (not standard rectangles), which adds material cost. Difficulty: hard. Cost band: high.
Checkerboard (chequerboard)
Alternating two colors in a grid, traditionally black and white. Works on floors and feature walls. Scale matters: a small tile (100×100mm) reads busy in a large room; a large tile (300×300mm or bigger) reads bold and graphic. Difficulty: easy. Cost band: low to medium.
Diagonal / diamond grid
A standard square tile rotated 45 degrees. The diagonal line creates movement and makes a narrow room feel wider. Works well on bathroom floors. Difficulty: medium. Cost band: medium.
Basketweave
Pairs of small rectangular tiles arranged perpendicular to each other around a central square, mimicking woven material. A traditional pattern common in Edwardian and Victorian-style bathrooms. Suits floors and wet room areas. Difficulty: medium. Cost band: medium.
Parquet-style (wood-effect herringbone)
Wood-effect porcelain planks laid in a herringbone pattern. Delivers the warmth of timber with the water resistance of porcelain. Popular in contemporary UK bathrooms as a floor treatment. Difficulty: hard. Cost band: high.
Modular stone
Mixed-size tiles (often two or three formats) arranged in a repeating but irregular pattern. Common with natural stone looks. Requires careful planning to avoid awkward cuts at edges. Difficulty: medium to hard. Cost band: medium to high.
Hexagon
Six-sided tiles in a honeycomb arrangement. Available from small mosaic scale (25mm) to large format (200mm+). Small hex tiles are a practical choice for shower floors because the high grout-line count improves grip. Larger hex tiles make a bold feature wall or bathroom floor statement. Difficulty: medium. Cost band: medium.
Pinwheel / patterned mosaics
A central square tile surrounded by four smaller rectangles, or intricate pre-mounted mosaic sheets with geometric or floral motifs. Often used as a feature insert or full floor treatment in period-style bathrooms. Difficulty: medium to hard. Cost band: medium to high.
Grout choices across all patterns: Narrow grout lines with a tile-matching color make a surface read as one continuous plane, which is ideal for small rooms. Contrasting grout (dark grout on white tile, for example) emphasizes the pattern geometry but also shows soap scum and limescale faster. For patterned floors, a mid-tone grout that sits between the tile colors is usually the most maintenance-friendly compromise.
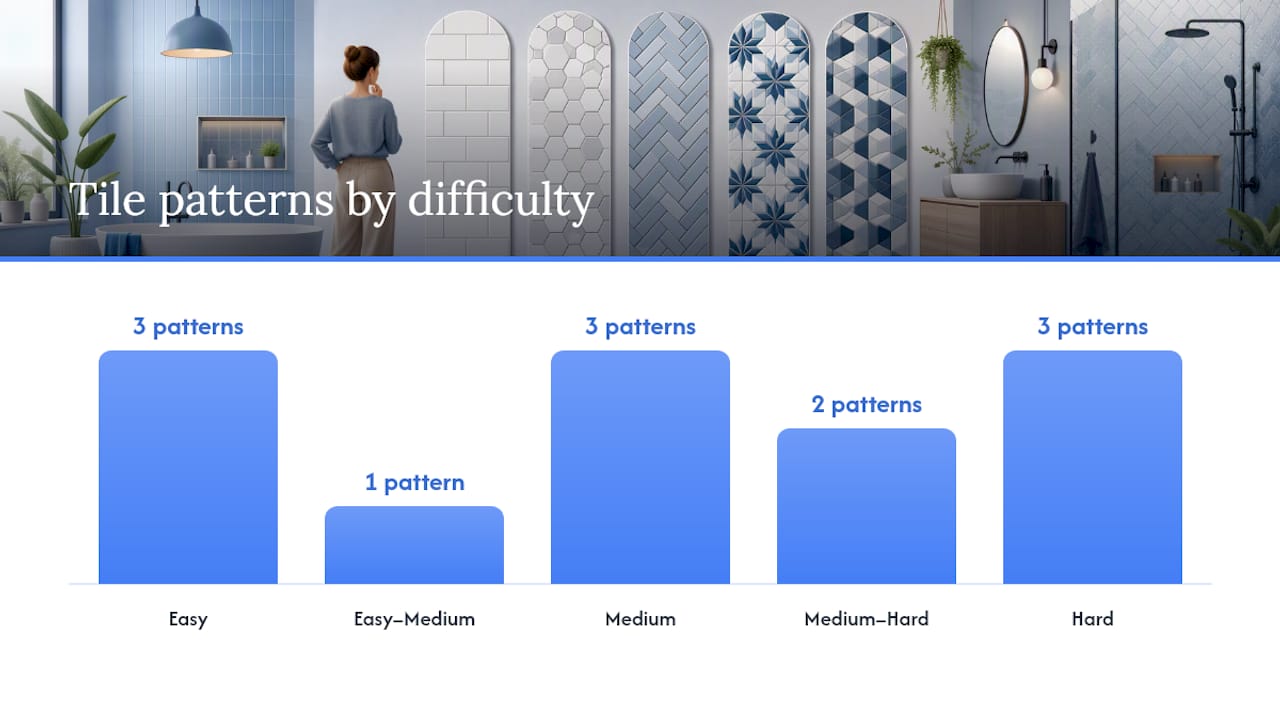
| Pattern | Difficulty | UK Cost Band | Best Placement |
|---|---|---|---|
| Straight lay / grid | Easy | Low | Floors, walls, any room |
| Running bond / subway | Easy | Low | Shower walls, splashbacks |
| 1/3 offset | Easy–Medium | Low–Medium | Large-format wall tiles |
| Herringbone | Hard | High | Feature walls, floors |
| Chevron | Hard | High | Feature floors, feature walls |
| Checkerboard | Easy | Low–Medium | Floors, feature walls |
| Diagonal / diamond | Medium | Medium | Bathroom floors |
| Basketweave | Medium | Medium | Floors, wet rooms |
| Parquet-style (wood-effect) | Hard | High | Floors |
| Modular stone | Medium–Hard | Medium–High | Walls, floors |
| Hexagon | Medium | Medium | Shower floors, feature walls |
| Pinwheel / mosaic | Medium–Hard | Medium–High | Feature floors, inserts |
How do you choose the right tile pattern for your bathroom?
Narrowing from twelve patterns to two or three realistic options takes about four decisions. Work through them in order.
Step 1: Measure the room and note the constraints. Write down floor area, ceiling height, shower position, and whether the floor needs to drain (wet room or shower tray). A room under 4 square meters calls for a different approach than a family bathroom at 8 square meters. Also note existing floor transitions: if the bathroom floor meets hardwood or LVT in a hallway, a continuous large-format tile or a simple grid avoids a jarring visual break.
Step 2: Decide the slip-resistance requirement. Any floor tile in a wet area needs an R-rating (or equivalent PEI rating for abrasion). For shower floors, aim for R10 or above. Mosaic and small hexagon tiles naturally achieve this because the high grout-line count adds texture. Large-format smooth porcelain on a shower floor needs a textured or matte finish to meet the same threshold. The UK Tile Association publishes guidance on slip-resistance classifications that installers and specifiers use as a reference.
Step 3: Match pattern to room size and budget.
- Small bathroom (under 5m²): large-format tiles (300×600mm or 600×600mm) in a straight lay or vertical stack, with narrow matching grout. Large-format tiles with continuous flooring and frameless glass can make a space read significantly larger by reducing the number of grout lines the eye has to process.
- Medium bathroom (5–8m²): running bond or 1/3 offset on walls; herringbone or checkerboard as a floor feature.
- Large bathroom (8m²+): almost any pattern works; use herringbone, chevron, or modular stone for drama, and keep walls quieter.
Step 4: Choose grout width and color as a finishing decision. Once the pattern is fixed, grout becomes a tuning dial. Matching grout color to tile color reads seamless. Contrasting grout reads graphic. For tiles 12 inches (300mm) and longer, many manufacturers recommend a 1/3 offset and a grout joint of 3mm or less to minimize lippage risk.
Practical checklist before you buy:
- Room dimensions and ceiling height noted
- Slip-resistance rating confirmed for wet areas (R10 minimum for shower floors)
- Existing floor transitions mapped
- Ventilation adequate (poor ventilation accelerates grout staining in any pattern)
- Budget band confirmed (include 10–15% extra for waste on complex patterns)
- Maintenance preference noted (glazed porcelain vs. cement encaustic)
- Rental or owner-occupied (simpler patterns protect resale appeal)
Pro Tip: Before ordering, do a dry-lay: place tiles on the floor without adhesive and photograph the result. A printed full-scale mockup of the pattern on paper works almost as well and costs nothing. Both methods reveal whether edge cuts will be awkwardly small and whether the pattern centers correctly on the main sightline.
Where should each pattern go, and what are the UK safety rules?
Pattern placement is partly aesthetic and partly governed by material performance in wet conditions.
Shower floors
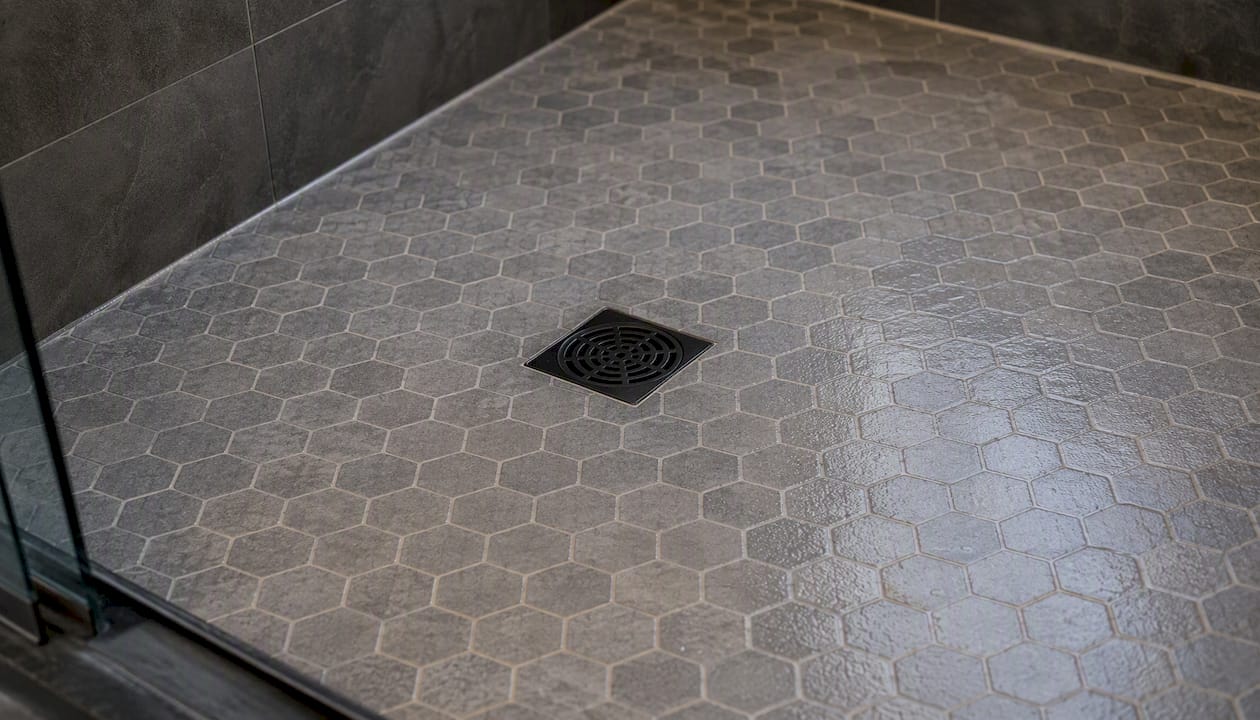
Small-format tiles win here. Mosaic sheets (25–50mm), small hexagons, and basketweave all achieve the high grout-line density that provides grip without a textured surface finish. For a shower floor to drain correctly, the substrate must be laid to a fall of at least 1:80 toward the drain. Smaller tiles follow that slope more easily than large-format tiles, which can bridge the fall and create pooling.
Shower walls
Running bond subway tile is the workhorse of UK shower walls: easy to clean, tolerant of slightly uneven studwork, and available in every price point. Herringbone on a shower wall is a statement choice but demands a flatter substrate and more precise cutting around fixtures. Vertical stack (tiles stacked directly above each other with no offset) reads contemporary and suits narrow shower enclosures by drawing the eye upward.
Bathroom floors outside the wet zone
This is where patterned porcelain floors shine. Checkerboard, diagonal grid, and parquet-style herringbone all work well here. The floor is the one surface that can carry a bold pattern without the room feeling cluttered, provided the walls stay quiet. Limiting pattern to roughly 30–40% of visible surface area is the rule that separates a considered design from an overwhelming one. Limiting pattern to roughly 30–40% of visible surface area is the rule that separates a considered design from an overwhelming one.
Splashbacks and feature walls
A single feature wall in herringbone or a geometric mosaic insert behind a freestanding bath is a low-risk way to introduce pattern. The rest of the room stays plain, so the feature reads as intentional rather than busy.
Slip resistance note: UK building regulations do not specify a mandatory R-rating for domestic bathroom floors, but the Health and Safety Executive and the Tile Association both recommend R10 as a minimum for wet domestic floors. For commercial or care-home bathrooms, R11 or higher applies. Always ask your supplier for the tile’s slip-resistance test data before purchasing.
Cement and encaustic tiles: a sealing caveat. Unglazed cement and encaustic tiles are porous. They must be sealed before grouting and resealed annually in a bathroom environment, or they absorb water, stain, and eventually crack. Glazed porcelain with a printed encaustic pattern avoids this entirely and is lower maintenance in the long run. If you want the genuine article for a period restoration, budget for professional sealing and factor in annual upkeep.
How much does tiling a bathroom cost in the UK, and how long does it take?
Installation cost in the UK depends on three variables: pattern complexity, tile format, and substrate condition. The table below maps each pattern to realistic expectations.
What a typical tiled bathroom install looks like, in order:
- Dry-lay and pattern planning: Tiles laid out without adhesive to confirm centering, edge cuts, and grout line alignment
- Substrate preparation: Walls checked for flatness (large-format tiles need a deviation of no more than 3mm over 2 meters); backer board or tanking applied in wet zones
- Waterproofing: Wet areas tanked with a liquid membrane or sheet system before any tile goes up
- Tiling: Adhesive applied, tiles set, spacers placed; complex patterns require more frequent checks against a reference line
- Grouting: Grout applied after adhesive cures (typically 24 hours minimum); excess cleaned off before it sets
- Sealing and drying: Silicone joints applied at internal corners; cement or encaustic tiles sealed; full cure before the shower or bath is used (usually 48–72 hours)
Large-format tiles (600×1200mm and above) require a notched trowel technique and back-buttering to achieve full adhesive coverage. Mosaic sheets take longer to bed because each sheet must be pressed evenly to avoid individual tiles sitting proud. Both add labour time compared with a standard subway tile install.
Pro Tip: If you love the look of encaustic patterned floors but want to avoid the sealing upkeep, patterned porcelain delivers an almost identical visual result at a fraction of the long-term maintenance cost. The savings on annual sealing products alone justify the switch within two years.
What tile patterns are trending in UK bathrooms right now?
The direction in 2026 is toward restraint with one bold move, rather than pattern everywhere.
Trend highlights:
- Patterned porcelain floors: Geometric and Moroccan-inspired prints on porcelain are the dominant floor trend. They deliver the encaustic look without the upkeep, which matters in the UK’s damp climate.
- Large-format matte porcelain walls: 600×1200mm or 800×1600mm slabs in warm stone tones or soft greige. Minimal grout lines, spa-like atmosphere. Pairs well with a freestanding bath or wall-hung vanity.
- Vertical stacked tiles: Tiles stacked directly above each other (no offset) in a tall format (e.g., 75×300mm or 100×400mm) to add height in low-ceilinged UK bathrooms. A strong choice for en-suite shower enclosures.
- Tone-on-tone hex: Small hexagon tiles in two adjacent tones (sage and cream, charcoal and slate) rather than high-contrast black and white. Reads contemporary and is more forgiving on resale.
- Muted checkerboard: The classic black-and-white checkerboard softened to grey-and-white or terracotta-and-cream. Works in both period and modern homes.
Styling pairings that hold resale value:
Brass fixtures with warm-toned patterned floors (terracotta, sage, warm grey) is the combination appearing most consistently in UK bathroom design in 2026. Chrome fixtures suit cooler palettes: white hex, grey checkerboard, or blue-and-white geometric. Matte black taps work with almost any pattern but read strongest against light, plain walls.
For vanity style: a shaker-style unit suits period patterns (basketweave, checkerboard, pinwheel mosaic); a handle-free floating vanity suits large-format matte porcelain or vertical stack.
When gathering tile samples, request at least a 300×300mm sample rather than the small chips most showrooms hand out. Hold the sample against your wall at the height it will be installed, under the room’s actual lighting, for at least a day before deciding. Tile color shifts dramatically between showroom spotlights and a north-facing UK bathroom window.
Thinking about how your tile choice affects bathroom remodel ROI is worth doing early, especially if you plan to sell within five years. Neutral, well-executed patterns consistently outperform bold or highly personal choices in resale surveys.
When should you hire a professional tiler?
Some tile jobs are genuinely DIY-friendly. A straight-lay subway tile on a flat wall, with no wet-zone waterproofing involved, is one of them. Most bathroom tile projects in the UK are not that simple.
Call a professional when:
- The pattern is herringbone, chevron, parquet-style, or modular stone (accurate cuts and reference lines are non-negotiable)
- The substrate is uneven, damp, or unknown (old plaster, timber floors with flex, or walls that have never been tiled)
- The project involves a wet room or shower enclosure (waterproofing must be continuous and correctly lapped)
- You are changing drainage or pipework as part of the refit
- Tiles are large-format (600×600mm and above), which require back-buttering, a flat substrate, and experience with lippage control
What a quality installer does on a bathroom tiling job:
- Site survey before quoting: checks substrate flatness, moisture levels, and drainage falls
- Pattern dry-lay to confirm centering and edge cuts before adhesive goes down
- Substrate preparation: repairs, backer board, and tanking in wet zones
- Tiling to manufacturer and BS 5385 standards (the British Standard for wall and floor tiling)
- Grouting, silicone joints at internal corners, and sealing where required
- Written sign-off with product specs and care instructions
Jmplumbingservicesltd covers all of this for Cardiff and Vale of Glamorgan homeowners. Their tiling services include full bathroom installations, wet rooms, and standalone tiling jobs. When requesting quotes from any installer, ask for photos of previous tiled bathrooms, written estimates that specify adhesive and grout products, and a clear timeline. References from local jobs are worth more than any website review.
For homeowners in the Vale of Glamorgan, the Llantwit Major service page gives a sense of the regional coverage and project types Jmplumbingservicesltd handles.
How do you clean and maintain different tile patterns?
Maintenance effort varies more by grout quantity and tile material than by pattern name. A herringbone floor in glazed porcelain is easy to clean. The same herringbone in unglazed cement tile is a weekly commitment.
Glazed porcelain (most patterns): Wipe down with a pH-neutral cleaner and a soft cloth. Grout lines are the only maintenance point: a grout sealer applied annually keeps them from absorbing soap scum and mildew. Narrow grout lines (2–3mm) accumulate less residue than wide ones.
Cement and encaustic tiles: Sweep daily to prevent grit scratching the surface. Clean with a stone-safe cleaner only; acidic products (vinegar, lemon-based cleaners) etch the surface permanently. Reseal every 12 months with a penetrating impregnator sealer. In a UK bathroom with variable ventilation, this is a real commitment.
Mosaic and small hexagon tiles: The high grout-line count means more surface area for mildew to colonize in a poorly ventilated bathroom. A squeegee after every shower and a weekly spray with a mildew-inhibiting cleaner keeps them looking sharp. An extractor fan rated for the room volume is not optional with mosaic floors.
Textured and matte tiles: Matte porcelain hides water spots better than polished tiles but traps soap residue in its surface texture. A microfiber mop rather than a sponge mop lifts residue without spreading it. Avoid abrasive scrubbers on matte finishes.
Grout color and long-term maintenance: White grout in a shower is a maintenance trap. Mid-grey or charcoal grout in the same space shows far less staining and needs less frequent deep cleaning. This is one of the most underrated decisions in a bathroom renovation, and it costs nothing extra to get right at the specification stage.
How do you combine multiple tile patterns in one bathroom?
Using two or more patterns in a single bathroom is achievable, but the margin for error is narrow. The rooms that pull it off share one characteristic: a clear hierarchy.
One pattern leads, one pattern supports, and nothing competes. A patterned porcelain floor (the lead) paired with a plain large-format wall tile (the support) is the most reliable combination in UK bathrooms. The floor does the work; the walls give it space to breathe.
Rules that prevent a clash:
- Limit pattern to one plane at a time. Pattern on the floor and pattern on the walls simultaneously works only when the two patterns share a color and differ significantly in scale (e.g., a large geometric floor tile with a small mosaic border at dado height).
- Use scale contrast deliberately. A large-format checkerboard floor (300×300mm tiles) pairs well with a small subway tile wall (75×150mm) because the scale difference prevents the two patterns from fighting.
- Tie them with a shared color. If the floor tile contains terracotta, the wall tile’s grout or body color should echo it. This is the thread that makes two different patterns read as a single design decision rather than two separate ones.
- Keep the transition clean. Where two tile patterns meet (floor to wall, feature wall to plain wall), a thin pencil liner or a deliberate grout joint in a contrasting color marks the boundary intentionally rather than accidentally.
A full bathroom renovation planning guide can help you sequence these decisions before any tiles are ordered, which prevents the common mistake of buying two patterns that look good individually but clash in the room.
What customization options exist within tile patterns?
The pattern is a framework. Within that framework, color, material, finish, and size all shift the result dramatically.
Color mixing within a pattern: Checkerboard does not have to be black and white. Sage and cream, navy and off-white, or charcoal and blush all use the same grid but read entirely differently. The same logic applies to hexagon tiles: a tone-on-tone hex in two shades of the same color reads subtle and contemporary; a high-contrast hex reads graphic and bold.
Mixing materials within a pattern: Combining glazed and unglazed tiles in the same pattern (e.g., alternating matte and gloss in a running bond) adds texture without adding color complexity. Mixing natural stone and porcelain in a modular pattern is possible but requires careful thickness matching to avoid lippage.
Finish choices: Polished porcelain reflects light and makes small rooms feel brighter but shows every water mark. Matte porcelain is more forgiving in daily use. Textured or structured surfaces add grip and visual depth, particularly on floors.
Grout as a design element: Colored grout is an underused customization tool. A terracotta tile with a rust-colored grout reads as one warm surface. The same tile with a white grout reads as a graphic grid. Neither is wrong; they are different rooms. Epoxy grout in a bold color (deep blue, forest green) on a plain white tile is a low-cost way to add character to an otherwise simple pattern.
Size variation within a pattern: Hexagon tiles range from 25mm mosaics to 300mm statement tiles. The pattern name stays the same; the room effect is completely different. A 25mm hex on a shower floor reads traditional and textured. A 200mm hex on a bathroom floor reads modern and bold. Sampling at the actual size you intend to install is the only reliable way to judge the result.
Where do popular bathroom tile patterns come from?
Understanding a pattern’s origins helps you use it with more confidence and avoid anachronistic combinations.
Running bond / brick: Derived directly from brickwork, where the offset joint distributes structural load. Roman builders used it in opus testaceum (fired brick construction). In bathrooms, it became standard in the early 20th century when ceramic subway tiles were introduced in New York’s underground stations in 1904. The name “subway tile” stuck, and the 3×6-inch format became the default residential bathroom tile for most of the 20th century.
Herringbone: Named for the skeleton of a herring fish, this pattern appears in Roman roads (via strata) laid in herringbone brick to distribute load. It entered decorative tile use during the Renaissance and became a staple of Victorian and Edwardian floor tiling in Britain. Many original herringbone tile floors survive in period UK homes, which is why the pattern reads as both historic and contemporary.
Checkerboard: Black-and-white checkerboard floors appear in medieval European churches and civic buildings. In domestic bathrooms, the pattern became popular in the late Victorian period alongside encaustic tile manufacturing in the UK, particularly from Staffordshire potteries. Minton and Maw & Co. were among the major British producers whose geometric floor tiles still appear in period restorations today.
Hexagon: The honeycomb geometry appears in nature and was adopted in decorative tile as early as ancient Rome. In British bathrooms, small white hexagon mosaic tiles became the standard floor treatment in Edwardian terraced houses, and many survive under later floor coverings. The pattern’s current revival in UK bathrooms is partly a period-restoration trend and partly a contemporary reinterpretation in larger formats and bolder colors.
Basketweave: A Victorian and Edwardian staple, particularly in entrance halls and bathroom floors of terraced houses built between 1880 and 1914. The pattern mimics woven reed or cane and was typically executed in white and black or white and grey marble chips. It remains a period-accurate choice for restoration projects and a charming anachronism in modern bathrooms.
Which tile patterns work best in small bathrooms?
Small UK bathrooms, typically under 5 square meters, punish busy patterns and reward visual simplicity. The goal is to reduce the number of lines the eye has to process.
Large-format tiles create fewer grout lines and make a small bathroom read significantly larger. A 300×600mm tile on the floor and the same tile continued up the shower wall, combined with a frameless glass screen, removes the visual interruptions that make a small room feel smaller. Running the same tile across floor and wall without a border is one of the most effective tricks available.
Vertical orientation adds height. A 75×300mm tile stacked vertically (no offset) draws the eye upward and makes a low ceiling feel higher. This works on shower walls and the main wall behind a basin.
Diagonal layouts widen a narrow room. A square tile rotated 45 degrees on the floor of a narrow bathroom creates diagonal lines that the eye reads as wider than the room actually is. The trade-off is more perimeter cuts and slightly higher waste.
Avoid busy patterns on every surface. A patterned floor in a small bathroom works well. A patterned floor plus a patterned feature wall in the same small room usually does not. Design restraint — one patterned surface, everything else quiet — is the most reliable approach for rooms under 5 square meters.
Grout color is critical in small rooms. Matching grout to tile color makes the floor or wall read as one continuous surface. A contrasting grout in a small room emphasizes every tile edge and makes the space feel more divided. This is the single cheapest decision that has the biggest visual impact in a small bathroom.
For Cardiff homeowners weighing up bathroom flooring options alongside tile patterns, the choice between large-format porcelain and LVT often comes down to underfloor heating compatibility and subfloor condition.
The patterns most homeowners get wrong, and the two fixes that cost nothing
The two mistakes that show up most consistently in UK bathroom renovations are choosing a tile that looks right in the showroom but wrong at scale in the room, and picking white grout because it seems safe.
On scale: a 100×100mm checkerboard tile that looks charming on a display board reads chaotic on a 4-square-meter floor. The fix is a dry-lay before any adhesive is mixed. Lay the tiles out on the actual floor, step back, and photograph it. That photograph will tell you more than an hour in a showroom.
On grout: white grout in a shower enclosure is the most common source of post-renovation regret in UK bathrooms. It stains within months in a poorly ventilated space, and no amount of cleaning fully restores it. A mid-grey or charcoal grout in the same shower costs the same and looks better for longer. The UK’s damp climate and variable ventilation make this a local consideration that matters more here than in drier climates.
One more thing worth saying: the patterns that hold their value in UK resale are the ones that read as considered rather than trendy. A well-executed running bond in a quality tile will outlast a fashionable geometric pattern that dates in three years. If you are renovating to sell within five years, lean toward the timeless end of the catalogue.
Tiling and bathroom installation in Cardiff and the Vale of Glamorgan
Choosing the right pattern is the first decision. Getting it installed correctly is the one that determines whether it looks as good in ten years as it does on day one.

Jmplumbingservicesltd handles the full process for homeowners across Cardiff and the Vale of Glamorgan: site survey, substrate preparation, waterproofing, tiling, grouting, and final sign-off. Whether the job is a herringbone feature wall, a wet room with a mosaic shower floor, or a full bathroom renovation with patterned porcelain throughout, the team brings the same attention to substrate flatness, pattern centering, and grout finish that separates a professional result from a DIY one.
Services include full bathroom installation, wet room installation, standalone tiling, waterproofing, and plumbing. To get a written estimate and see photos of previous Cardiff and Vale of Glamorgan projects, request a quote or visit the main installation page to start the conversation.
Sources
- Bathroom Tile Layout Ideas: 10 Patterns Compared (UK Guide 2026) | Bowmans
- How to Choose Bathroom Tile Layout: A Step-by-Step Guide
- How to Make a Small Bathroom Look Bigger | Stones Design