
Cardiff Homeowners: Tile Over Bathroom Tiles Only If Surface Is Within 3 mm
A trade checklist for Cardiff homeowners: learn the 3 mm flatness and 18–22 kg/m2 weight limits, simple DIY checks, and when to call a pro.
Cardiff Homeowners: Tile Over Bathroom Tiles Only If Surface Is Within 3 mm
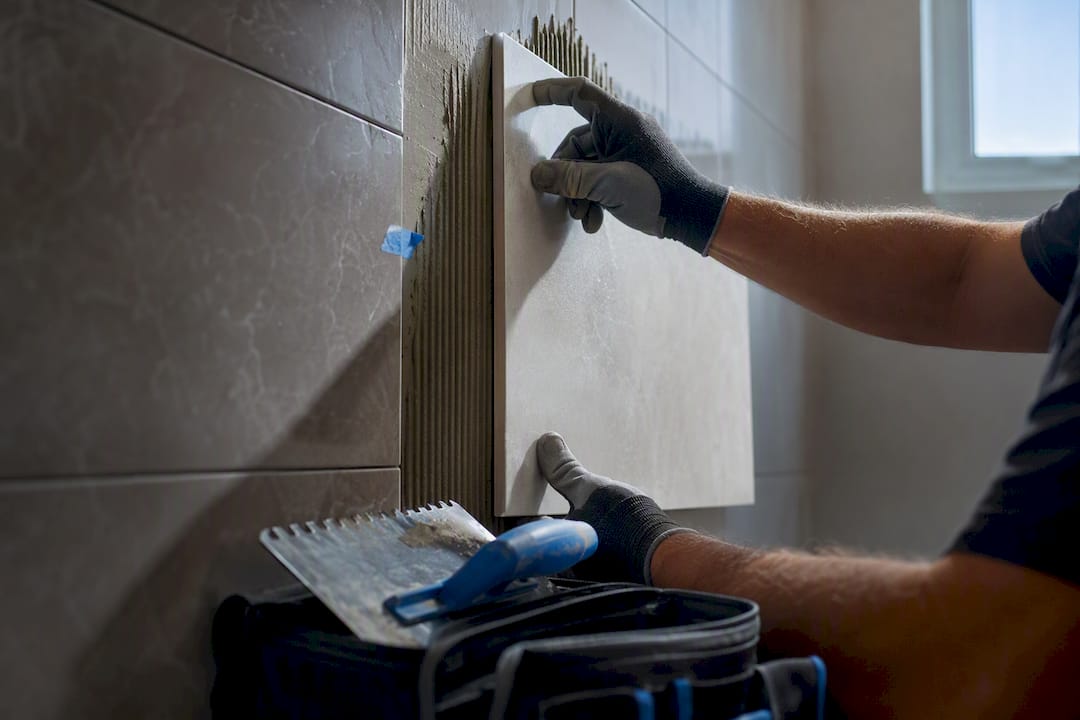
Yes, tiling over existing bathroom tiles usually works, but only when the old tiles are fully bonded, dry, and flat within tight tolerances. The two biggest deal-breakers are hollow, drummy tiles and any wall or floor where you can’t confirm the waterproofing behind it is sound. Check both before you buy a single new tile, using the assessment steps below.
TL;DR:
- Tiling over existing tiles is only safe on dry, flat, and well-bonded surfaces in non-wet areas like powder rooms or dry walls, avoiding hollow or cracked tiles.
- Avoid tiling over tiles in wet zones such as showers or wet rooms when waterproofing is compromised or if structural issues like cracks or moisture signs are present.
- Conduct quick checks including tap testing, flatness measurement, moisture inspection, and weight calculation to determine if the surface is suitable for overlaying.
- Proper surface preparation, including abrasion and primer application, is essential for a successful tile-on-tile bond that lasts.
- When in doubt, especially with moisture or structural concerns, professional inspection and possibly full removal are the safest options for long-term durability.
Table of Contents
- Can Tiling Over Tiles in a Bathroom Ever Make Sense?
- When Should You Avoid Tiling Over Existing Tiles?
- How Do You Check If a Tiled Surface Is Safe to Tile Over?
- What Materials and Tools Do You Need for Tile-on-Tile?
- How Do You Prepare and Install Tiles Over Old Tiles?
- Can You Tile Over Tiles in a Shower or on a Bathroom Floor?
- What Are the Most Common Mistakes When Tiling Over Tiles?
- When to Call a Professional for Tiling Over Tiles
- Bond, Moisture, and Flatness Decide the Outcome
- A Trade View on Overlaying vs. Stripping Back
- Get a Straight Answer From a Cardiff Bathroom Specialist
- Sources
- FAQ
Can Tiling Over Tiles in a Bathroom Ever Make Sense?
Tiling over old tiles works best on dry, non-wet walls and on solid concrete floors that are already flat and structurally sound. Think powder room walls, a dry-side bathroom wall away from the shower, or a downstairs cloakroom floor. Skip demolition here and you skip most of the mess that comes with it.
The upside is real: less demolition dust, far less waste going to a skip, and a shorter time without a working bathroom. A weekend project instead of a two-week gut job matters when you’ve only got one bathroom in the house.
But the benefit has limits worth weighing before you commit:
- Each new layer raises the finished height, which can crowd doors, thresholds, and shower trays.
- Cabinets, toilets, and vanity units may need to be reset or re-plumbed to sit flush again.
- You inherit whatever is hiding under the old tiles, good or bad.
If the room is dry and the old surface checks out, tiling over old bathroom tiles is a legitimate shortcut, not a corner-cut.
When Should You Avoid Tiling Over Existing Tiles?
Wet areas are where this approach gets risky fast. Shower enclosures and wet rooms depend on waterproofing (tanking) sitting directly against a sound substrate, and covering that layer with more tile doesn’t fix a compromised membrane. It just hides it while water keeps finding its way behind the wall. Since tile and grout aren’t waterproof on their own, any doubt about what’s behind the existing tiles is a reason to strip back rather than build up.
Walk away from tiling over the top when you see any of the following:
- Drummy or hollow-sounding tiles, especially in clusters rather than one stray tile.
- Visible cracks in tiles or grout lines that run in a pattern, suggesting movement.
- Staining, dark grout, soft skirting, or a musty smell pointing to trapped moisture.
- Structural sag, bouncy floors, or a room already close to its height or weight limits.
None of these are cosmetic problems. They’re substrate problems, and a new tile layer just buries the evidence.
How Do You Check If a Tiled Surface Is Safe to Tile Over?
Run these checks before you buy materials. They take under an hour for an average bathroom and will tell you almost everything you need to know.
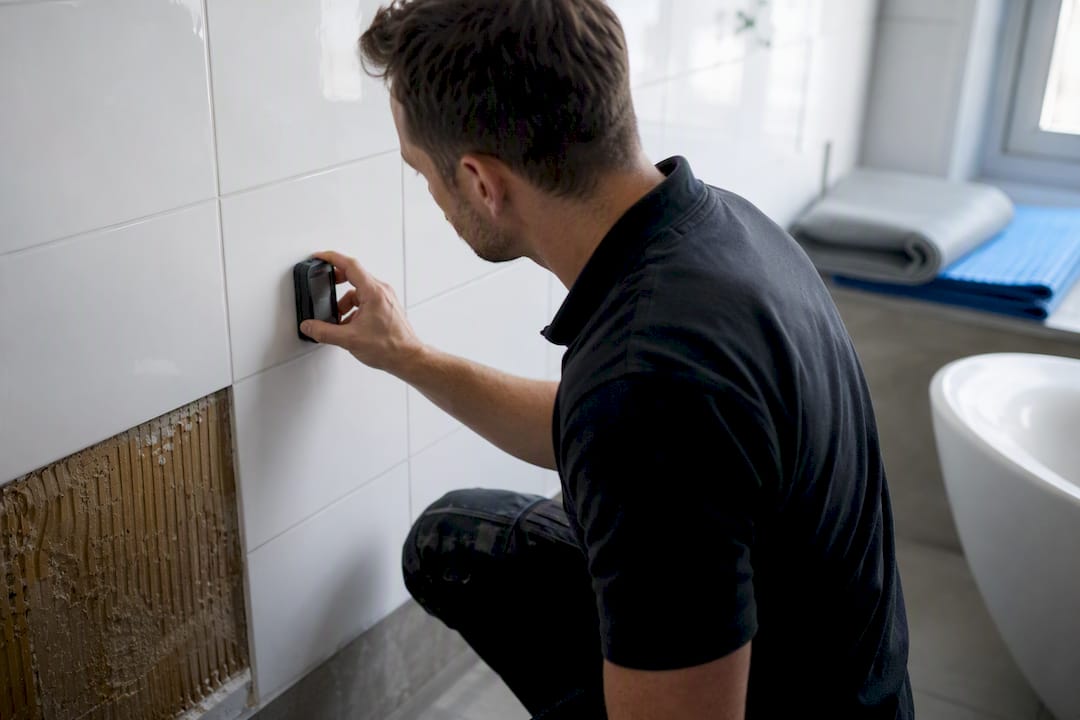
- Tap test every tile. Knock each one with a coin or the handle of a screwdriver. A sharp, solid sound means good bond. A dull, hollow thud means the tile has debonded from the substrate underneath.
- Check flatness with a straightedge. Lay a 2-meter level or straight batten across the surface. Industry guidance treats a maximum of ±3 mm of deviation over that 2-meter span as the practical cutoff. More than that, and your new tiles will sit unevenly or crack at high points.
- Look for moisture signs. Staining, blistered paint nearby, mold at grout lines, or a soft feel to adjacent skirting boards all point to damp. A basic moisture meter, borrowed or bought for under £30, gives you a hard reading instead of a guess.
- Work out the added weight. A second tile layer typically adds somewhere in the range of 18 to 22 kilograms per square meter, sometimes more with a thick adhesive bed. On timber floors, that load matters. On a suspended floor with any bounce, get a professional to check joist condition first.
- Measure the height build-up. Add up old tile, new adhesive, new tile, and grout, then check it against door swing, shower tray lips, and drainage falls toward wastes.
Pro Tip: Do the tap test in a grid pattern, not just randomly. Hollow tiles often cluster near a corner or under a window where the original installer rushed the adhesive bed, so one bad patch can tell you the whole wall needs a closer look.
What Materials and Tools Do You Need for Tile-on-Tile?
The right prep and adhesive matter more here than in a standard install, because you’re bonding tile to tile, not tile to a fresh, absorbent substrate. Mechanical abrasion of the glazed surface, paired with the correct adhesive, is what separates a lasting job from one that fails within a year.
You’ll want:
- An angle grinder with a diamond cup wheel, or coarse sanding pads, to key the glazed surface. Safety glasses, a dust mask, and gloves are non-negotiable here.
- A tile-to-tile bonding primer, applied after abrasion, which gives the new adhesive something to grip.
- A flexible, deformation-tolerant tile adhesive rated for tile-on-tile use, not a standard cement-based mix.
- Grout, movement-joint sealant, edge trims, and, for any wet-adjacent floor, a waterproof membrane suited to that zone.
Full adhesive coverage matters more than the tile choice itself on a second layer.
How Do You Prepare and Install Tiles Over Old Tiles?
- Inspect and remove problem tiles. Any tile that failed the tap test comes out, along with loose grout. Patch those spots level with a suitable filler before moving on.
- Clean and degrease the surface. Soap scum, silicone residue, and limescale all block adhesion. Wash with a degreasing cleaner, rinse, and let the surface dry fully, ideally overnight.
- Abrade the glaze. Rough up every tile you’re bonding to, not just the damaged ones. A smooth glazed finish is the single biggest cause of later adhesive failure.
- Apply a bonding primer where the adhesive manufacturer calls for one, especially over any glossy or heavily glazed tile.
- Spread adhesive with full contact. Use a notched trowel sized for your tile format, and back-butter large-format tiles as well as combing the surface, so you avoid voids under the tile. Bedding voids are a leading cause of cracked grout and loose tiles later on, particularly with large-format tiles, so don’t rush this step.
- Set, level, and grout. Use tile spacers, check with a level as you go, and leave movement joints where the new surface meets a different material or a corner.
- Let it cure fully before using the room. Check the adhesive and grout manufacturer’s cure times. Rushing this step is how newly set tiles crack under first use.
- Do a final check. Tap a few new tiles to confirm solid adhesion, check door and threshold clearance, and confirm floor tiles still fall correctly toward any drain.
Pro Tip: If you’re overlaying a floor near a shower tray or bath, dry-fit a spare tile with spacers before committing adhesive to the wall. It only takes five minutes and it’s the cheapest insurance against discovering a clearance problem after the grout has gone off.
Can You Tile Over Tiles in a Shower or on a Bathroom Floor?
Shower walls and wet rooms are where this method usually breaks down. Tanking has to bond directly to a sound substrate, and overlaying old tiles means your waterproof membrane sits underneath two tile layers instead of one, which is rarely how it was designed to perform. Builders generally recommend a full strip-out in any wet zone where the state of the substrate or the tanking can’t be confirmed, and it’s the one place where “just tile over it” causes the most expensive repairs down the line.
A few room-specific rules worth knowing:
- Floors need a deflection and load check, especially timber floors with a suspended structure. Concrete slabs handle the extra weight more comfortably.
- Underfloor heating changes everything. Confirm the system is compatible with an added layer, and use adhesives designed to accommodate the thermal movement.
- If you want a lower-risk, grout-free finish for a shower wall, large-format shower panels can install over some existing surfaces and remove grout lines entirely, which is worth weighing against a full re-tile.
What Are the Most Common Mistakes When Tiling Over Tiles?
Most tile-on-tile failures trace back to the same handful of shortcuts. Skipping mechanical abrasion or reaching for a standard adhesive instead of a flexible, tile-rated one is the most common. Standard adhesives don’t accommodate the slight movement between two rigid tile layers, and that’s usually where cracking starts.
Watch for these as well:
- Tiling straight over a wall with damp staining or a wall that’s already moved, just because it “looks fine” from a distance.
- Leaving voids under large-format tiles by combing adhesive onto the wall alone instead of back-buttering the tile too.
- Forgetting movement joints at corners, changes of plane, and junctions with other materials.
- Ignoring the extra height until the shower door won’t close or the threshold trips people up.
Tiling over tiles saves labor and mess, but it isn’t a repair. Cracked tiles, loose grout, and damp problems don’t disappear under a new layer. They just wait.
When to Call a Professional for Tiling Over Tiles
Bring in a professional when you find large drummy patches, any sign of failed waterproofing, soft or moldy wall linings, or a floor with a noticeable slope or bounce. A qualified tradesperson can run proper moisture tests, repair the substrate, install compliant tanking, and handle structural remediation before a full re-tile if that’s what the wall or floor needs.
Pro Tip: A five-minute site visit from an experienced tiler often costs less than the tile and adhesive you’d waste finding out the hard way that a wall needs stripping back.
Bond, Moisture, and Flatness Decide the Outcome
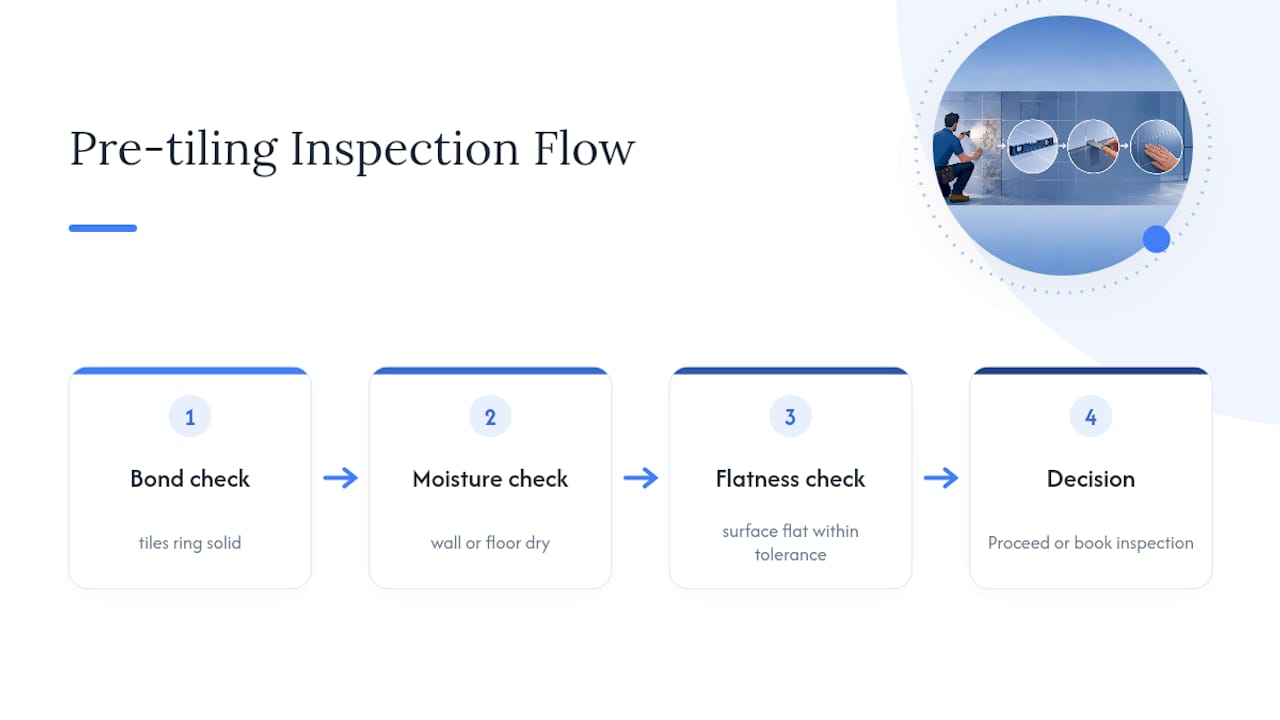
Run the bond, moisture, and flatness checks before you buy anything. If the tiles ring solid, the wall or floor is dry, and the surface sits flat within tolerance, proceed. If any red flag shows up, book a professional inspection before you tile.
A Trade View on Overlaying vs. Stripping Back
Overlaying earns its place on dry walls and sound concrete floors where the tap test and straightedge both come back clean. That’s a genuine time and cost saving, not a compromise. But the moment moisture, cracked substrate, or unverifiable tanking enters the picture, stripping back is the only option that holds up long term. Overlay the good surfaces. Strip the doubtful ones. There’s no middle ground worth trusting.
— James
Get a Straight Answer From a Cardiff Bathroom Specialist
Not sure if your bathroom tiles pass the tap test, or worried about what’s behind that shower wall? Jmplumbingservicesltd is the alternative to guessing your way through a DIY overlay in Cardiff and the Vale of Glamorgan: a proper on-site inspection tells you in minutes whether tiling over is safe or whether the wall needs to come back to brick.

Contact the team for an assessment covering moisture, bond strength, and compliant tanking where wet areas are involved. If the news is bad, the same visit turns into a written quote for a full strip-and-renovate or a fresh tile installation, scheduled around your household. Reach out through the bathroom installation and renovation page to book an inspection and get a clear answer instead of a guess.
Sources
- Can You Tile Over Tile? Rules, Limits, Risks, and Best Practice Explained
- Shower panels vs tiles: expert advice (Checkatrade)
- Can you tile over tiles? What are the pros and cons | Homebuilding
- Is tiling over tile a good idea? (Apollo Tile blog)
FAQ
What Are the Disadvantages of Tiling Over Existing Tiles?
You add finished height that can crowd doors and thresholds, extra weight the structure needs to support, and you risk sealing in any existing damp or cracked substrate rather than fixing it.
Is It Better to Remove Tile or Tile Over It?
If the old tiles are sound, dry, and flat, tiling over is fine and saves time; if there’s any doubt about moisture, bonding, or structural condition, removal is the safer long-term choice.
Do I Need to Prime Tiles Before Tiling Over Them?
Yes, in most cases. Mechanically abrading the glazed surface and applying a tile-to-tile bonding primer significantly improves adhesion for the new layer.
How Can I Cover Bathroom Tiles Without Removing Them?
Tiling directly over sound, flat tiles with a flexible adhesive is one option; large-format shower panels are another route that skips grout lines entirely on wet walls. For anything uncertain, a professional inspection settles which approach fits your bathroom.