
How to Replace a Bathroom Subfloor: DIY Step-by-Step
Learn how to replace a bathroom subfloor yourself with our step-by-step guide, ensuring a strong and safe foundation for your space.
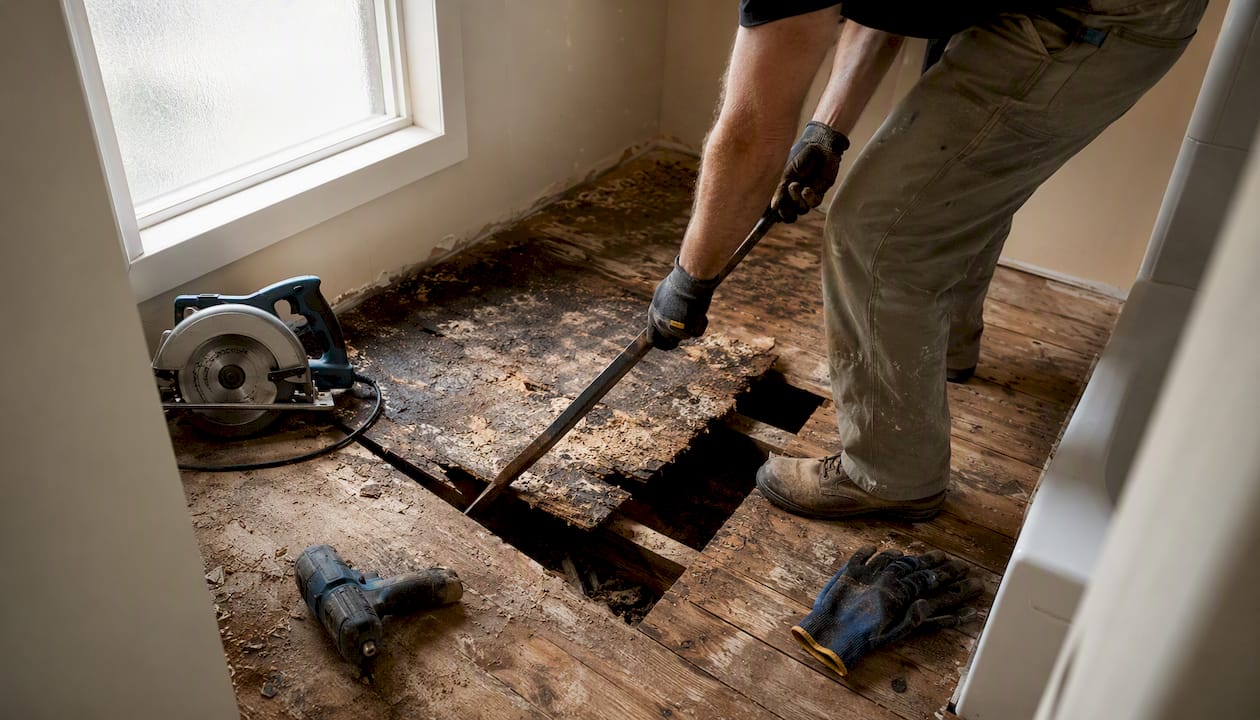
Yes, most homeowners can replace a bathroom subfloor themselves when damage is localized, the joists are sound, and the rot covers less than about 4 square feet. If the wood is soft when you probe it with a screwdriver, you see visible mold, or the joists themselves have started to decay, you are looking at a job that either requires full replacement or a professional.
Three factors settle the decision fast:
- Area of damage. Soft, delaminated plywood over a rough threshold area usually means full replacement rather than a patch.
- Joist condition. A screwdriver that sinks into a joist with light pressure signals structural rot. That changes the scope entirely.
- Mold presence. Visible mold beyond a small, isolated spot means the contamination has likely spread further than you can see.
For most localized bathroom floor water damage, the repair sequence is: diagnose, isolate the moisture source, cut out the damaged panel, sister or block the joists if needed, and install new 3/4-inch CDX plywood with a glue-and-screw fastening pattern. The sections below walk through every step.
Pro Tip: Before touching a single floorboard, photograph every inch of the damage. Insurance companies and building-control officers both want documentation, and photos protect you if the scope grows once the floor is open.
Key Takeaways
Replacing a bathroom subfloor is a viable DIY job for localized damage with sound joists, but joist rot, widespread mold, or an unidentified moisture source all require professional intervention before new material goes down.
| Point | Details |
|---|---|
| Patch vs. full replacement | Replace fully when plywood is soft, delaminating, or damage covers more than about 4 square feet. |
| Material standard | Use 3/4-inch CDX or Exposure-1 plywood for bathrooms; it outperforms OSB in wet environments. |
| Fastening method | Apply construction adhesive plus screws every 6 inches at edges and every 8–10 inches in the field. |
| Mold urgency | Mold can develop within 24–48 hours of a water intrusion; act fast and call a pro if it has spread. |
| Jmplumbingservicesltd | Offers onsite subfloor assessments, joist sistering, tanking, and full bathroom renovation across Cardiff and the Vale of Glamorgan. |
Table of Contents
- How do you know if the bathroom subfloor needs full replacement?
- What tools and materials do you need before starting?
- Step-by-step: how to remove fixtures and cut out the damaged subfloor
- Step-by-step: inspect joists, install blocking, and fit the new subfloor
- What waterproofing does a bathroom subfloor need?
- How long does it take and what does it cost in the UK?
- Red flags: when does this become a professional job?
- How do you prevent subfloor damage from happening again?
- How Jmplumbingservicesltd handles subfloor replacements in Cardiff
- The honest case for hiring versus doing it yourself
- Jmplumbingservicesltd: get a professional subfloor assessment in Cardiff
- Sources
How do you know if the bathroom subfloor needs full replacement?
TAPI’s diagnostic guide identifies four primary warning signs: a persistent musty smell, separating or bubbling floor coverings, spongy areas underfoot, and fixtures that rock or shift. Any one of these warrants investigation. Two or more together almost always means the plywood has lost structural integrity.
Visual signs:
- Dark staining or discoloration on the subfloor surface
- Delamination (layers of plywood separating and lifting)
- Bubbling, lifting, or separating vinyl or tile
- Water marks on the ceiling below (if applicable)
Tactile and smell signs:
- Spongy or soft feel when you walk across the floor
- A screwdriver penetrates the wood with light hand pressure
- Persistent musty or damp odor even after ventilating the room
Fixture movement:
- A toilet that rocks side to side
- Tiles that flex or crack along grout lines (“telegraphing”)
- A bath panel that shifts when you press it
Pro Tip: Use a moisture meter before you commit to a repair scope. Find and fix the source first.
Oakwood Remodel’s decision framework is clear: patch when the damaged area is small and the wood is still firm; replace fully when the plywood is soft, delaminating, or damage covers more than about 4 square feet. If you are unsure, probe a 12-inch grid across the suspect area with a screwdriver and mark every soft spot. That map tells you whether you are dealing with a patch or a full sheet replacement.
What tools and materials do you need before starting?
Safety first
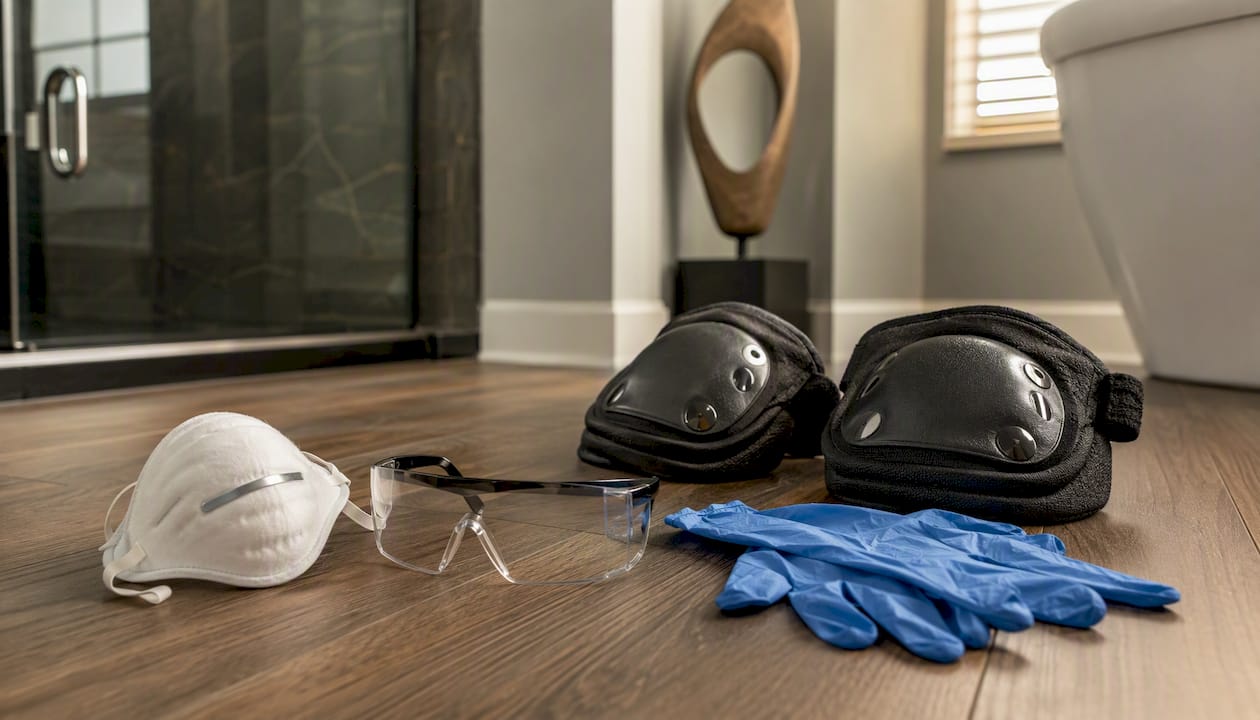
Wear an N95 respirator or FFP2 dust mask whenever mold is suspected. Add safety glasses, nitrile gloves, and knee pads for floor work. Turn off the relevant circuit breakers before cutting, and use a cable and pipe detector across the floor before the saw goes anywhere near it. Open windows and run the exhaust fan throughout.
For UK homeowners: structural joist repairs and certain waste disposal routes (particularly for mold-contaminated material) may require notification to your local building control authority. Check with your local council before starting if you plan to sister or replace a joist.
Tools checklist
- Circular saw (blade depth set to subfloor thickness only)
- Oscillating multi-tool with a plunge-cut blade
- Pry bar and hammer
- Impact driver and drill bits
- Stud finder or nail-pattern inspection to locate joists
- Moisture meter
- Tape measure, pencil, and speed square
- Shop vacuum
- Cardboard for templating complex shapes
Materials checklist
- 3/4-inch (23/32" nominal) CDX or Exposure-1 plywood. This is the industry standard for bathroom subfloors. RapidRepair’s installation guide recommends CDX/Exposure-1 specifically because it tolerates occasional moisture without the severe edge swelling that OSB suffers. For joists at 16 inches on center, 3/4-inch thickness is the correct choice.
- Subfloor construction adhesive (PL Premium or equivalent, widely available at UK builders’ merchants)
- Corrosion-resistant decking screws (stainless or hot-dip galvanized), 2.5-inch minimum
- Blocking timber (matching joist depth, typically 47x150mm C16 or C24 in the UK)
- Joist hanger hardware if sistering
- Waterproof membrane or tanking kit (liquid-applied or sheet, see Section 6)
- Silicone sealant (sanitary grade)
Pro Tip: CDX plywood is labeled by its face veneer grades (C on one side, D on the other) and its glue type (X = exterior, waterproof glue). OSB uses waterproof binders too, but its edges absorb water far more readily than plywood’s cross-laminated core. In a bathroom, that edge behavior matters.
Step-by-step: how to remove fixtures and cut out the damaged subfloor
Removal sequence
- Shut off the water supply to the bathroom at the isolation valve or stopcock. Flush the toilet to empty the cistern.
- Photograph everything before touching a fixture. Document the damage extent, pipe runs, and any visible mold.
- Remove finish flooring. Pry up vinyl or tiles carefully. Score grout lines first with an oscillating tool to avoid cracking tiles you want to reuse.
- Expose the full damage area. Once the finish layer is off, probe the subfloor systematically to map the soft zone.
Fixture handling
For a toilet: disconnect the supply line, remove the two floor bolts, and lift the toilet straight up. Stuff a rag into the soil pipe to block sewer gas. For a pedestal basin, disconnect the trap and supply lines, then lift free.
For a bathtub, removal is rarely necessary when rot is localized. Fix It In The Home’s technique uses an oscillating multi-tool to make flush cuts right up to the tub apron, then installs blocking and a patch panel without disturbing the tub at all. This saves several hours of heavy lifting and avoids the risk of cracking a cast-iron or acrylic tub during removal.
Cutting out the damaged panel
- Locate joist centerlines. Look for the nail pattern in the old subfloor or use a stud finder. Mark the centers clearly with a pencil line.
- Set circular saw depth to exactly the subfloor thickness, typically 18–19mm for 3/4-inch plywood. Going deeper risks cutting joists or concealed pipework.
- Cut to joist centers so the new panel has solid bearing on each side. Make a clean rectangular cut wherever possible.
- Use the oscillating tool for cuts close to walls, tubs, or toilet flanges where the circular saw cannot reach safely.
- Remove in sections using the pry bar. Work carefully to avoid splintering the joist faces.
Safety warnings:
- Run a cable and pipe detector across every cut line before the saw touches the floor.
- Wear your respirator throughout if any mold is visible. Bag contaminated material immediately in heavy-duty polythene sacks and seal them.
- Dispose of mold-contaminated timber at a licensed waste facility. Do not put it in general household waste.
Step-by-step: inspect joists, install blocking, and fit the new subfloor
Joist inspection and repair
Once the damaged panel is out, probe every exposed joist with a screwdriver. Sound timber resists penetration. Soft or crumbling wood means rot has set in.
- Sister a joist when the damage is localized to one section: bolt or screw a new full-length joist alongside the damaged one, bearing on the same plates. Use structural screws at 300mm intervals and construction adhesive on the mating face.
- Replace a joist only when sistering is not feasible (severe rot along the full length). This requires temporary shoring of the floor above and is generally a job for a professional or an experienced builder.
Blocking and ledger placement
Where a new panel edge falls between joists (not on a joist centerline), install blocking: short lengths of matching timber nailed or screwed between the joists to give the panel edge solid bearing. Place blocking at every seam location. Flush the top face of the blocking with the top face of the joists. Vacuum the joist bays thoroughly before fitting new material; debris under a panel creates high spots that telegraph through finished flooring.
Cutting and fitting new plywood
- Measure the opening carefully. For irregular shapes around pipes or flanges, make a cardboard template first.
- Cut the replacement panel approximately 1/8 inch smaller than the opening on all sides. That small gap allows for humidity-driven expansion and prevents buckling later.
- Orient the plywood so its strength axis (the direction of the face grain) runs perpendicular to the joists.
- Test-fit without adhesive first. The panel should drop in cleanly with the small expansion gap visible all around.
Fastening pattern
Apply a continuous bead of subfloor construction adhesive along every joist and blocking face that will contact the new panel. Set the panel in place immediately. Then:
- Drive screws every 6 inches along all edges into joists or blocking.
- Drive screws every 8–10 inches across the field of the panel into each joist below.
- Stagger panel joints so no two seams align. Offset new panels by at least half a sheet from any existing seams.
The glue-and-screw method creates what installers call a monolithic bond: the panel and the joists act as a single unit, eliminating the floor bounce that cracks tile grout over time. RapidRepair’s guide documents this as the industry-preferred fastening approach for exactly that reason.
What waterproofing does a bathroom subfloor need?
Plywood is structural, not waterproof. Every bathroom subfloor repair needs a waterproofing layer between the structural deck and the finish material.
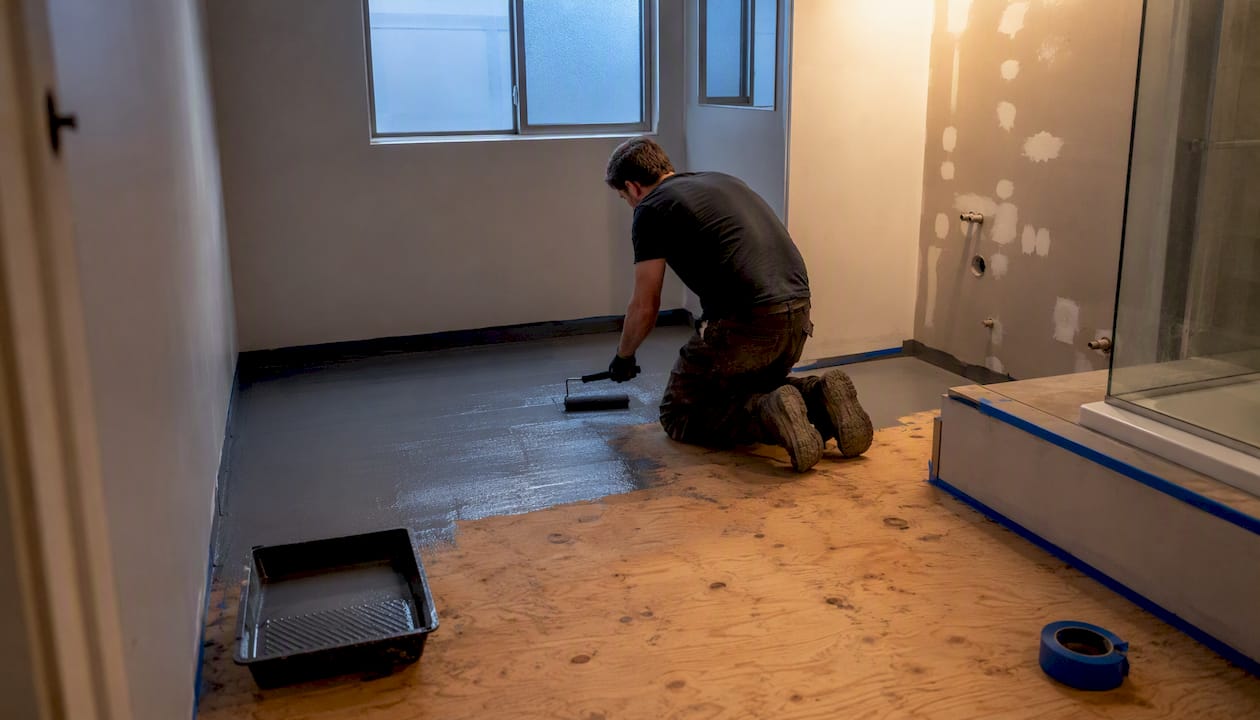
Liquid-applied membranes (paint-on tanking slurry or flexible waterproof coating such as BAL Waterproofing Membrane or Mapei Mapelastic) are the most practical choice for UK bathrooms. Apply two coats, extending at least 50mm (2 inches) up all walls to create the “tub effect” that stops water tracking down behind the finish. These products are widely available at UK tile and builders’ merchants and are compatible with most tile adhesives.
Sheet membranes (such as Schluter Kerdi or similar uncoupling membranes) offer excellent performance under tile but add cost and require careful seam taping. They are worth specifying for wet rooms or large walk-in showers.
Sealing penetrations:
- Toilet flange: use a foam gasket or silicone bead around the base of the flange collar before reinstating the toilet.
- Pipe boots and supply connections: apply sanitary silicone around every pipe penetration through the subfloor.
- Expansion gaps at the perimeter: fill with flexible silicone, not grout or rigid filler.
Substrate prep for different finishes:
For tile: if the plywood surface has any flex, lay 6mm or 12mm cement backer board (such as Hardiebacker or Wedi) over the membrane before tiling. This eliminates movement that cracks grout. For LVT or vinyl flooring, the plywood surface must be flat to within 3mm over 1.8 meters. Use a floor-leveling compound to fill screw heads and any low spots before laying the finish.
When planning the full finish, moisture-resistant door choices are worth considering at the same time, since a newly waterproofed bathroom floor is only as protected as the rest of the room’s moisture management.
Pro Tip: Prime the plywood surface with a diluted PVA or the membrane manufacturer’s primer before applying liquid tanking. It dramatically improves adhesion and reduces the risk of pinholes in the membrane.
How long does it take and what does it cost in the UK?
Typical DIY timeline
A small patch (one damaged section, sound joists, no fixture removal): half a day to a full day, including drying time for adhesive.
A full small-bathroom subfloor replacement with joist sistering and waterproofing: 2–3 days, allowing for adhesive cure and membrane drying between stages.
Rough UK cost ranges (2026)
Prices vary by region; Cardiff and the Vale of Glamorgan sit broadly in line with the Welsh average.
Insurance note: If the damage follows a sudden insured event (a burst pipe, for example), document everything with photos before any repair work begins. Many homeowners combine insurance mitigation funds with a broader bathroom upgrade at the same time, since the floor is already open. MrRemodel’s water damage guide recommends treating any water event as urgent: mold can begin to develop within 24–48 hours of an intrusion, which compresses the window for DIY mitigation significantly.
Red flags: when does this become a professional job?
Stop work and call a professional if you encounter any of the following:
- Joist rot. A screwdriver sinks into a joist with light pressure. Structural shoring and joist replacement are beyond standard DIY scope.
- Mold beyond a small, isolated patch. SERVPRO’s guidance is explicit: when water has reached subfloors, wall cavities, or areas behind tiles, professional drying and mitigation is generally required because mold spreads rapidly and the wood may be structurally compromised.
- Damage covering more than 4 square feet or spanning multiple areas. This usually indicates a long-running leak, not a single event, and the source may still be active.
- Exposed electrical wiring or junction boxes in the floor cavity. Do not proceed until a qualified electrician has assessed and isolated the circuit.
- Sagging or visible deflection in the floor when you walk across it. This signals joist failure, not just panel damage.
- Sewage contamination. If the damage involves a soil pipe failure, the area is a biohazard. Professional remediation is required before any structural repair.
- You cannot identify the moisture source. Installing a new subfloor over an active leak is money wasted. If you cannot find and fix the source, a professional assessment is the right next step.
If a bathroom leak is the underlying cause and you cannot trace it, get a plumber in before the floor goes back down.
How do you prevent subfloor damage from happening again?
The most common cause of repeat subfloor failure is reinstating a new floor without fixing the original moisture source. Resolve that first, then build in these habits:
Routine maintenance:
- Inspect grout and silicone seals around the bath, shower tray, and toilet base every 12 months. Cracked or missing silicone is the most common entry point for slow leaks.
- Replace the toilet wax ring (or modern foam gasket equivalent) every 10–15 years or whenever the toilet is removed.
- Test the exhaust fan monthly. A fan that takes more than a few seconds to clear steam after a shower is not moving enough air.
- Check under the basin and behind the toilet cistern for slow drips every six months. A dripping tap or weeping supply fitting can saturate a subfloor over months without being obvious.
Upgrades worth doing at installation time:
- Apply liquid waterproofing membrane across the full subfloor surface, not just the wet zone. The marginal cost is small; the protection is significant.
- Fit a high-CFM extractor fan (at least 15 litres per second for a standard UK bathroom) with a humidity sensor so it runs automatically after showers.
- Use quality foam gasket flange seals rather than old-style wax rings when reinstating the toilet.
- Consider a leaking shower tray check as part of any post-repair inspection if a shower sits on or near the repaired area.
How Jmplumbingservicesltd handles subfloor replacements in Cardiff
When a Cardiff homeowner calls Jmplumbingservicesltd about a soft or damaged bathroom floor, the process starts with an onsite assessment rather than a quote over the phone. The team photographs the damage, probes the subfloor and joists, and maps the full extent before recommending a repair scope.
What that assessment typically covers: moisture readings across the affected area, joist condition check, identification of the moisture source, and a written damage report with photos. The homeowner gets a clear picture of whether a patch, a full subfloor replacement, or a broader renovation is the right call before any work begins.
Jmplumbingservicesltd’s capabilities for this type of job include:
- Subfloor removal and replacement (patch or full sheet)
- Joist sistering and blocking installation
- Liquid tanking and sheet membrane waterproofing
- Full bathroom installation and renovation, including tiling, LVT flooring, and plumbing
- Local building-control experience across Cardiff and the Vale of Glamorgan
For homeowners whose subfloor damage turns out to be part of a larger problem, that bathroom renovation conversation is one the team handles regularly. Sometimes opening a floor reveals that a full refit makes more financial sense than a repair.
The honest case for hiring versus doing it yourself
The DIY path makes sense when the damage is genuinely localized, the joists are sound, you have access to the right tools, and you can realistically give the job two to three days. Plywood work is not technically demanding. The fastening pattern, the expansion gaps, the membrane application: none of it requires specialist training. What it does require is patience, the right PPE, and the discipline to stop and call someone if the scope grows once the floor is open.
Where homeowners get into trouble is underestimating scope. A soft patch that looks like a square foot of damage often turns out to be three square feet once the finish flooring comes up. Joists that look fine from above can be half-rotted on the underside. The screwdriver test is not optional; it is the single most important diagnostic step in the whole job.
The smarter rule is this: if you find joist damage, mold beyond a small patch, or cannot identify the moisture source, stop and get a professional assessment. The cost of a site visit is trivial compared to the cost of a failed repair or a structural problem that compounds for another year behind new flooring.
Jmplumbingservicesltd: get a professional subfloor assessment in Cardiff
Replacing a bathroom subfloor is manageable as a DIY project when the damage is contained. When it is not, having a trusted local contractor assess the situation before you commit to a repair scope saves both money and time.

Jmplumbingservicesltd offers onsite subfloor assessments across Cardiff and the Vale of Glamorgan, covering everything from a localized patch to a full bathroom installation. The inspection includes moisture readings, joist checks, damage photography, and a written estimate so you know exactly what you are dealing with before any work starts. The team handles subfloor replacement, joist sistering, tanking, tiling, LVT flooring, and full bathroom installations in Cardiff. To book a site visit or request a quote, contact Jmplumbingservicesltd directly through Jmplumbingservicesltd.
Sources
The following resources are worth bookmarking depending on where you are in the repair process:
- Bathroom Subfloor Repair: What to Expect When We Open the Floor
- How to Repair Bathroom Water Damage
- Rapidrepair
- Rotten Subfloor Under Bathtub? Replace It Without Removing the Tub - Fix It In The Home
- MrRemodel | Bathroom Water Damage: What to Do | 2026 Cost & Repair Guide
- How to Tell It’s Time to Replace Your Subfloor