
Shower Leak Through Ceiling: Fix It Before It Gets Worse
Spotting a shower leak through ceiling? Discover quick fixes to prevent worsening damage. Act now to protect your home and safety.
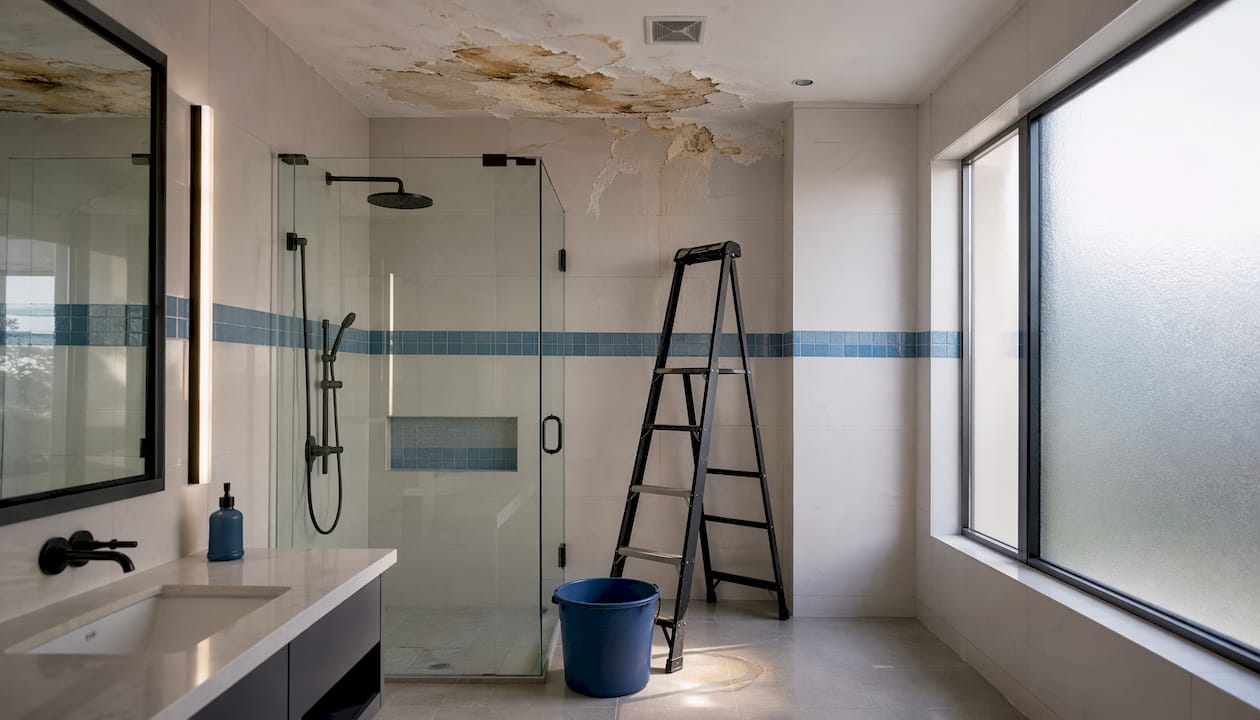
A shower leak through the ceiling comes down to one of two problems: either a plumbing fault or a waterproofing failure. Plumbing faults, such as cracked pipes, loose fittings, or a failed drain gasket, drip constantly, even when nobody has used the shower in hours. Waterproofing failures, including broken grout, deteriorated silicone, or a compromised tanking membrane behind the tiles, only leak during or shortly after shower use. That single distinction tells you whether you need a plumber, a tiler, or both.
The moment you spot water staining or a ceiling drip from the shower, stop using that bathroom. Every additional shower forces more water into the floor structure, saturating timber joists and plasterboard that were never designed to get wet. Move anything valuable out from under the drip, place a bucket to catch water, and check whether any light fittings or electrical outlets are near the wet area. Water near electrics is a safety emergency: turn off the breaker for that circuit immediately.
- Constant drip, shower not running: suspect a supply pipe, loose fitting, or drain pipe leak. Call a plumber.
- Leak only during or after shower use: suspect grout failure, silicone breakdown, or a failed waterproof membrane. Call a tiler or bathroom specialist.
- Ceiling sagging, soft, or musty-smelling: structural compromise is possible, requiring urgent professional assessment.
- Water near electrical fixtures: turn off the circuit breaker before doing anything else.
Pro Tip: Press a dry paper towel against the ceiling around the stain. If it comes away damp but the shower hasn’t run for several hours, you’re dealing with a plumbing leak, not a waterproofing issue. That one test can save you from calling the wrong tradesperson.
Table of Contents
- How do you find the true source of a shower leak causing ceiling water damage?
- What are the most common causes and what does repair actually cost?
- How do you prevent future shower leaks and keep waterproofing in good shape?
- What does a professional shower leak repair actually look like, step by step?
- Which materials suffer most when a shower leaks through the floor?
- How do you recognize mold or structural damage from a shower leak?
- How long does shower leak repair and ceiling restoration actually take?
- Jmplumbingservicesltd handles shower leaks and bathroom repairs across Cardiff and the Vale of Glamorgan
- Key Takeaways
How do you find the true source of a shower leak causing ceiling water damage?
Water almost never drips straight down from where the problem starts. It travels along joists, pipes, and subfloor boards until it finds a low point, which means the ceiling stain can sit several feet from the actual leak. Chasing the stain without tracing the water’s path leads to wrong repairs and recurring problems.
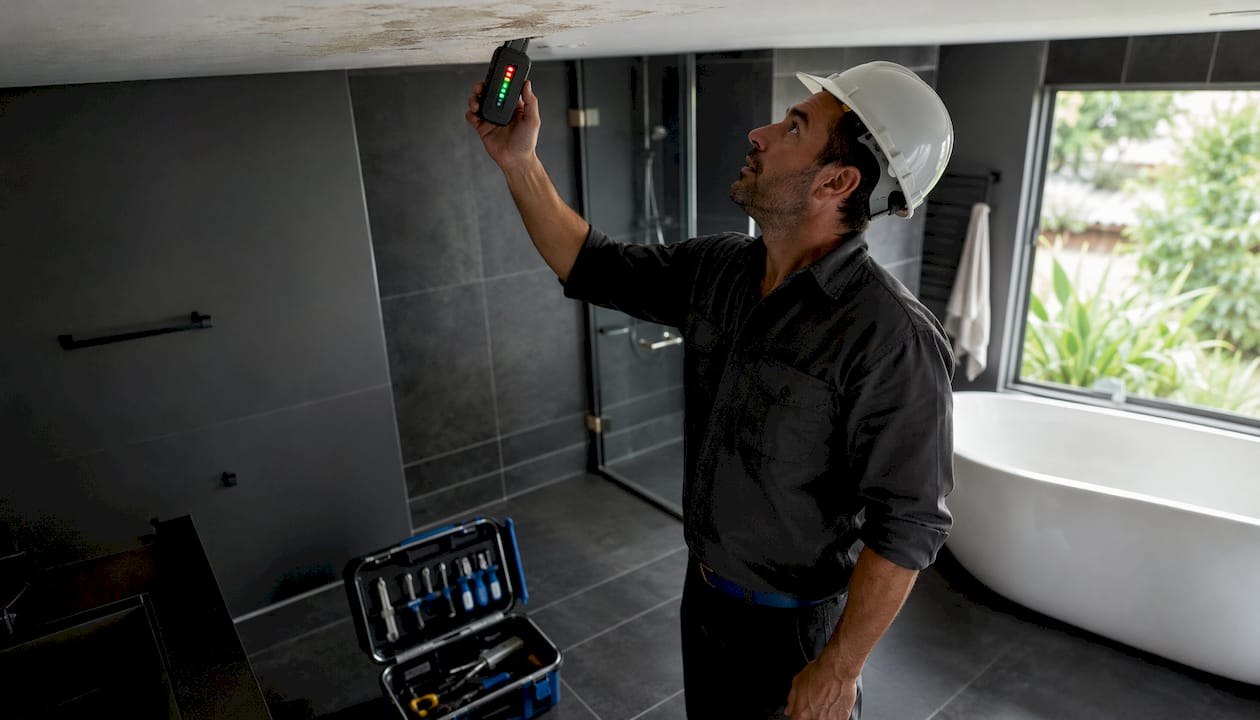
Start above the damaged ceiling, not below it. If there’s a bathroom directly overhead, inspect every fixture methodically.
Step-by-step diagnostic checklist:
- Check the toilet wax ring. Rock the toilet gently side to side. Any movement suggests the wax seal has failed. Press a paper towel around the base after flushing; dampness confirms it.
- Feel every supply line. Run a finger along each pipe connection under the sink, behind the toilet, and at the shower valve. Even slight dampness is a problem.
- Test the shower pan. Fill the shower floor with an inch of water and leave it for an hour. Check the ceiling below for new dripping.
- Run each fixture separately. Have someone watch the ceiling below while you run the shower, then the sink, then flush the toilet. Isolating which fixture triggers the drip narrows the source fast.
- Inspect grout and silicone. Look for cracked grout lines, missing caulk at the shower tray edges, and any gaps where the screen meets the wall.
For leaks that resist visual diagnosis, professional tools make the difference. Moisture meters and thermal imaging cameras map hidden water spread through walls and ceiling cavities, identifying moisture paths that are completely invisible to the eye. A stain that looks like a two-foot patch on the ceiling can mask a much wider moisture spread in the insulation layer above.
What are the most common causes and what does repair actually cost?
Most shower leaks causing ceiling water damage trace back to a handful of recurring faults. Understanding which one you’re dealing with determines who fixes it and what it costs.
Common causes:
- Failed grout or silicone: Daily water exposure degrades grout and silicone over time. Water slips behind the tile surface and works its way down. Surface-only grout failure is a DIY-accessible repair; if the waterproof membrane behind the tiles is also compromised, tiles must come up.
- Broken shower tray or pan: Cracks in the shower base allow water to bypass the drain entirely and soak into the subfloor. This is a professional repair.
- Faulty drain gasket: The rubber seal on the drain assembly dries out and cracks over time, leaking with every shower. A plumber can re-seal or replace the drain assembly.
- Leaking supply pipes or loose fittings: Cracked pipes, corroded joints, or loose connections leak continuously and need a licensed plumber with pressure testing to confirm the fix.
- Failed toilet wax ring: Water escapes every flush and travels down through the floor structure. Replacement is a straightforward plumber job but causes ceiling damage surprisingly fast if left.
Ignoring any of these carries real risk. Delayed repairs lead to structural damage, mold growth, and ceiling collapse in UK homes with timber joists and plasterboard ceilings. Mold can establish itself quickly under warm, humid conditions.
Estimated repair costs (UK) are as follows:
| Repair Type | Estimated Cost (£) | Who Does It |
|---|---|---|
| Regrout and reseal shower | Moderate cost | Tiler / DIY if surface only |
| Drain gasket replacement | Moderate cost | Plumber |
| Shower tray replacement | Higher cost | Plumber and tiler |
| Full membrane replacement (tanking) | Highest cost | Tiler / bathroom specialist |
| Pipe repair or joint tightening | Moderate cost | Licensed plumber |
| Ceiling repair (plasterboard, paint) | Variable cost | Decorator / contractor |
Minor cosmetic ceiling repairs, a small stain with no structural compromise, are manageable as DIY. Structural damage, visible mold, or drywall that is sagging or soft requires professional contractors. In the UK, sudden and accidental water damage from a burst pipe or failed supply line is typically covered by home insurance; gradual damage from a slow leak you were aware of usually is not.
How do you prevent future shower leaks and keep waterproofing in good shape?
Prevention is cheaper than repair by a significant margin. Most recurring shower leaks come down to maintenance that was skipped or waterproofing that was never done properly in the first place.
- Inspect grout and silicone every six months. Look for cracks, gaps, or discoloration. Catching a failing seal early means a tube of bathroom silicone and an afternoon, not a full retile.
- Never rely on grout alone. Tiles and grout are water-resistant, not waterproof. The tanking membrane behind the tiles does the real work. If that membrane is absent or damaged, surface repairs will keep failing.
- Fix small cracks immediately. A hairline crack in the shower tray or a missing section of grout seems trivial. Left for a season, it allows water to saturate the subfloor.
- Use your shower screen correctly. Leaving the screen door open during a shower or letting water pool against the screen edges accelerates silicone failure.
- Ventilate the bathroom properly. Run the extractor fan during and for at least 15 minutes after every shower. Persistent humidity degrades grout and silicone faster and encourages mold growth.
- Schedule a professional inspection before any renovation. If you’re planning a bathroom update, have the waterproofing assessed first. Tiling over a compromised membrane just delays the problem.
Pro Tip: Book a professional waterproofing check every two to three years, especially in bathrooms over five years old. Jmplumbingservicesltd includes a waterproofing assessment as part of bathroom renovation projects, which catches membrane issues before they become ceiling damage.
What does a professional shower leak repair actually look like, step by step?
Knowing the process helps you ask the right questions and avoid being surprised by the scope of work.
1. Isolate and confirm the source. The tradesperson runs water through each fixture separately, uses a moisture meter to map spread, and may use thermal imaging to trace hidden paths. No repair starts until the source is confirmed.
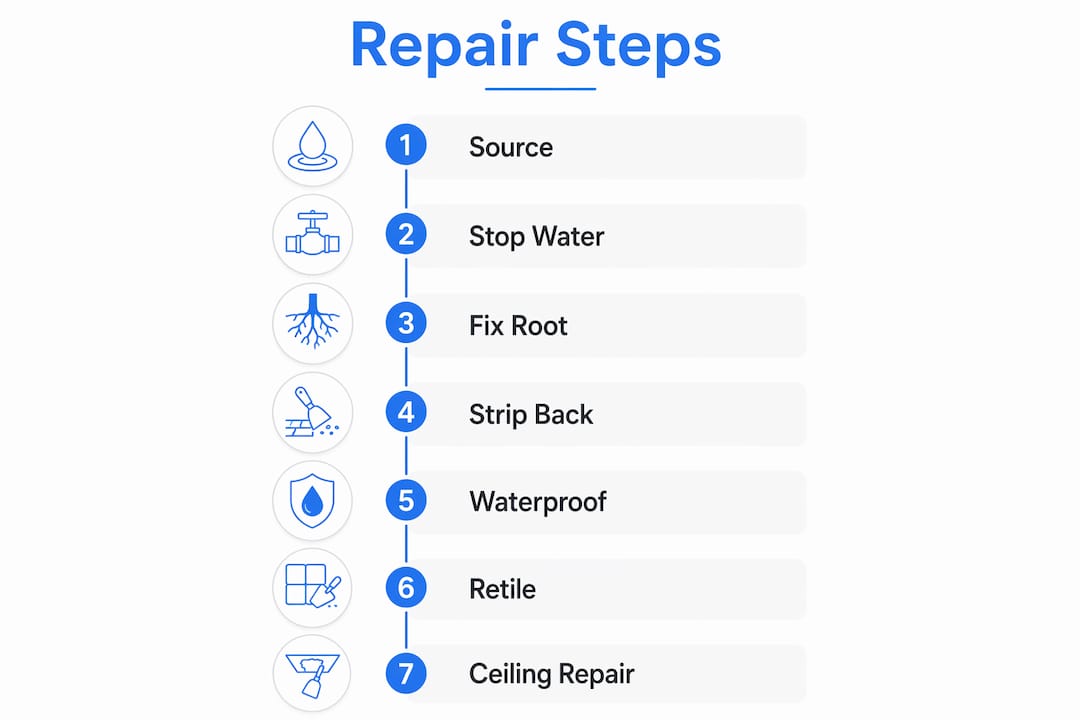
2. Stop the water. Supply lines are shut off. If the leak is active, the ceiling may need a small relief hole to drain trapped water before it causes a larger collapse.
3. Address the root cause first. A plumber fixes any pipe, fitting, or drain issues. A tiler handles membrane and tile work. Effective repair requires both trades working in sequence, not patching over each other’s work.
4. Strip back to sound material. For waterproofing failures, tiles come off, damaged substrate is removed, and the area is dried thoroughly before any new material goes in. Surface repairs like regrouting fail if the membrane underneath is compromised.
5. Install new waterproofing. A quality tanking membrane is applied to the substrate before any new tiles go down. This is the step most DIY repairs skip, and it’s why they fail.
6. Retile, reseal, and test. New tiles and grout go in, silicone is applied at all junctions, and the shower is tested with a standing water test before sign-off.
7. Repair the ceiling below. Once the source is fixed and the structure is dry, damaged plasterboard is replaced, stain-blocking primer is applied, and the ceiling is repainted.
Which materials suffer most when a shower leaks through the floor?
Water doesn’t discriminate, but some materials fail faster than others.
Plasterboard (drywall) absorbs water quickly and loses structural integrity within days of sustained exposure. Once it sags or crumbles, it needs full replacement, not patching.
Timber joists are the most serious concern in UK homes. Prolonged moisture causes rot and structural weakening. Joist repair or “sistering” (adding new timber alongside damaged joists) is expensive and disruptive.
Insulation between floors retains moisture long after the leak is fixed, creating ideal conditions for mold. It usually needs to be removed and replaced entirely.
Subfloor boards directly under the shower tray absorb water over months before any ceiling stain appears. By the time you see the damage below, the boards above may already be soft or rotting.
Tile adhesive and grout break down under repeated water ingress, accelerating the cycle of failure. Once adhesive fails, tiles become loose and the membrane beneath is exposed.
How do you recognize mold or structural damage from a shower leak?
Some signs are obvious. Others are easy to miss until the damage is already serious.
Visible mold appears as dark green or black patches, often starting at the ceiling stain and spreading outward. Mold inside the shower cubicle is common and manageable. Mold on the ceiling below, on adjacent walls, or on skirting boards signals that moisture is moving through the structure.
Musty odor without visible mold usually means it’s growing inside the ceiling cavity or wall, out of sight. Structural damage may extend well beyond visible stains, affecting insulation, joists, and floorboards.
Sagging or spongy ceiling means the plasterboard has absorbed enough water to lose rigidity. This is a collapse risk. A ceiling that feels soft when pressed needs professional attention the same day.
Discolored rings that keep growing indicate an active leak, not a historic one. A stain that expands between showers means water is still moving through the structure.
If any of these signs are present alongside a large ceiling area affected, professional remediation is the only safe path forward.
How long does shower leak repair and ceiling restoration actually take?
Timelines vary significantly depending on what’s damaged and how long the leak has been running.
A simple drain gasket replacement or pipe tightening can be completed in a single visit, often under two hours. Ceiling cosmetic repair (stain sealing and repainting) adds another half-day once the area is fully dry.
A full membrane replacement requires removing tiles, drying the substrate (typically 3–5 days with professional drying equipment), installing new tanking, retiling, and grouting. Expect 5–10 working days minimum, longer if the subfloor needs replacement.
Structural repairs involving joist work, insulation replacement, and full ceiling replacement can run 2–4 weeks, particularly if mold remediation is also required.
The single biggest factor in timeline is how long the leak has been running before it was caught. A leak discovered within days is a repair job. One that’s been running unnoticed for months becomes a restoration project. If you’re unsure how long the damage has been building, check out signs it’s time to renovate your bathroom for a broader picture of what delayed repairs look like.
Jmplumbingservicesltd handles shower leaks and bathroom repairs across Cardiff and the Vale of Glamorgan
When a shower leak has already reached the ceiling, you need someone who understands both the plumbing and the waterproofing side of the repair. Calling the wrong trade first wastes time and money.

Jmplumbingservicesltd covers the full scope: leak diagnosis, plumbing repairs, tanking membrane installation, tiling, and complete bathroom renovation across Cardiff, Penarth, Barry, Cowbridge, and the wider Vale of Glamorgan. Whether the problem is a failed drain gasket or a bathroom that needs a full refit to fix recurring waterproofing issues, the team handles it as a single coordinated job rather than a series of patch repairs. For immediate guidance on what to do while you wait, the bathroom leak advice page walks you through the right steps. To get a proper assessment and quote for your repair or renovation, visit the Cardiff bathroom installation page and get in touch directly.
Key Takeaways
A shower leak through the ceiling is either a plumbing fault or a waterproofing failure, and correctly identifying which one determines every repair decision that follows.
| Point | Details |
|---|---|
| Identify the leak type first | Constant dripping points to a pipe fault; leaks only during shower use point to waterproofing failure. |
| Stop using the shower immediately | Every additional shower forces more water into the floor structure, worsening damage and cost. |
| Surface repairs often fail | Regrouting over a compromised tanking membrane will not hold; tiles must come up for a lasting fix. |
| Structural damage signs need urgent action | Sagging ceilings, musty odors, or affected areas over 10 square feet require same-day professional assessment. |
| Jmplumbingservicesltd covers the full repair | From leak diagnosis and plumbing repairs to full bathroom renovation with proper waterproofing across Cardiff and the Vale of Glamorgan. |