
Mould in Bathroom: What to Do Right Now in the UK
Discover effective steps to tackle mould in your bathroom. Learn when to DIY and when to call a pro for safe, lasting solutions.
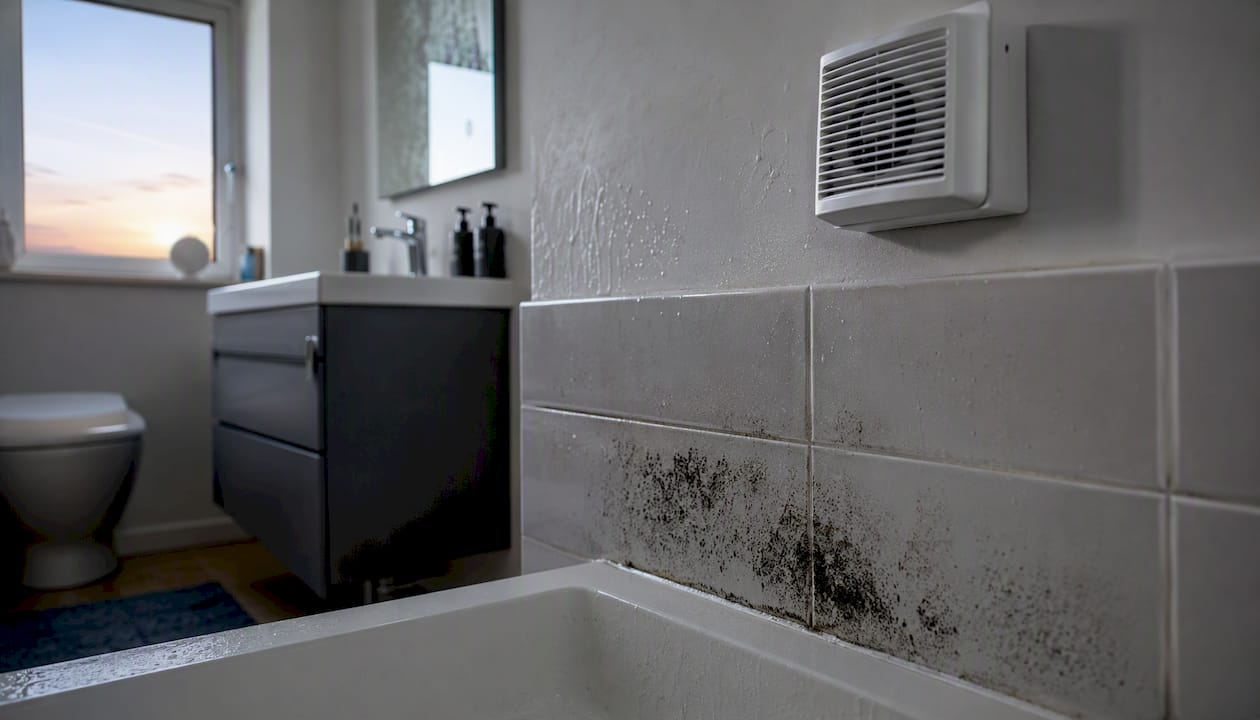
Small patches of mould in bathroom spaces are usually manageable with safe DIY cleaning. Large areas, mould that keeps coming back within weeks, or any growth accompanied by soft plaster, a persistent musty smell, or worsening household respiratory symptoms needs professional assessment, not another bottle of spray cleaner.
Three things to do right now:
- Ventilate immediately. Open a window or run the extractor fan to reduce airborne spore concentration.
- Don’t disturb the patch until you have gloves, a mask, and eye protection ready.
- Assess the size. If the affected area is larger than a small patch or if it has returned soon after cleaning, stop and call a contractor.
Quick stop-and-call checklist: visible water staining or tidemarks, soft or crumbling plaster behind the mould, mould on more than one surface in the same room, or anyone in the household developing new respiratory symptoms.
Gov confirms that mould can establish within 24–48 hours of sustained surface moisture, which is why acting quickly matters even for small patches.
Key Takeaways
Mould in a bathroom is a building moisture problem first and a cleaning task second: fix the source, or it will return.
| Point | Details |
|---|---|
| Act within 24–48 hours | Mould can establish that fast on wet surfaces; ventilate and assess size immediately. |
| Call a pro above 1 m² | Professional assessment is recommended when mould exceeds 1 m² or recurs within weeks. |
| Vulnerable people should not clean | Anyone with asthma, mould allergy, or weakened immunity should not handle mould removal. |
| Fix ventilation first | Fans must vent outside, be correctly sized, and run for 15–20 minutes after showering. |
| Silicone needs replacing, not cleaning | Black-stained sealant has been colonized internally; surface sprays will not clear it. |
Table of Contents
- How does mould in the bathroom affect your health?
- Why does mould keep appearing in your bathroom?
- How do you know if it’s a surface problem or something deeper?
- How to safely remove small patches yourself
- When should you call a professional, and what should you expect?
- How do you stop mould from coming back?
- What are your rights as a tenant, and what must landlords do?
- Why fixing the source beats cleaning every time
- Sources
How does mould in the bathroom affect your health?
Most bathroom mould is not the highly toxic Stachybotrys species that generates alarming headlines. The dark patches you find on grout or silicone are far more likely to be common species such as Cladosporium. That said, “less toxic” does not mean harmless.
CDC research links indoor mould exposure to a recognizable cluster of symptoms: stuffy or runny nose, sore throat, coughing or wheezing, burning eyes, and skin rash. For most healthy adults, these effects are irritating rather than dangerous. The picture changes significantly for certain groups.
Who is most at risk:
- Children and infants, whose developing lungs are more sensitive to airborne irritants
- Older people, particularly those with pre-existing lung conditions
- Anyone with asthma, hay fever, or a diagnosed mould allergy
- People with weakened immune systems, including those on immunosuppressant medication or undergoing chemotherapy
For these groups, even moderate mould exposure can trigger serious asthma attacks or allergic reactions. The NHS advises that vulnerable people should not carry out mould cleaning themselves and should leave the room while it is being treated.
The scale of the problem in England puts this in perspective. UKHSA research estimates that roughly 2 million people in England currently live in homes with significant damp and/or mould, representing a measurable public-health burden that extends well beyond the occasional grout stain.
Why does mould keep appearing in your bathroom?
Bathrooms are the most mould-prone room in most homes, and the reason is almost always moisture. Understanding which moisture source is driving your problem determines whether cleaning will work or whether you need a structural fix.
The condensation cycle
A single 10-minute shower releases roughly 2 liters of water vapor into the air. That warm, humid air rises and meets the coldest surface in the room — typically the ceiling or an exterior wall — where it condenses into liquid water. Black mould on bathroom ceilings is almost always this process at work.
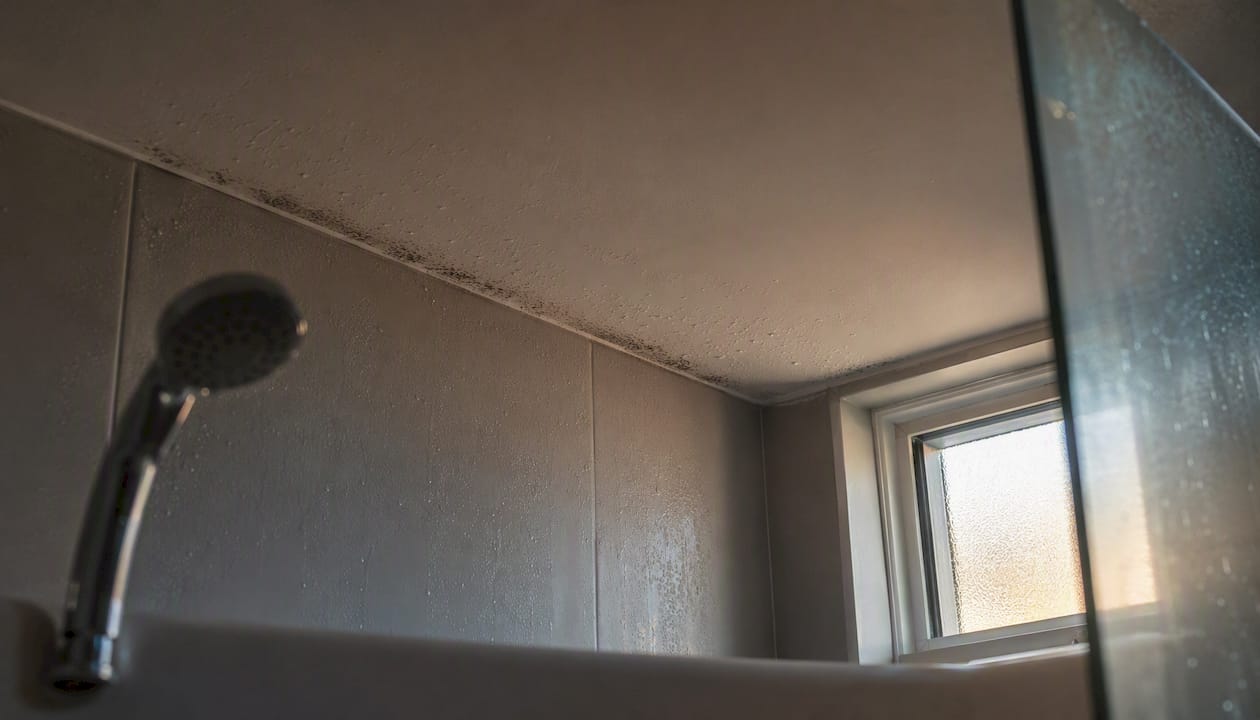
Nordic Damp Proofing notes that inadequate ventilation is the leading cause of recurring ceiling mould, and the failure is often not a missing fan but a poorly specified or clogged one.
Common causes at a glance
- Inadequate or broken extraction: fan venting into the loft rather than outside, undersized fan, or blocked grille
- Cold, uninsulated surfaces: ceilings and external walls with poor insulation create persistent cold spots where condensation forms even with moderate humidity
- Porous materials: grout, silicone sealant, and unpainted plaster absorb moisture and provide an ideal substrate for mould spores
- Slow or hidden leaks: a dripping pipe joint behind a panel or a shower leak through the ceiling keeps surfaces permanently damp regardless of ventilation
Condensation-driven vs. leak-driven mould: how to tell
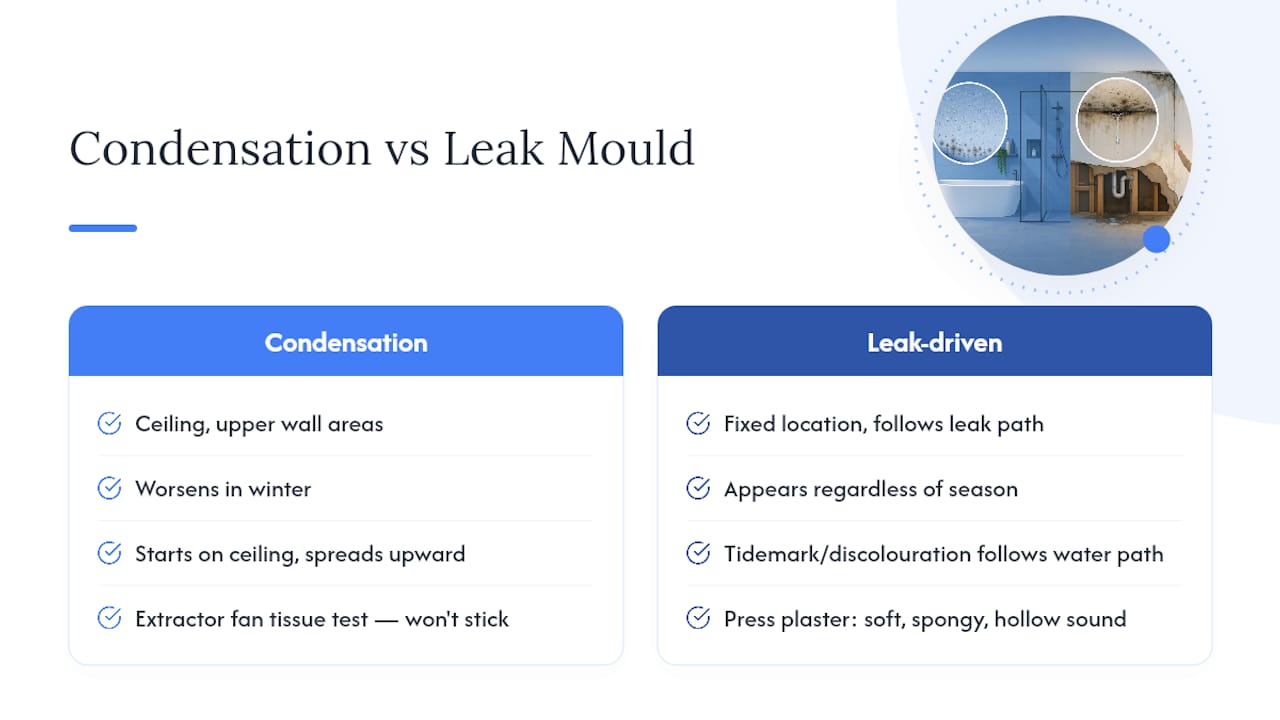
Condensation mould typically appears on the ceiling first, spreads to the upper sections of walls, and worsens in winter when surface temperatures drop. Leak-driven mould tends to appear in a fixed location regardless of season, often with a tidemark or discoloration that follows the water’s path downward. Press the plaster gently: soft, spongy, or hollow-sounding areas suggest water has been sitting behind the surface for some time.
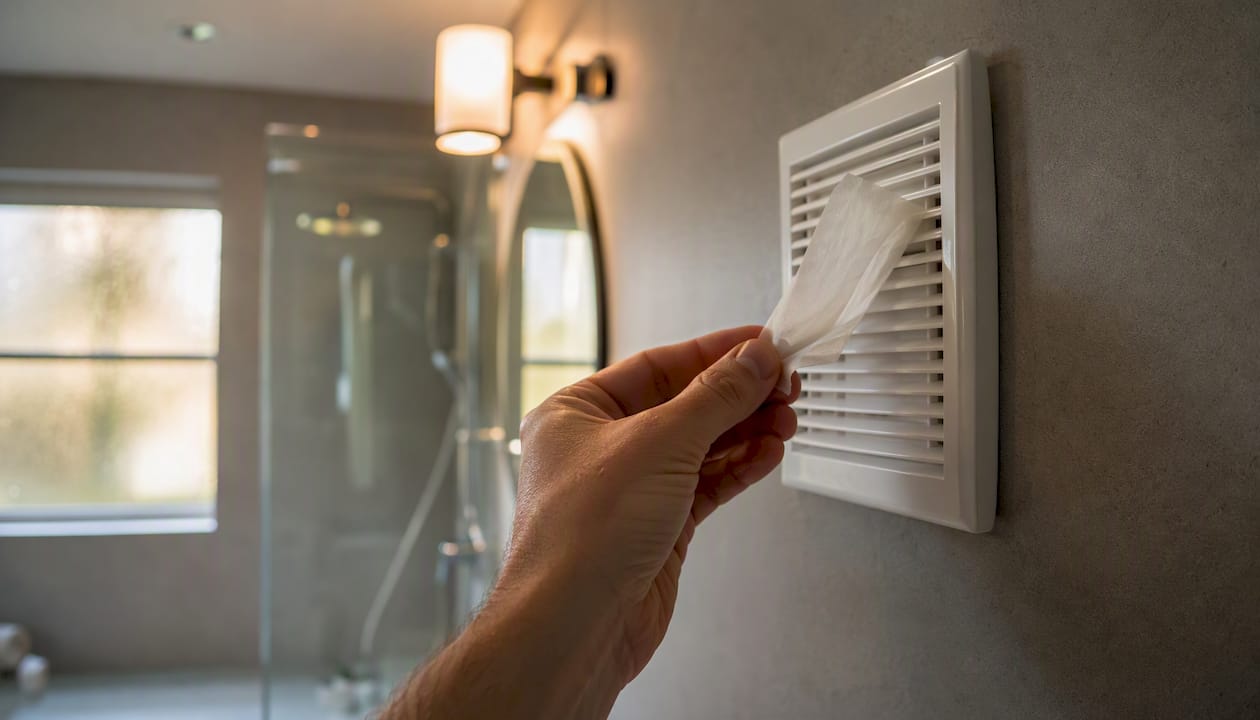
Pro Tip: Hold a piece of tissue against your extractor fan grille while it runs. If the tissue doesn’t stay put, the fan isn’t generating enough suction to clear the room’s moisture load.
How do you know if it’s a surface problem or something deeper?
The 1 m² threshold is the most practical starting point. NHS guidance recommends professional assessment when mould covers more than approximately 1 m² or recurs rapidly after cleaning. That’s roughly a 1-meter square patch, which is larger than most people picture when they think of “a bit of mould.”
Beyond size, watch for these red flags:
- Mould returns within two to four weeks of thorough cleaning
- Plaster feels soft, sounds hollow, or shows cracks and bubbling paint
- A persistent musty smell even after cleaning and ventilating
- Tidemarks or brown staining on walls or ceilings
- Household members developing new coughs, wheeze, or eye irritation that clears when they leave the property
Yorkshire Mould Removal’s guidance makes the point plainly: persistent condensation mould usually signals a building performance failure, and cleaning alone will not stop it returning. The mould is a symptom. The cause is ventilation, insulation, or a leak.
Quick non-technical checks you can do today
Run the tissue test on your extractor fan (described above). Look for tidemarks on the ceiling above the shower or bath. Open any access panels and check for damp or discoloration around pipe joints. Feel along the base of walls for soft or damp patches. If you find any of these, the problem almost certainly goes beyond surface mould.
Pro Tip: Black staining on silicone sealant around the bath or shower tray rarely responds to surface cleaning. The mould has colonized the silicone itself. The only reliable fix is to cut out the old sealant entirely and replace it with a mould-resistant product.
How to safely remove small patches yourself
Before you start, confirm the area is under 1 m², no vulnerable people are in the household, and the mould has not penetrated behind the surface. If all three conditions are met, DIY removal is reasonable.
Who should not do this
Anyone with asthma, a mould allergy, or a weakened immune system should leave the room and let someone else handle it. Pregnant women and parents of young children should also consider whether the room can be kept clear during and for several hours after treatment.
Step-by-step safe removal
- Gear up first. Put on an FFP2 or N95 respirator mask, disposable nitrile gloves, and eye protection. These are not optional: disturbing mould releases spores into the air.
- Ventilate the room. Open the window fully and run the extractor fan. If there is no window, prop the door open and keep other internal doors closed to contain spores.
- Dampen the patch lightly with water before scrubbing. This reduces the number of spores that become airborne.
- Apply your chosen cleaner and leave it to work for the time stated on the product. Do not mix cleaners.
- Scrub with a disposable cloth or old toothbrush, working from the outer edge inward to avoid spreading the colony.
- Wipe clean and repeat if staining remains.
- Bag and bin all materials immediately. Do not shake them out or leave them on surfaces.
- Dry the area thoroughly. Leave the fan running and the window open for at least 30 minutes after finishing.
Which cleaner to use on which surface
- Glazed tiles: a proprietary fungicidal wash or a diluted bleach solution (follow label dilution ratios). Rinse well.
- Grout: fungicidal spray or a paste of bicarbonate of soda and white vinegar applied with an old toothbrush. For deeply stained grout, re-grouting is often more effective than repeated cleaning.
- Silicone sealant: if the mould is on the surface only, a fungicidal spray may suppress it temporarily. If it has penetrated the sealant (black staining that doesn’t shift), replace the sealant entirely.
- Painted plaster: a fungicidal wash designed for painted surfaces. Do not use neat bleach on painted walls; it strips the paint and can damage the plaster beneath.
- Fabrics (bath mats, curtains): machine wash at the highest temperature the fabric tolerates, adding a laundry sanitizer.
One firm rule: never mix bleach with vinegar, ammonia, or any other cleaning product. The chemical reaction produces toxic chlorine gas. Use one product at a time, rinse between applications, and ventilate throughout.
Mira Showers’ prevention guidance reinforces the basics: wipe down wet surfaces after every shower, ventilate immediately, and use a dehumidifier or extractor fan consistently to prevent mould re-establishing.
When should you call a professional, and what should you expect?
Clear triggers for professional help
- Mould covers more than 1 m²
- It has returned within a few weeks of thorough cleaning
- You can see or feel soft, damp, or damaged plaster or drywall
- There is visible water ingress: staining, tidemarks, or active drips
- Anyone in the household has developed respiratory symptoms that improve when they leave the property
- The mould is on a structural surface or behind fixtures
If you are dealing with a bathroom leak as the underlying cause, that needs to be diagnosed and repaired before any remediation work will hold.
What a remediation contractor actually does
A competent contractor does not just spray and wipe. The process typically runs in this order: a moisture survey (often using a pin or non-invasive moisture meter), identification of the moisture source, targeted removal of colonized materials, deep biocide treatment of affected surfaces, replacement of porous materials such as grout and sealant, and then addressing the root cause, whether that is a ventilation upgrade, insulation improvement, or leak repair.
Questions worth asking before you hire
- Do you carry out a moisture survey before quoting?
- Will you identify and fix the moisture source, or only treat the mould?
- What biocide products do you use, and are they appropriate for the surface type?
- Do you offer a guarantee on recurrence within a defined period?
- Are you insured for domestic remediation work?
Ballpark costs and timelines
These are indicative ranges for the UK market. Costs vary by region, access difficulty, and the extent of structural work required. Always get at least two written quotes.
How do you stop mould from coming back?
Cleaning mould without fixing the moisture source is a short-term measure. The following steps break the cycle.
Extraction that actually works
A bathroom extractor fan must vent to the outside of the building, not into the loft or a wall cavity. GOV.WALES building regulations guidance specifies that fans must be correctly sized for the room volume, externally terminated, and ideally fitted with a run-on timer set to 15–20 minutes after the room is vacated. Exhausts that terminate in the loft simply move moisture into the roof space, creating hidden damp problems elsewhere.
Fan failures are common and often invisible. The grille gets clogged with dust, the duct develops a sag that traps condensation, or the fan was undersized from installation. The tissue test described earlier is the fastest way to check whether yours is actually working.
Humidity targets
Aim for indoor relative humidity below moderate levels after showering. A basic hygrometer costs under £15 and gives you a real number to work with rather than guessing.
Material choices that reduce risk
- Antimicrobial grout and sealant: widely available and worth specifying on any re-grouting or sealant replacement job
- Non-porous wall panels: acrylic, PVC, or porcelain panels around the shower and bath eliminate the grout lines that harbour mould
- Moisture-resistant flooring: non-porous bathroom flooring options such as LVT or large-format porcelain tiles leave fewer places for water to sit
- Insulated ceilings and external walls: reducing cold spots cuts condensation at source; this is particularly relevant for older properties with uninsulated flat roofs or solid walls
- Moisture-resistant door materials: choosing the right bathroom door with appropriate coatings prevents swelling, warping, and mould on door surfaces
A simple monthly maintenance routine
- Wipe down the extractor fan grille with a dry cloth
- Check silicone sealant for any new black staining or gaps
- Run the tissue test on the fan
- Wipe down any condensation from windows and cold walls after showering
- Re-seal any gaps in sealant before water can get behind them
What are your rights as a tenant, and what must landlords do?
Landlord responsibilities
In England and Wales, landlords have a legal duty to maintain properties in a condition fit for habitation. Damp and mould caused by structural defects, inadequate ventilation, or disrepair are the landlord’s responsibility to fix. This is reinforced by GOV.UK guidance on damp and mould in rented housing, which explicitly states that landlords must not treat damp and mould as a lifestyle issue caused by tenants and must investigate and address the underlying cause.
Awaab’s Law and what it means for renters
Awaab’s Law, introduced following the death of two-year-old Awaab Ishak from prolonged mould exposure in a social housing property, requires social landlords in England to investigate and begin repairs for hazardous damp and mould within defined timeframes. As of 2026, the government is consulting on extending similar requirements to the private rented sector. UKHSA guidance has raised the priority of persistent damp and mould as a public-health issue, and local authorities are increasingly using Housing Health and Safety Rating System (HHSRS) powers to compel landlords to act.
Practical steps for tenants
- Report in writing. Email or text so you have a timestamped record. Describe the location, size, and any symptoms.
- Photograph everything. Date-stamped photos are your evidence if the issue escalates.
- Request a formal inspection. Ask the landlord to identify the moisture source, not just treat the visible mould.
- Set a reasonable deadline. If the landlord does not respond within a reasonable period (typically 14–28 days for non-emergency repairs), escalate.
- Contact your local council’s environmental health team. They can inspect the property and issue an improvement notice under HHSRS if the mould represents a category 1 hazard.
- Seek advice from Shelter or Citizens Advice. Both organizations offer free guidance on housing disrepair and tenants’ rights in England and Wales.
Why fixing the source beats cleaning every time
Mould in a bathroom is almost never just a cleaning problem. After years of seeing the same bathrooms treated with spray after spray while the underlying issue goes untouched, the pattern is consistent: the mould comes back, usually within a month, because the moisture source was never addressed.
The jobs that actually stop recurrence tend to be straightforward once you know what you’re looking for. Replacing colonized silicone sealant takes an hour and costs very little. Rerouting a fan duct that was venting into the loft instead of outside makes an immediate difference to ceiling condensation. Adding insulation to a cold flat-roof bathroom ceiling removes the cold spot that was generating condensation every single morning. These are not complicated interventions, but they require someone to diagnose the moisture source correctly before picking up a cleaning cloth.
A full bathroom renovation is sometimes the right answer, particularly in older properties where the combination of poor ventilation, uninsulated walls, and degraded materials means that piecemeal repairs will keep falling short. Replacing porous grout and sealant with antimicrobial alternatives, upgrading to non-porous wall panels, and fitting a correctly specified extractor fan as part of a single project removes most of the conditions mould needs to establish.
The 10 signs it’s time to renovate your bathroom guide covers the building-failure indicators that go beyond mould, including persistent leaks, failing sealant, and inadequate ventilation, all of which contribute to recurring damp problems.

If you’re in Cardiff or the Vale of Glamorgan and dealing with persistent bathroom mould, Jmplumbingservicesltd offers diagnosis and repair as part of its bathroom installation and renovation service. The team handles everything from sealant replacement and fan upgrades to full wet room installations designed to eliminate the conditions that cause mould in the first place. Contact Jmplumbingservicesltd to discuss what your bathroom actually needs.
Sources
The following UK public-health and technical guidance documents underpin the advice in this article:
This article is general information, not a substitute for advice from a qualified doctor. Consult a qualified healthcare professional about your own circumstances before acting on anything here.