
Leaking Shower Tray: Fix It Yourself or Call a Pro?
Dealing with a leaking shower tray? Learn to fix it yourself or know when to call a pro for effective solutions and safety tips.
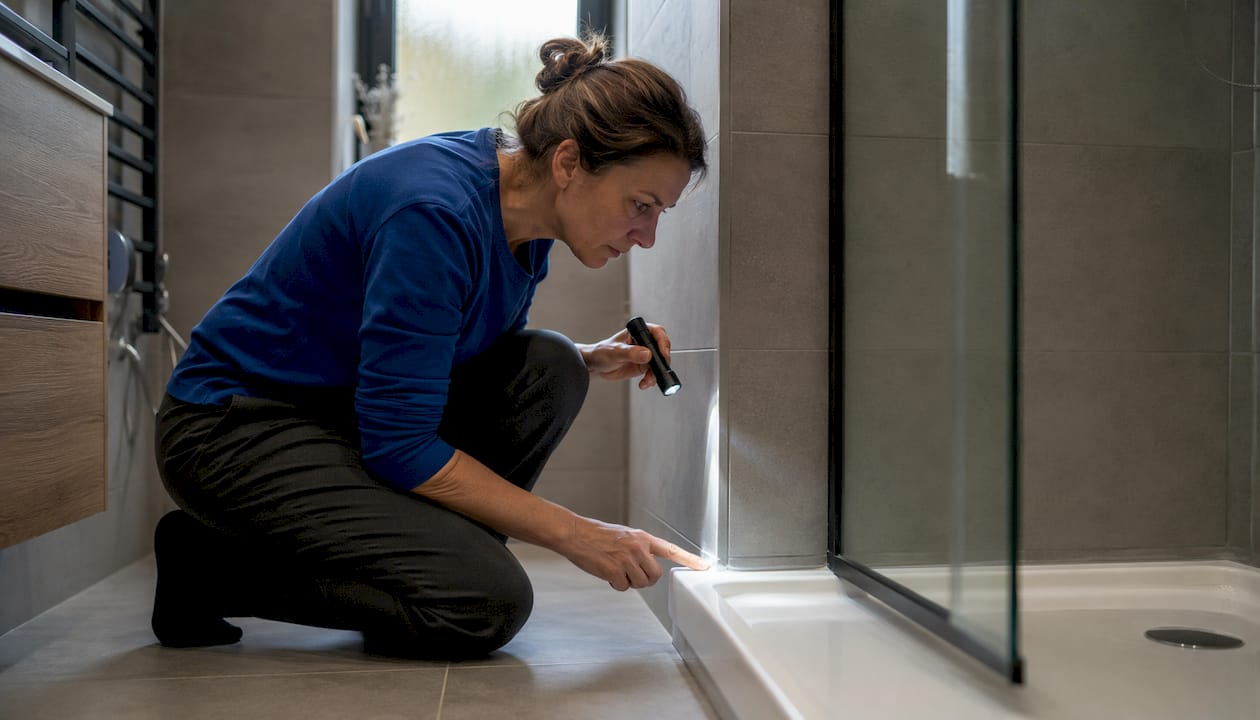
Most leaking shower trays start with one thing: failed sealant at the junction between the tray and the wall. A reseal will stop the majority of surface leaks, and a competent homeowner can do it in an afternoon. But if the tray flexes underfoot, water is appearing on the ceiling below, or you’ve already resealed once and it failed again, you’re looking at something structural, and that needs a professional.
Three immediate actions to take right now:
- Stop using the shower if water is visibly escaping in volume, dripping through a ceiling, or near any electrical fittings. Wet electrics are a safety emergency.
- Protect what’s below. Put towels or a bucket under any drip point and move anything stored in the cupboard beneath the bathroom.
- Take dated photos of every wet patch, stain, or damaged seal before you touch anything. You’ll need them for diagnosis, and possibly for an insurance claim.
Quick diagnostic rule of thumb: if water only appears while the shower is running and seems to come from the screen or wall tiles, the screen seal or grout is the likely culprit. If you see standing water under the tray, damp in the cupboard below, or a stain on the ceiling, the tray base, drain, or waterproofing membrane is involved. A sanitary silicone seal around a shower tray typically lasts 5–10 years under normal domestic conditions, so if yours is older than that, a reseal is overdue regardless of visible damage.
Table of Contents
- What causes a leaking shower tray?
- How do you find exactly where the leak is coming from?
- DIY repairs that actually fix most tray leaks
- When should you stop DIY and call a professional?
- How Jmplumbingservicesltd diagnoses and fixes shower tray leaks
- What does it cost to fix a leaking shower tray in the UK?
- Is a leaking shower covered by home insurance in the UK?
- Maintenance and prevention: how to stop the next leak
- What tools and materials do you need for a DIY reseal?
- How do you safely remove and replace a shower tray?
- Long-term maintenance tips to prevent future leaks
- What damage can a leaking shower tray cause if you ignore it?
- Key Takeaways
- Why quick reseals so often fail — and what actually works
- Jmplumbingservicesltd: professional shower tray repairs in Cardiff and the Vale of Glamorgan
- Useful sources and further reading
What causes a leaking shower tray?
Failed sealant is the most common culprit, but it’s rarely the whole story. Here’s what actually goes wrong, and what each failure looks like in practice.
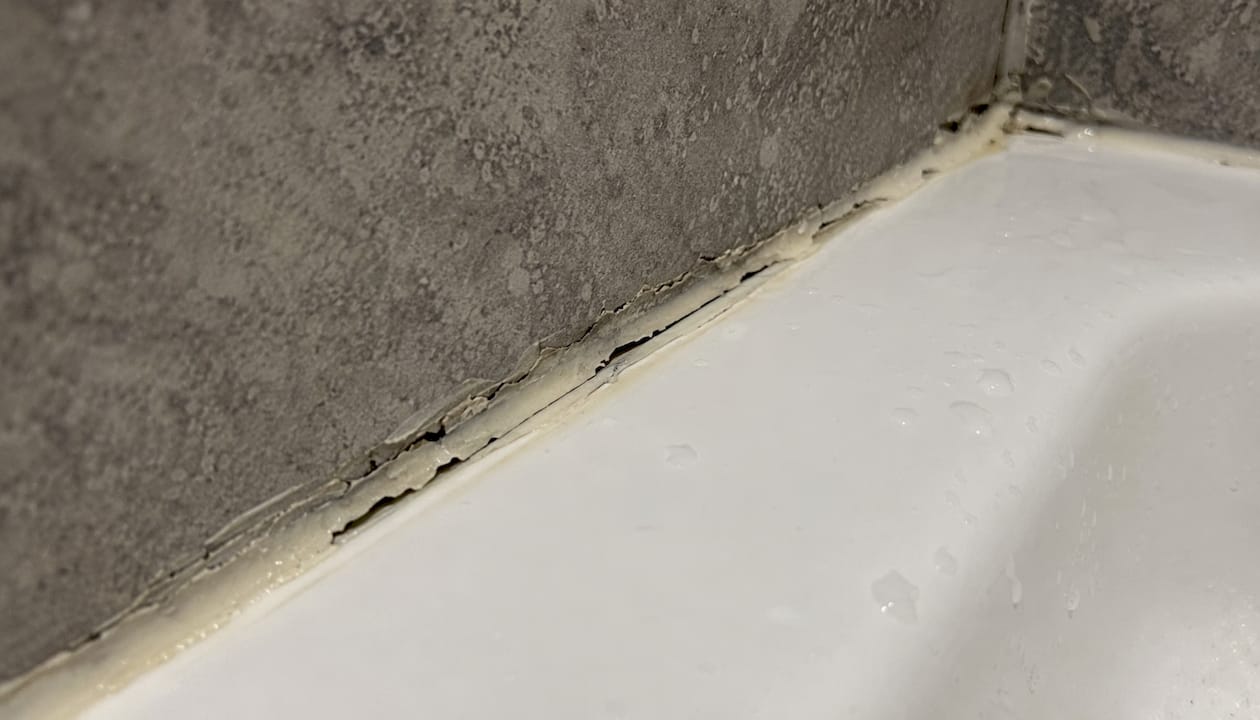
Failed sealant at the tray/wall junction
Silicone shrinks slightly as it ages, and daily thermal cycling from hot showers accelerates that process. Once the bead cracks or pulls away from the wall, every shower pushes water into the gap. You’ll usually see black mold growing along the sealant line before the leak becomes obvious.
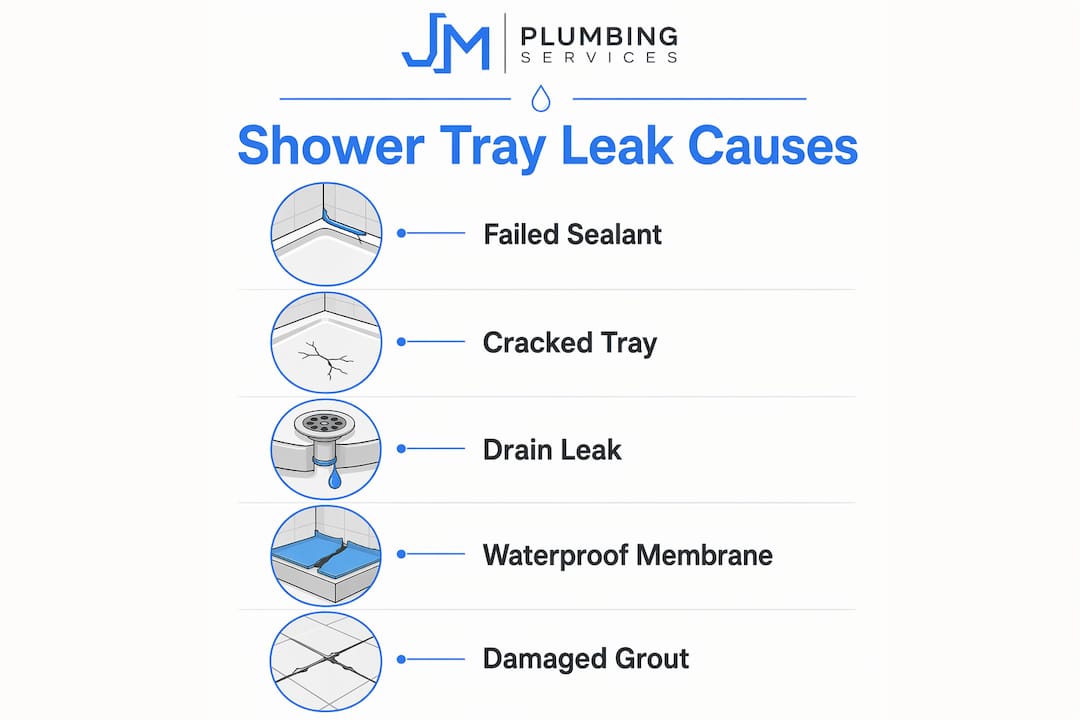
Cracked or flexing tray
Acrylic trays flex. If the tray wasn’t bedded properly on a rigid mortar base or adjustable feet set correctly, that flex breaks the silicone bond repeatedly, no matter how many times you reseal it. Tray movement is considered the single biggest cause of reseal failure by professional installers. Even 1–2mm of bounce is enough to split a fresh bead within months. Press down firmly on the tray edges while someone watches the sealant joint. Any visible movement means the bedding needs fixing before resealing.
Leaking drain or flange
The drain flange sits between the tray and the waste pipe. The rubber gasket that seals it degrades over time, and if the flange wasn’t tightened correctly on installation, it can work loose. Water from a drain leak typically appears directly under the tray rather than at the wall junction.
Failed waterproofing membrane behind tiles
Tiled shower walls rely on a waterproofing membrane or tanking system applied before tiling. When that membrane fails, water soaks through grout and tile adhesive into the wall structure. This one is insidious because the visible damage (damp patches, bubbling paint, soft plaster) often appears several feet away from the actual breach.
Damaged grout or cracked tiles
Hairline cracks in grout or tiles let water through slowly. Over months, that moisture saturates the substrate behind the tiles, eventually finding its way down to the tray junction or through the floor. Check the grout lines at the tray/wall junction first; these take the most stress from daily temperature changes.
Pro Tip: The most common homeowner mistake is resealing over old, contaminated, or moving joints. Fresh silicone applied over mold, residue, or a flexing tray will fail within weeks. The substrate has to be clean, dry, and completely stable before you apply a single bead.
How do you find exactly where the leak is coming from?
Pinpointing the source before you start any repair saves you from tearing out tiles unnecessarily. Work through these steps in order.
Step 1: Visual and smell inspection
Start dry. Look at every sealant bead around the tray and up the walls. Check grout lines for cracks or missing sections. Inspect the screen frame where it meets the tray and wall. Then open any cupboard or access panel below the bathroom and look for water stains, damp timber, or a musty smell. Check the ceiling of the room below if there is one.
Step 2: The tray fill test
Plug the drain and fill the tray with about an inch of water. Mark the water level with masking tape. Wait 20–30 minutes without running any water. If the level drops, the tray itself or the surrounding seal is leaking. If the level holds, the leak is coming from the shower head, pipes, or screen when water is running. This simple bucket-fill test is a preferred professional first step because running the shower head can mask the true source entirely.
Step 3: Targeted spray test
If the tray fill test holds, use the handset to spray the screen frame and wall joints. Start low, near the tray, and work upward. Watch the outside of the screen and the cupboard below. This isolates screen seal failures and high wall-joint leaks that the fill test won’t catch.
Step 4: Check below the floor
If you have access to the ceiling below, look for water marks directly under the drain position versus under the tray edges. The location of the stain tells you whether the drain flange or the tray seal is the source.
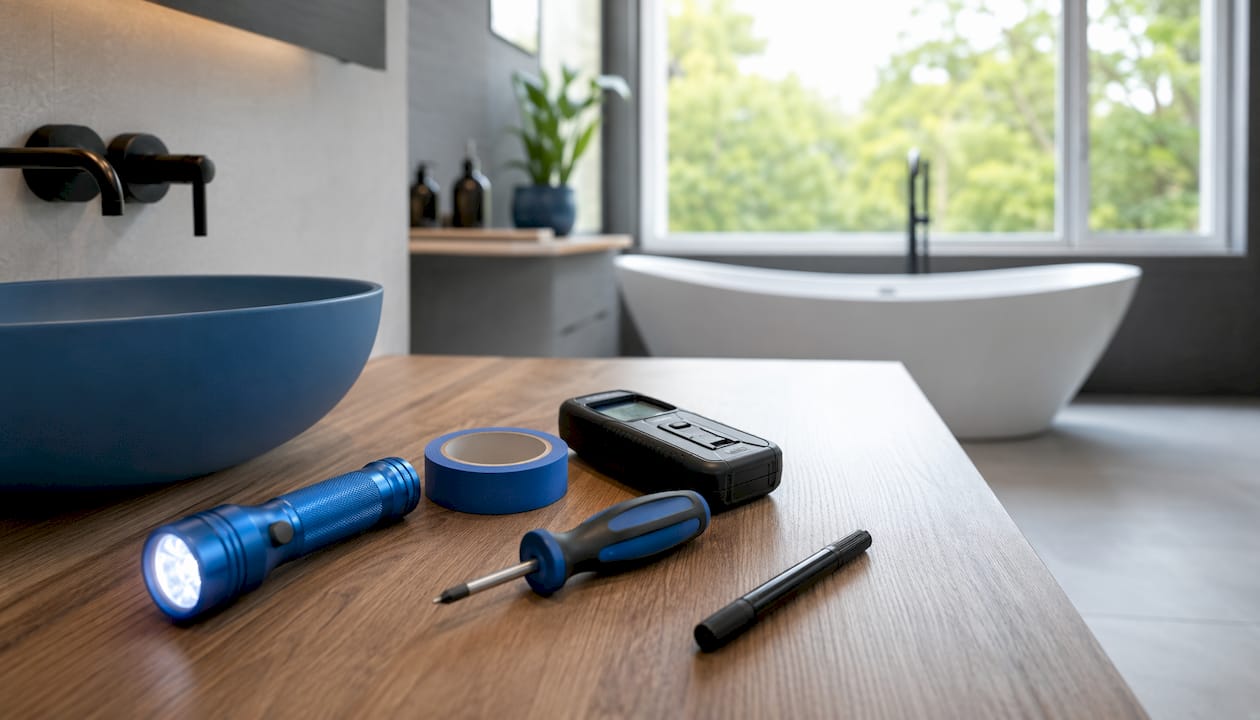
Tools you’ll need for diagnosis: a torch, masking tape, a marker pen, towels, a bucket, a screwdriver for access panels, and a camera or phone for dated photos.
Safety warnings: stop immediately and call a professional if any electrical fitting is wet, if the ceiling below is saturated or sagging, or if the floor timbers feel soft when you press on them. These are not DIY situations.
DIY repairs that actually fix most tray leaks
For surface sealant failures and minor drain issues, a competent homeowner can get a lasting result. Here’s what works, and where to stop.
Materials and tools checklist
| Item | Purpose |
|---|---|
| Neutral-cure sanitary silicone | Primary sealant for tray/wall junction |
| Sealant remover (gel or tool) | Stripping old bead cleanly |
| Isopropyl alcohol (IPA) | Final surface decontamination |
| Masking tape | Clean sealant lines |
| Silicone profiling tool or wet finger | Smooth the bead |
| Replacement drain gasket | Drain flange reseal |
| Acrylic/fiberglass repair resin kit | Small crack repairs |
| Rags and paper towels | Cleanup |
Step-by-step reseal method
- Remove all old sealant. Use a sealant remover gel, let it soften the bead, then cut and peel it away with a plastic scraper. Don’t leave any residue. A Stanley knife blade helps in tight corners, but be careful not to score the tray surface.
- Clean with isopropyl alcohol. Wipe the entire joint area twice. Any trace of mold, soap scum, or old sealant will prevent adhesion. Let it dry completely.
- Check for tray movement. Press down on the tray edges. If it flexes, stop here and address the bedding before sealing. Applying silicone over a moving tray is wasted effort.
- Apply masking tape. Run two strips of tape parallel to the joint, leaving a 5–6mm gap. This gives you a clean, consistent bead line.
- Apply a continuous bead of neutral-cure sanitary silicone. Cut the nozzle at 45 degrees to match the joint width. Work in one smooth pass without stopping.
- Tool the bead. Wet your finger or use a profiling tool and draw it along the bead in one stroke to press it into the joint and smooth the surface.
- Remove the masking tape immediately, before the silicone skins over.
- Allow full cure time. Most sanitary silicones state 24 hours before light water contact, but check your product. Full cure is typically 48–72 hours. Don’t use the shower until it’s fully cured.
Pro Tip: Silicone won’t bond to contaminated or unstable surfaces. If you skip the IPA wipe or leave even a thin film of old sealant, the new bead will peel away within weeks. Prep is 80% of the job.
Drain reseal steps
If the tray fill test shows the drain is leaking, try tightening the drain flange first. If you have underside access, inspect the rubber gasket and replace it if it’s compressed or cracked. Drain gaskets are inexpensive and available at most plumbing merchants. If you have no underside access, isolate the drain by plugging it and running the fill test again to confirm the source before doing anything invasive.
Small crack repairs
Hairline cracks in acrylic or fiberglass trays can be filled with a two-part resin repair kit. Clean the area thoroughly, mix the resin per the instructions, fill the crack, and sand flush when cured. This is a stopgap for minor surface cracks only. A crack that runs through the full thickness of the tray, or one that reappears after repair, means the tray needs replacing.
Stop DIY if: the tray flexes underfoot, there’s evidence of timber rot or structural water damage, or you cannot access the drain properly. These require professional assessment.
When should you stop DIY and call a professional?
Some shower leaks look like a reseal job but aren’t. Here are the situations where DIY will cost you more in the long run.
Red flags that mean you need a pro
- The tray bounces or flexes when you stand on it
- You’ve resealed once (or twice) and the leak came back
- Water is appearing on the ceiling of the room below
- There’s a persistent damp smell even after the shower has dried out
- Visible timber rot or soft floorboards near the tray
- Large cracks in the tray, or cracks that reappear after repair
- Water visible on the underside of the tray or on the ceiling below — these are not reliably fixed by a surface reseal
- Suspected membrane failure behind tiles (bubbling tiles, hollow sound when tapped)
What a professional will do
- Survey and isolate the source using moisture meters, visual inspection, and targeted water tests.
- Assess tray support and subfloor condition — lift or remove the tray if needed to inspect joists and the floor structure.
- Pressure-test supply pipes to rule out a plumbing leak above the tray.
- Inspect the waterproofing membrane and drain connections.
- Provide a written quote covering repair method, materials, timescale, and warranty.
What to ask when getting quotes
Ask specifically: what warranty do you offer on the repair? Will you need to remove tiles? What happens if you find structural damage once the tray is lifted? A contractor who can answer these clearly before starting is worth the extra call.
Professionals will also flag electrical safety issues and mold remediation needs that a DIY inspection can miss. Moisture meters and endoscopic cameras can find hidden membrane or joist damage that no visual check will catch.
How Jmplumbingservicesltd diagnoses and fixes shower tray leaks
Jmplumbingservicesltd follows a structured process on every shower leak job in Cardiff and the Vale of Glamorgan, designed to avoid unnecessary tray removal wherever possible.
The JM Plumbing Services process
- Initial survey: visual inspection, moisture meter readings across the floor and walls, photo documentation of all affected areas.
- Source isolation: tray fill test, targeted spray tests, and drain inspection before any invasive work.
- Access confirmation: determine whether the repair can be done from above or requires underside/ceiling access.
- Repair or replacement: reseal, drain gasket replacement, resin repair, tray reseating, or full tray removal and reinstall depending on findings.
- Waterproof test: fill test repeated after repair to confirm the fix before sign-off.
- Written sign-off: photo evidence of completed work and written confirmation of what was done.
Typical job timings
A straightforward reseal takes 1–3 hours on site, including prep and cleanup. A drain reseal or small structural repair is typically a half-day job. Full tray removal, subfloor inspection, and reinstall with retiling runs 1–3 days depending on the extent of floor repairs and whether tiles need replacing.
Pro Tip: Jmplumbingservicesltd prioritizes diagnosis before committing to tray removal. In many cases, a correctly prepared reseal or drain gasket replacement resolves the leak without lifting a single tile. That approach saves clients significant cost and disruption.
When you book a survey, expect a moisture meter reading of the floor and walls, a written quote with clear scope, and honest advice on whether a repair or a full replacement makes more sense for your situation.
What does it cost to fix a leaking shower tray in the UK?
Costs vary considerably depending on what the diagnosis finds. Here are realistic UK ranges.
- Reseal only (surface sealant replacement): minor repairs like resealing often take under two hours and typically cost in the range of £50–£150 for a professional, or under £20 in materials for a confident DIYer.
- Drain gasket replacement: usually £80–£200 depending on access difficulty.
- Tray reseating (re-bedding and reseal without tile removal): typically £150–£350.
- Full tray removal and replacement (no tile work): £300–£600 for a standard acrylic tray.
- Full tray replacement with tile removal and subfloor repairs: £600–£1,500+, depending on the extent of structural damage, tile replacement, and whether a waterproofing membrane needs to be reinstated.
Factors that push costs up include: stone resin trays (heavier, harder to handle), no underside access, significant timber rot, the need for new floor tiles, and membrane replacement across the full shower area. If you’re weighing repair against replacement, it’s worth considering whether a full bathroom renovation makes more financial sense when the tray is already out.
Is a leaking shower covered by home insurance in the UK?
The short answer: it depends on how the leak happened and how long it’s been going on.
UK home insurers generally draw a clear line between sudden, accidental damage and gradual deterioration. A fitting that fails unexpectedly and causes water to escape quickly is often covered under the “escape of water” section of a buildings or contents policy. A decade-old sealant that slowly failed because it was never maintained is almost always excluded as wear and tear.
What to do if you think you have a claim
- Take dated photos of every wet patch, stain, and damaged seal immediately.
- Note the date you first noticed the problem and write it down.
- Get a professional report if possible. A written assessment from a qualified plumber carries far more weight with an insurer than a homeowner’s account.
- Keep all repair invoices and any moisture meter readings.
- Check your policy wording under “escape of water” and look for any maintenance clauses. Some policies require you to maintain seals and report damage promptly.
Report the damage to your insurer as soon as you discover it. Delayed reporting is one of the most common reasons claims are reduced or rejected. If the leak has caused damage to a neighbor’s property, you may have a liability claim to deal with as well.
Maintenance and prevention: how to stop the next leak
Most shower tray leaks are preventable with a simple routine. These habits take minutes and save hundreds.
- Inspect sealant every 6–12 months. Look for cracks, shrinkage, or black mold growing into the bead. Replace at the first sign of failure, not after it starts leaking.
- Wipe down the tray and screen after use. Standing water in the seal joint accelerates silicone degradation.
- Keep the extractor fan running during and for 15 minutes after every shower. Humidity is the enemy of grout and sealant.
- Check for tray movement periodically. Press down on the tray edges. Any flex means the bedding is failing.
- Use neutral-cure sanitary silicone only. Acetoxy-cure silicone (the type that smells strongly of vinegar) can corrode metal fittings and doesn’t bond as well in wet environments.
Pro Tip: Industry best practice for UK installations is to tile down onto the tray, leave a 2–3mm gap, and then apply neutral-cure sanitary silicone. Pre-sealing before tiling can trap moisture and reduce adhesion over time. If your shower was installed the other way around, it’s worth checking the seal condition more frequently.
Choosing the right materials for the bathroom environment matters beyond just the shower. Moisture-resistant bathroom doors reduce the humidity that accelerates sealant and grout failure throughout the room.
One safety reminder: if you ever find soft floorboards, smell sewage, or notice that electrical fittings near the shower are damp, stop and call a professional. These are not maintenance issues.
What tools and materials do you need for a DIY reseal?
You don’t need a van full of kit. Here’s what actually matters for a reseal or small repair job.
For resealing:
- Neutral-cure sanitary silicone (Dow Corning 785, Everbuild Everflex, or equivalent)
- Sealant remover gel (Dow Corning OS-2 or similar)
- Plastic scraper and a Stanley knife
- Isopropyl alcohol (IPA) wipes or spray
- Masking tape (low-tack)
- Silicone profiling tool or a wet finger
- Rags and paper towels
For drain work:
- Replacement drain gasket (match to your drain brand/size)
- Adjustable spanner or drain key
- Plumber’s PTFE tape
For small crack repairs:
- Two-part acrylic or fiberglass repair resin kit (Plastic Padding or equivalent)
- Fine-grit wet-and-dry sandpaper (400–600 grit)
- Matching tray touch-up paint if needed
Total cost for a reseal kit runs under £20 at most DIY merchants. The silicone is the most important purchase: don’t substitute a general-purpose silicone for a sanitary-grade product. General silicone lacks the mold-inhibiting additives that bathroom environments demand.
How do you safely remove and replace a shower tray?
Full tray removal is a significant job. It’s manageable for a skilled DIYer, but there are several points where the wrong move causes expensive collateral damage.
Before you start
Turn off the water supply to the shower. If the shower has a thermostatic or electric valve, isolate the power at the consumer unit. Take photos of all pipework connections before disconnecting anything.
Removal steps
- Remove the shower screen or enclosure first. Most screens unclip or unscrew from the tray and wall channels. Have a second person help; screens are awkward and heavy.
- Cut the sealant around the entire tray perimeter with a Stanley knife. Work slowly to avoid scoring the tiles.
- Disconnect the waste pipe at the trap below the tray. Have a bucket ready; there will be residual water in the trap.
- Lift the tray. Acrylic trays are light enough for two people. Stone resin trays can weigh 40–80kg and may need three people or mechanical assistance. Never lever against tiles.
- Inspect the subfloor. Check joists for rot, look for signs of long-term water damage, and assess whether the floor needs drying out before reinstalling.
Reinstallation
Set the new tray on a mortar bed or adjustable feet per the manufacturer’s instructions. The tray must be completely level and rigid before any pipework is connected. Connect the waste, test the drain with a fill test, then fit the screen and apply the final sealant bead. Allow full cure before use.
If you find rot or structural damage during removal, stop and get a professional assessment before proceeding. Fitting a new tray over damaged joists just restarts the problem. Jmplumbingservicesltd handles full tray replacement as part of its bathroom renovation service in Cardiff, including subfloor repairs and retiling where needed.
Long-term maintenance tips to prevent future leaks
A shower tray that’s been properly repaired or replaced will stay watertight for years, but only with consistent upkeep. The habits that matter most are the ones that catch problems early.
Inspect the sealant bead every six months. Run your finger along it. Any section that feels hollow, has lifted from the surface, or shows black mold penetrating the bead should be stripped and replaced immediately, not patched over. A full reseal takes two hours and costs almost nothing compared to the damage a slow leak causes over six months.
Grout is the other weak point. Tap along the grout lines at the tray/wall junction with a coin. A hollow sound means the tile has debonded from the substrate behind it, and water is already getting in. Regrout those sections before the tile cracks.
Keep the drain clear. Hair and soap buildup in the drain trap slow drainage and keep water sitting in the tray longer, which accelerates sealant wear. A monthly clean with a drain guard and occasional use of an enzyme-based drain cleaner keeps flow rate up without damaging the trap seals.
Finally, check the tray support annually. Stand on the edges and corners. A tray that was perfectly rigid at installation can settle over time, especially in older properties where floor joists flex seasonally.
What damage can a leaking shower tray cause if you ignore it?
A slow leak that goes unaddressed for months causes damage that costs far more to fix than the original leak ever would have.
Mold and mildew establish quickly in damp timber and plasterboard. Black mold (Stachybotrys and Aspergillus species) can colonize wall cavities within weeks of sustained moisture exposure. Remediation requires stripping back affected materials, treating with fungicide, and allowing full drying before rebuilding. That’s a much bigger job than a reseal.
Structural timber damage is the worst-case outcome. Floor joists that stay wet for months soften and rot. In a first-floor bathroom, a seriously compromised joist can fail under load. Joist replacement in a bathroom requires lifting the floor, removing the tray, and potentially opening the ceiling below. Costs escalate quickly once structural timber is involved.
Subfloor and screed damage is common in ground-floor bathrooms. Water that reaches the screed or concrete base can cause it to crack and heave, requiring full removal and replacement before a new tray can be installed.
Electrical hazards are the most urgent concern. Downlights in the ceiling below a leaking bathroom, or any electrical fitting within the shower zone, become a shock and fire risk when wet. If you see water near any electrical fitting, treat it as an emergency.
Secondary water damage spreads further than most homeowners expect. A leak that starts under the tray can wick along joists, appear as a stain on a wall two meters away, or drip through to a ground-floor room. The visible damage is rarely the full extent of the problem. Getting a professional bathroom leak assessment early is almost always cheaper than waiting until the damage becomes obvious.
Key Takeaways
A leaking shower tray is usually a failed sealant issue you can fix yourself, but tray movement, structural water damage, or a failed waterproofing membrane require professional repair to avoid repeat failures and escalating costs.
| Point | Details |
|---|---|
| Sealant is the most common cause | Failed sealant at the tray/wall junction is the leading cause; a reseal lasts 5–10 years in normal conditions. |
| Test before you repair | Plug the drain and fill the tray 1 inch deep to isolate tray leaks from screen or pipe leaks before doing any work. |
| Prep determines whether the reseal holds | Strip all old sealant, clean with isopropyl alcohol, and confirm zero tray movement before applying new silicone. |
| Know when to stop DIY | Tray flex, ceiling leaks, timber rot, or a reseal that failed once already all require a professional assessment. |
| Jmplumbingservicesltd covers the full scope | From a simple reseal to full tray replacement and subfloor repair, Jmplumbingservicesltd serves Cardiff and the Vale of Glamorgan with a survey-first approach. |
Why quick reseals so often fail — and what actually works
The conventional wisdom on shower leaks is that a tube of silicone fixes everything. It doesn’t, and the reason is almost always the same: the substrate wasn’t ready, or the tray was moving.
Silicone is a flexible sealant, not a structural adhesive. It needs a clean, dry, completely stable surface to bond to. Apply it over mold, over old residue, or across a joint that flexes every time someone steps in the shower, and you’re not fixing the leak. You’re just delaying it by a few months while giving yourself a false sense of security.
The deeper issue is that recurring tray leaks often point to poor original installation. A tray that wasn’t bedded on a rigid mortar base, or that was installed on adjustable feet that weren’t locked off properly, will flex for its entire life. No sealant survives that. The fix isn’t a better silicone product; it’s addressing the support.
For homeowners weighing DIY against hiring a professional: the decision should hinge on what the diagnosis shows, not on cost alone. A reseal you do yourself on a stable, well-supported tray will last years. A reseal on a moving tray will fail before the year is out, and by then the water damage underneath will have gotten worse. Early, correct action is always cheaper than a second repair on top of accumulated damage.
Jmplumbingservicesltd: professional shower tray repairs in Cardiff and the Vale of Glamorgan
When a reseal isn’t enough, or you’d simply rather have it done right the first time, Jmplumbingservicesltd offers a full range of shower tray repair and replacement services across Cardiff and the Vale of Glamorgan.

Every job starts with a proper survey: moisture meter readings, a tray fill test, visual inspection of the drain and sealant, and photo documentation before any work begins. You get a written quote with clear scope, honest advice on whether repair or replacement makes more sense, and a timescale you can plan around. Services cover everything from a straightforward reseal to drain gasket replacement, tray reseating, full tray removal and reinstall, and wet room conversion where a tray replacement opens the door to a better long-term solution.
Jmplumbingservicesltd works across Cardiff, Penarth, Barry, Cowbridge, Llantwit Major, and the wider Vale of Glamorgan. If you’re in the area and dealing with a persistent leak, book a survey with our Cardiff plumbing team or explore the full range of bathroom fitting services in Cardiff to see what a proper repair looks like from start to finish.
Useful sources and further reading
- GOV.UK — Approved Document H: Drainage and Waste Disposal — the UK building regulations standard covering drainage installations, relevant to drain flange requirements and waste connections.
- HSE — Health and Safety Executive — guidance on electrical safety in wet zones and mold remediation in domestic properties.
- Why Is My Shower Leaking Around the Tray? | ROSEAL — clear breakdown of the most common tray leak causes, including sealant failure and membrane issues; underpins the causes section of this article.
- How to Seal Around a Shower Tray Properly | BookaBuilderUK — detailed guidance on reseal preparation, silicone selection, and why tray movement causes repeat failures; underpins the DIY repair steps.
- Why Is My Shower Leaking? | Tap Warehouse — covers the tray fill test method and insurance considerations; underpins the diagnosis and insurance sections.
- How Much Does Bathroom Leak Repair Cost | Tapron UK — UK cost guidance for reseal, repair, and replacement jobs; underpins the costs and timescales section.
- Shower Tray Leak Causes and Solutions | OBLOC — technical overview of waterproofing membrane requirements and professional diagnostic tools including moisture meters and endoscopic cameras.
- What to Do If You Have a Bathroom Leak | Jmplumbingservicesltd — practical immediate-action guide from Jmplumbingservicesltd covering Cardiff and the Vale of Glamorgan.