
Accessible Bathroom Design: A Complete UK Guide
Discover essential tips for accessible bathroom design, ensuring safety, independence, and modern aesthetics. Start your renovation today!
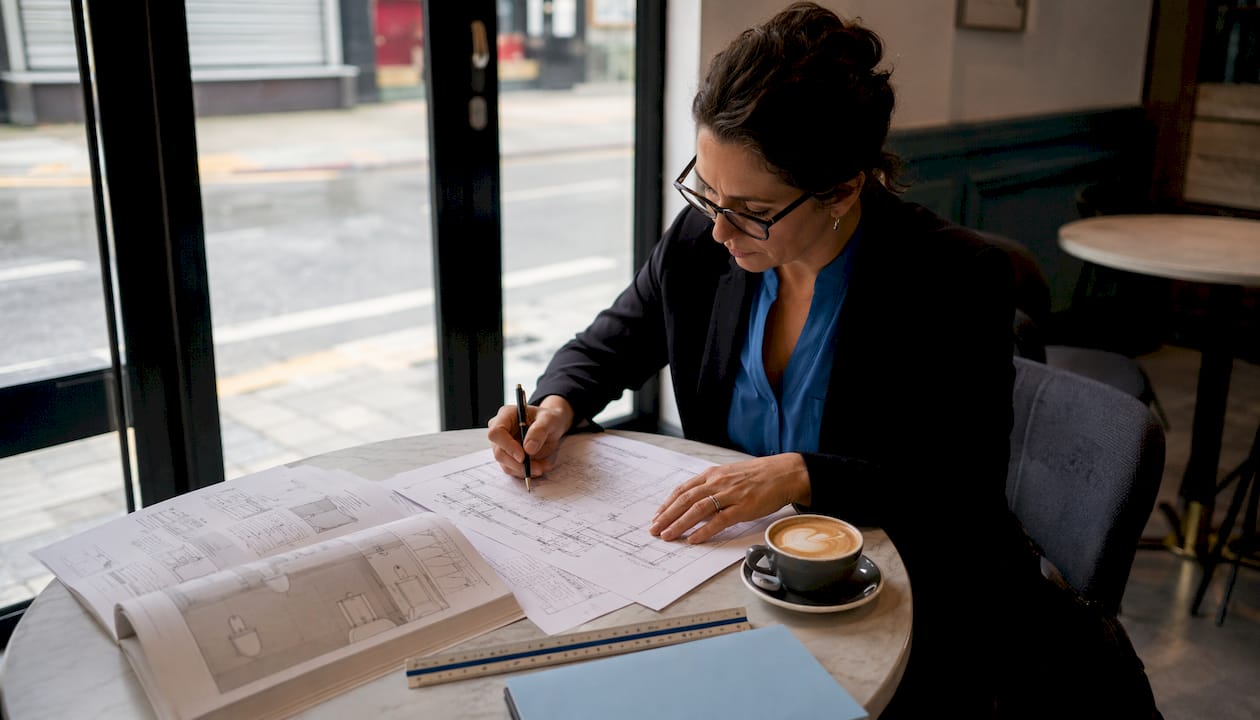
An accessible bathroom works when it combines a level-access shower, clear transfer zones beside the toilet, securely anchored supports, and thermostatic anti-scald controls. That combination preserves independence, reduces fall risk, and can look genuinely contemporary. Start here, and you will have covered the four things that matter most before any tradesperson sets foot on site.
Your immediate site-visit checklist:
- Floor levels and drainage: Can the floor be graded to a linear drain without raising the threshold? Structural floor depth determines whether a wet room is feasible.
- Transfer clearance by the WC: Is there at least 750 mm of clear space on the transfer side? This single measurement drives toilet position more than anything else.
- Grab rail anchoring points (blocking): Are the walls solid enough, or does timber blocking need to be installed between studs at 46–122 cm from the floor before tiling?
- Thermostatic anti-scald valves: Is a thermostatic mixing valve specified for every shower and tap outlet? This is non-negotiable for safety.
Building Regulations Part M and BS 8300 are the UK standards to consult for dimensional guidance. If you need a professional survey before committing to a layout, Jmplumbingservicesltd covers Cardiff and the Vale of Glamorgan and can assess your space from the ground up.
Table of Contents
- What does “accessible bathroom” actually mean?
- Essential fixtures that make a bathroom genuinely accessible
- Layout, clearances, and the UK guidance to check
- How to keep the finish stylish and avoid the institutional look
- Safety and technical installation: what to insist on before sign-off
- Grants, charities, and UK funding to know about
- Typical costs and timescales for UK accessible bathroom work
- How to choose and brief an accessible bathroom installer
- A local accessible bathroom project by Jmplumbingservicesltd
- Key Takeaways
- The thing most accessible bathroom guides get wrong
- Jmplumbingservicesltd: accessible bathroom installations across Cardiff and the Vale of Glamorgan
- Useful sources and further reading
What does “accessible bathroom” actually mean?
The phrase gets misread constantly. People picture clinical white grab bars, a plastic shower chair, and a floor that smells faintly of a hospital corridor. That is not what good accessible bathroom design looks like in 2026.
The real definition is simpler: a bathroom designed around the user rather than a standard layout. Mobility, transfer technique, handedness, seated versus standing use, and whether a carer needs to assist — these are the actual design determinants. Universal bathroom design takes that further by specifying features that work for the broadest range of people from the outset, so the room does not need to be ripped out and rebuilt as needs change.
Four working zones give you a practical framework:
- Basin zone: Height, knee clearance, and reach to controls.
- Toilet zone: Seat height, transfer space, and support positions.
- Shower zone: Entry method, seating, controls within reach, and drainage.
- Changing zone: Floor space, turning circle, and carer access if needed.
Designing each zone independently, then checking they do not conflict, is how professionals avoid the most common layout errors. A toilet positioned for right-handed transfer that sits against the wrong wall is a mistake that costs thousands to fix after tiling.
Pro Tip: Design for progression from day one. Installing wall blocking and specifying adjustable fixtures now costs a fraction of what a second renovation costs later. Universal design is almost always more cost-effective over time than retrofitting.
Essential fixtures that make a bathroom genuinely accessible
Level-access showers and wet rooms
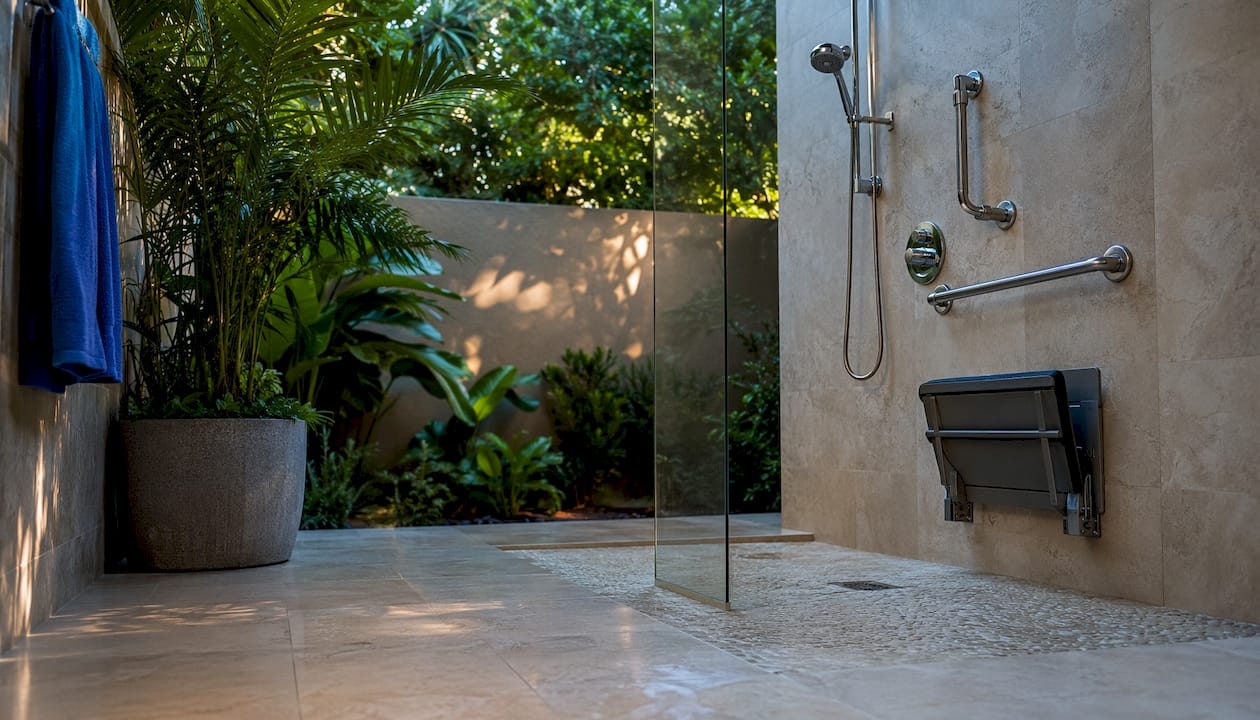
Level-access (wet room) showers are the gold standard for removing barriers to entry and reducing fall risk. They eliminate the shower tray lip entirely, accommodate a wheelchair if mobility declines, and are far easier to clean than a tray with a frame. The choice between an open wet room and an enclosed walk-in shower with a low-profile tray comes down to floor depth, room size, and personal preference.
Shower seating
A wall-mounted foldaway seat is the most space-efficient option and keeps the floor clear when not in use. Fixed seats suit users who need a permanent, stable surface. Mary Jo Peterson, a kitchen and bath designer specializing in aging in place, recommends a seat at least 15 inches deep and 24 inches wide, with a standard seat height of 18 inches. Mount the seat with blocking in the wall so it can be repositioned later without re-tiling.
Grab rails
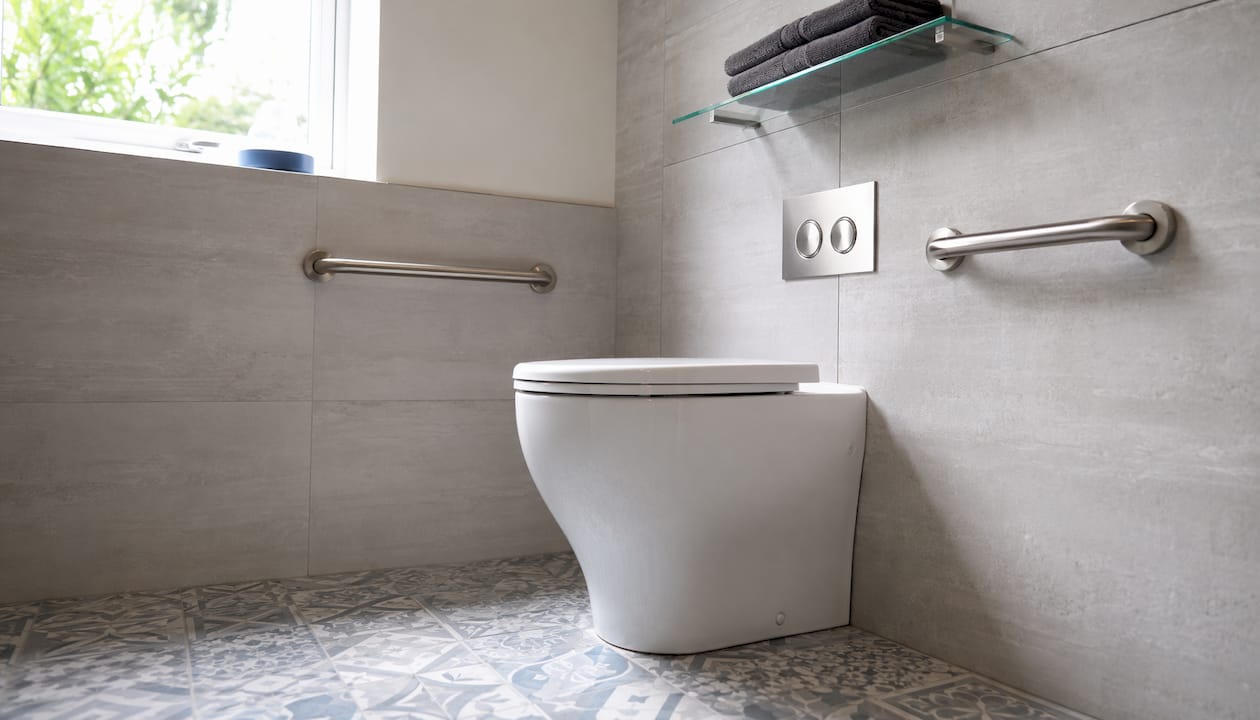
Rails must be anchored to wall studs or solid blocking, not just plasterboard. Blocking installed between 46–122 cm from the floor in shower and toilet walls allows for secure future installation even if rail positions change. Drop-down support arms beside the toilet are particularly useful where transfer space is tight. Match the finish to towel rails and tap hardware so rails read as design features rather than medical equipment.
Toilets
Comfort-height toilets sit at 43–48 cm (17–19 inches), which reduces the effort of standing from seated. Where a standard-height toilet is already in place, a toilet riser or riser frame adds height without a full replacement. Clear transfer space of at least 750 mm on the dominant transfer side is the priority; the toilet position should be set before anything else is fixed.
Basins
Knee clearance under the basin matters for seated users. Height-adjustable basins (manual or powered) allow the same fitting to work for a standing adult and a wheelchair user. Critically, insulated or shrouded pipework under the basin prevents scald injuries for users with reduced leg sensation — a detail that is commonly specified by professionals but missed in basic renovations.
Taps and controls
Lever taps require only one finger to operate and suit users with limited grip. Sensor taps go further by removing the need to touch the fitting at all. Handheld showerheads with adjustable slide bars let the user direct water from a seated or standing position. Thermostatic anti-scald valves are mandatory for every shower and tap outlet in an accessible bathroom.
Pro Tip: Powered height-adjustable basins suit users whose needs change frequently or who transfer between seated and standing during the day. Manual adjustment is adequate for a fixed-height user or a carer-assisted setup where the height is set once and left.
Layout, clearances, and the UK guidance to check
Dimensions matter, but they are not fixed absolutes. BS 8300 and Building Regulations Part M provide the reference ranges; the actual figures for your bathroom depend on the user’s transfer technique, whether a carer assists, and the room’s existing structure.
Key clearance figures to work from:
- Turning circle: Universal design guidance commonly specifies a 60 × 60 inch (152 × 152 cm) unobstructed area to allow a wheelchair to turn. In a smaller room, a peninsular layout or pocket door can free up floor space.
- Transfer space beside the WC: 750 mm minimum on the transfer side; 1,000 mm is preferable where the room allows.
- Shower footprint: A 1,200 × 900 mm shower area is a practical minimum for a seated user with a carer; a full wet room with no screen gives more flexibility.
- Door width: 850 mm clear opening width accommodates most powered wheelchairs; pocket doors or outward-swinging doors recover floor space that an inward-swinging door would consume. For door options that work in tight spaces, pocket and barn-style doors are worth considering during the design stage.
An occupational therapist’s assessment report is the most useful document you can bring to a design meeting. It specifies transfer technique, dominant side, reach ranges, and carer requirements — information that turns a generic layout into one that actually works for the person using it.
How to keep the finish stylish and avoid the institutional look
The gap between a clinical-looking adaptation and a bathroom that appears in a design magazine is mostly about detail choices, not cost. Stylish accessible equipment exists: low-profile, height-adjustable products with concealed fixings and coordinated metal finishes are widely available.
Practical styling strategies:
- Coordinated hardware: Specify grab rails, towel rails, and tap hardware in the same finish (brushed brass, matte black, or polished chrome). A grab rail in brushed brass reads as a design feature; the same rail in white plastic reads as medical equipment.
- Non-slip flooring with refined texture: Large-format porcelain with a matte or honed finish offers good slip resistance without the visual noise of small mosaic tiles. Look for a DCOF rating of 0.42 or higher when wet for genuine grip underfoot.
- Wall-hung sanitaryware: Wall-hung toilets and floating vanities create visual space, allow knee clearance underneath, and make floor cleaning easier. A floating vanity with a toe kick of at least 23 cm (9 inches) high accommodates footrests on a wheelchair.
- Layered lighting: Combine a main ceiling fitting with LED strip lighting under the vanity and a night light at floor level. The under-vanity strip signals the floor edge clearly, which matters for balance and low-light navigation.
- Recessed niches: Storage located between 38–122 cm from the floor is reachable for seated users. Recessed niches in the shower wall eliminate protruding shelves that create bumping hazards.
- Fold-down shower seats: A teak or composite fold-down seat in a matching tone to the floor tile disappears visually when folded up. It does not read as a disability aid.
Pro Tip: Use a horizontal tile pattern or a long linear drain to draw the eye across the room rather than down. This subtly reinforces balance cues and makes a compact wet room feel wider.
Styling directions worth exploring: minimalist monochrome with matte black hardware; warm natural stone effect with brushed brass rails; bold feature tile on the shower wall with plain large-format floor tile.
Safety and technical installation: what to insist on before sign-off
A bathroom that looks right but is not installed correctly is a liability. These are the technical checks that matter.
Installation checklist:
- Wall blocking and anchor loads: Grab rails and fold-down seats must be anchored to solid blocking or studs. Blocking should be installed at 46–122 cm from the floor before tiling so future repositioning does not require re-tiling.
- Drainage falls: Wet room floors require a consistent fall to the drain, typically 1:80 to 1:60. An uneven fall creates pooling, which increases slip risk and accelerates grout deterioration.
- Waterproofing: A tanked wet room with a continuous waterproof membrane behind the tiles is the correct specification. Surface sealants alone are not adequate.
- Thermostatic mixing valves: Every shower and tap outlet should have a thermostatic mixing valve set to a maximum of 44°C for vulnerable users. Controls should be reachable from outside the water stream.
- Electrical compliance: Any new electrical work in a bathroom must be carried out by a Part P-registered electrician. NICEIC- or NAPIT-registered contractors can self-certify their work. Shaver sockets and lighting circuits must comply with the bathroom zone requirements in BS 7671.
- TrustMark registration: Installers carrying TrustMark registration have been vetted for technical competence and trading standards compliance. Ask for the registration number and verify it on the TrustMark website.
- Underfloor heating: Electric underfloor heating under a wet room floor must be specified for wet-area use and installed by a qualified electrician. It also affects the floor build-up depth, which feeds back into the drainage fall calculation.
Pro Tip: Insulate or shroud all exposed pipework under the basin. Users with reduced sensation in their legs may not notice contact with a hot pipe until a scald has already occurred. This takes ten minutes to do correctly and is almost never done in a basic renovation.
Maintenance is straightforward if the right finishes are specified: large-format tiles with minimal grout joints, anti-bacterial grout, and replaceable seat pads. Schedule an annual check of rail anchors and door seals.
Grants, charities, and UK funding to know about
Money is often the reason accessible adaptations get delayed. The good news is that several funding routes exist in the UK, and VAT relief can reduce equipment costs significantly.
Main funding routes:
- Disabled Facilities Grant (DFG): The primary government grant for home adaptations in England, Wales, and Northern Ireland. In Wales, the DFG is administered by local councils and covers adaptations that help a disabled person live more independently. The grant is means-tested for adults and covers work such as wet room conversions, grab rail installation, and accessible toilet adaptations. Maximum grant amounts vary by nation.
- VAT relief: Equipment and adaptations for people who are chronically sick or disabled may qualify for zero-rated VAT. Confirming eligibility before purchase can reduce equipment cost by up to 20%. Check eligibility with HMRC or ask your installer to confirm the scope before ordering.
- Age UK: Provides advice on funding, benefits, and local support services for older people. Age UK’s local branches can signpost to handyperson services for smaller adaptations and help with grant applications.
- Disabled Living Foundation (DLF): The DLF (now part of the Living Made Easy service) provides impartial information on equipment and adaptations. Their advisors can help identify the right products before you commit to a specification.
- Scope: Scope offers practical support and information for disabled people and their families, including guidance on navigating the social care and housing adaptation system.
Next steps checklist:
- Contact your local council’s occupational therapy team for a home assessment. This is free and generates the report that most grant applications require.
- Gather measurements and photographs of the existing bathroom before any assessment visit.
- Check VAT relief eligibility with HMRC before purchasing any equipment.
- Apply for the DFG before commissioning work — retrospective applications are rarely accepted.
- Allow 8–16 weeks for a full assessment and grant decision; some councils have longer waiting lists.
Funding note: The Disabled Facilities Grant in Wales is administered through local councils. Grant availability, maximum amounts, and means-testing thresholds can change. Always confirm current figures directly with your local authority.
Typical costs and timescales for UK accessible bathroom work
Costs vary widely depending on room size, structural complexity, and the level of finish. The figures below are broad indicative ranges for planning purposes; get written quotes for your specific project.
| Intervention | Typical cost range (£) | Typical lead time |
|---|---|---|
| Grab rails and shower seat (supply and fit) | — | 1–3 days |
| Toilet riser or comfort-height toilet replacement | — | 1–2 days |
| Walk-in shower with low-profile tray | — | 3–5 days |
| Full wet room conversion (standard room) | — | 1–2 weeks |
| Full accessible bathroom refit (structural work included) | — | 3–6 weeks |
Timescale checklist:
- Survey and occupational therapy assessment: 1–8 weeks depending on council waiting lists.
- Design, specification, and ordering: 2–4 weeks; powered height-adjustable fixtures and bespoke items can take 6–10 weeks to arrive.
- Installation: 1 day for minor adaptations; 2–6 weeks for a full refit.
- Certification and sign-off: Electrical work requires a completion certificate; wet room waterproofing should be inspected before tiling.
Structural work (moving a soil stack, rerouting drainage, or removing a load-bearing wall) adds cost and time that is impossible to estimate without a site survey. VAT relief eligibility, where it applies, reduces the net cost of qualifying equipment and materials.
How to choose and brief an accessible bathroom installer
The wrong installer can produce a bathroom that looks finished but fails on the details that matter most: a grab rail that pulls from the wall, a wet room floor that pools, or a thermostatic valve set too high. Vetting takes an hour and saves months of remedial work.
Questions to ask before you hire:
- Can you show me examples of accessible bathroom or wet room installations you have completed?
- Are you TrustMark-registered? What is your registration number?
- Who carries out the electrical work, and are they NICEIC- or NAPIT-registered?
- Do you install thermostatic mixing valves as standard on accessible projects?
- How do you specify and install wall blocking for grab rails?
- What waterproofing system do you use for wet rooms, and can you show me the product specification?
- What warranties do you offer on installation and on the products you supply?
Credentials to verify:
- TrustMark: Government-endorsed quality scheme for home improvement trades. Verify the registration number at trustmark.org.uk.
- NICEIC or NAPIT: For any electrical work within the bathroom. Both schemes allow contractors to self-certify Part P compliance.
- Gas Safe: Required if the project involves relocating a gas boiler or connecting a gas supply.
- Public liability insurance: Ask for a certificate; minimum £2 million cover is standard.
Briefing checklist — agree these in writing before work starts:
- Blocking locations and specification (timber size, fixing method).
- Anti-scald valve specification and maximum temperature setting.
- Waterproofing system and membrane brand.
- Finish samples approved and signed off.
- Drainage fall specification for wet room floors.
- Change-order process: any variation from the agreed spec requires a written amendment before work proceeds.
Commissioning sequence:
- Site survey and occupational therapy report reviewed together.
- Written quote and specification issued; review line by line.
- Contract signed with staged payment schedule tied to completion milestones.
- Staging checks: inspect blocking before boarding, waterproofing before tiling, and electrical rough-in before plastering.
- Handover: test all fixtures, check rail anchors, receive all certificates and warranties.
A local accessible bathroom project by Jmplumbingservicesltd
A homeowner in the Vale of Glamorgan approached Jmplumbingservicesltd after a family member’s mobility had declined following surgery. The existing bathroom had a standard bath, a high-sided shower tray, and no support rails. The brief was clear: remove the bath, create a level-access wet room, and keep the finish contemporary enough that it did not feel like a clinical adaptation.
The survey identified three constraints immediately: the floor joists ran parallel to the drain direction (requiring a structural noggin to redirect the fall), the wall behind the toilet was a stud partition with no blocking, and the existing hot water system had no thermostatic control.
What was installed:
- Full wet room with a linear drain and continuous tanked waterproofing membrane.
- Large-format matte porcelain floor tile with a DCOF rating above 0.42.
- Wall-mounted foldaway shower seat in a teak composite finish.
- Grab rails in brushed nickel, matching the towel rail and tap hardware.
- Comfort-height wall-hung toilet with 800 mm clear transfer space on the left side.
- Height-adjustable basin with shrouded pipework and a lever tap.
- Thermostatic mixing valve set to 44°C, with the control positioned outside the water stream.
- Timber blocking installed at 46–122 cm throughout the shower and toilet walls before tiling.
The project took 11 working days from survey to handover. The homeowner subsequently confirmed VAT relief eligibility on the height-adjustable basin and thermostatic valve, reducing the equipment cost on those items.
Lessons for your own brief: Get the occupational therapy report before the design is fixed. Specify blocking throughout, not just at the obvious rail positions. And treat the thermostatic valve as a structural element, not an optional upgrade.
Jmplumbingservicesltd covers Cardiff and the Vale of Glamorgan, including Penarth, Barry, Cowbridge, Dinas Powys, Rhoose, and Llantwit Major.
Key Takeaways
A well-executed accessible bathroom combines a level-access shower, securely anchored supports with wall blocking, thermostatic anti-scald controls, and a layout verified against BS 8300 and Building Regulations Part M.
| Point | Details |
|---|---|
| Level-access shower first | Wet rooms eliminate trip hazards and accommodate wheelchairs; they are the gold standard for accessible design. |
| Blocking is non-negotiable | Install timber blocking at 46–122 cm from the floor before tiling so rails can be anchored securely now and repositioned later. |
| Thermostatic controls everywhere | Set thermostatic mixing valves to a maximum of 44°C on every shower and tap outlet; this is a safety requirement, not an optional feature. |
| Check funding before you start | The Disabled Facilities Grant and VAT relief (up to 20% on qualifying equipment) can significantly reduce net cost; apply before commissioning work. |
| Jmplumbingservicesltd for Cardiff and Vale | Jmplumbingservicesltd surveys, designs, and installs accessible bathrooms across Cardiff and the Vale of Glamorgan, coordinating plumbing, electrical, and tiling in one project. |
The thing most accessible bathroom guides get wrong
Most guides treat accessible design as a checklist of features to add to a standard bathroom. That framing produces rooms that feel like afterthoughts. The better mental model is subtraction: what barriers does this bathroom currently create, and how do you remove them without introducing new ones?
The mistake I see most often is wrong handing. A grab rail installed on the wrong side of the toilet is not just useless — it actively gets in the way of the transfer the user actually performs. The second most common error is underestimating the drainage work. A wet room floor that pools because the fall was not properly calculated creates a slip hazard that defeats the entire purpose of the conversion.
The third mistake is treating aesthetics and accessibility as competing priorities. They are not. The decision to match grab rail finishes to towel rails, to use large-format matte tile instead of small mosaic, to specify a teak fold-down seat instead of a white plastic one — these take minutes in the specification stage and produce a room that a homeowner is proud of rather than embarrassed by.
Plan the survey before the design. Bring the occupational therapy report to the first meeting. And insist on seeing blocking installed before the walls are boarded. Those three habits will save more money and frustration than any other advice in this guide.
Jmplumbingservicesltd: accessible bathroom installations across Cardiff and the Vale of Glamorgan
If you have read this far, you already know what a well-specified accessible bathroom requires. The harder part is finding a local team that can deliver the plumbing, tiling, electrical coordination, and finish to the standard the brief demands.

Jmplumbingservicesltd handles the full scope: wet room conversion, height-adjustable basin installation, comfort-height toilet fitting, grab rail and blocking installation, thermostatic valve specification, LVT and porcelain tiling, and coordination with NICEIC-registered electricians. Every project starts with a site survey, so the quote reflects the actual conditions rather than a generic estimate.
Coverage includes Cardiff, Penarth, Barry, Cowbridge, Dinas Powys, Rhoose, and Llantwit Major. To arrange a survey or request a written quote, visit the Cardiff bathroom installation page or the bathroom renovation Cardiff page and submit an enquiry. A member of the team will confirm availability and outline what to expect at the survey visit.
Useful sources and further reading
Before applying for grants or requesting formal quotes, have your occupational therapy report, room measurements, and photographs ready. These documents speed up every subsequent step.
- Disabled Facilities Grant (gov.uk): The primary reference for grant eligibility, application process, and local authority contacts in England and Wales.
- Building Regulations Approved Document M (Part M): The statutory UK standard for accessible design in new builds and material changes of use. Available via the Planning Portal and gov.uk.
- BS 8300: British Standard for the design of accessible and inclusive built environments. The reference most occupational therapists and specialist designers use for existing domestic properties. Available from the BSI website.
- Age UK (ageuk.org.uk): Advice on funding, benefits, and local handyperson services for older people.
- Disabled Living Foundation / Living Made Easy (livingmadeeasy.org.uk): Impartial product and equipment information; useful for comparing aids and adaptations before specifying.
- Scope (scope.org.uk): Practical support and information for disabled people navigating housing adaptations and social care.
- ADA Standards for Accessible Design (US Access Board): US guidance on bathing rooms — useful as an international reference point for concepts like roll-in showers and transfer compartments, but note that this is US regulation, not UK law.
- Universal Design Project (universaldesign.org): Reference specifications for bathroom clearances and blocking — a US source, cited here for dimensional reference only.